
WordPress block themes were introduced in WordPress 5.0 and were intended to allow users to modify all the areas of the website (headers, footers, sidebars, etc.) as blocks. In other words, to give all parts of the layout the editing familiarity that was until then applicable to posts and pages via the Gutenberg block editor. Full-Site Editing is a new interface that aims to give users a single way to make changes to their WordPress sites, so they don’t need technical knowledge or help from a professional.
Full-Site Editing To Customize WordPress
Requirements
- WordPress version 5.9 or later is required. The complete site editing features are not available in earlier versions of WordPress.
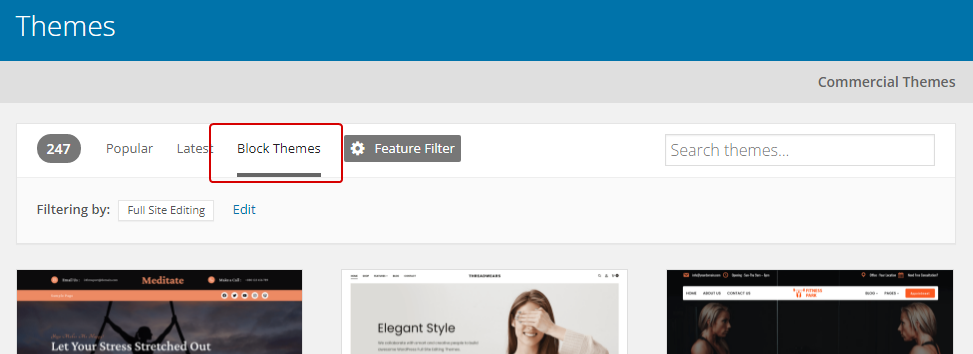
- Second, you must be utilizing a WordPress theme with full site editing support and block functionality. You can search for themes that support full site editing using the Full Site Editing feature filter at the WordPress.org theme directory.
The basics of using full Site Editor
You can install and enable a block theme of your choice to help you ride along and see what’s coming. We will use the CraftMag block theme for our demonstrations.
Edit templates
You can view the site editor’s page by clicking Appearance->Editor in the admin menu.
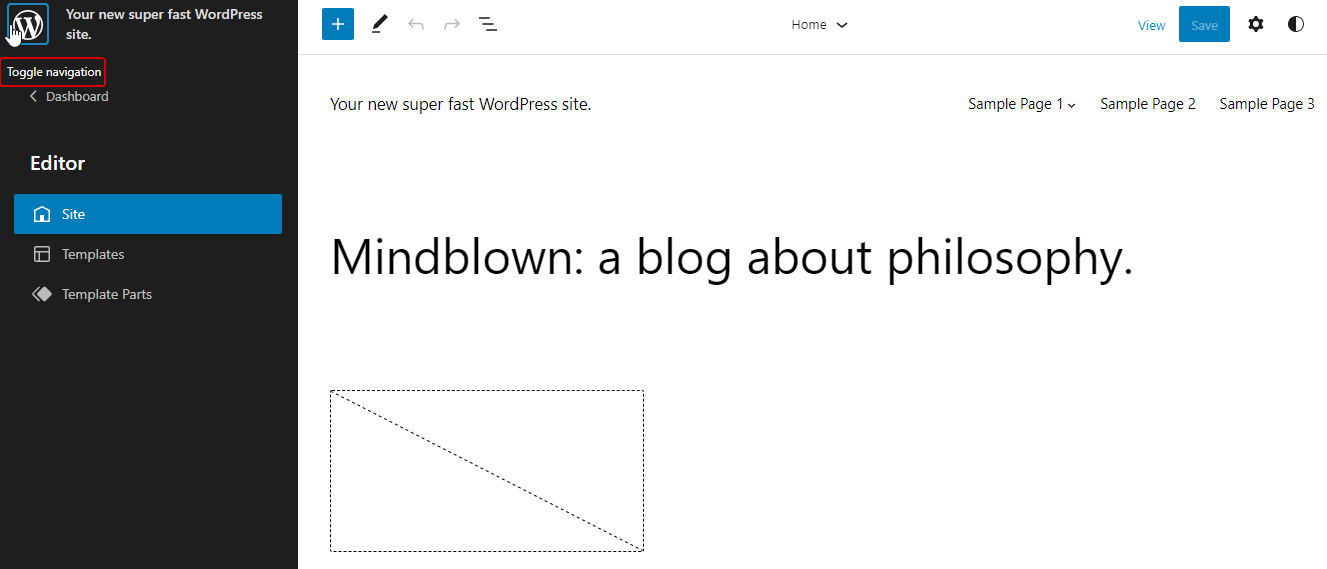
In the Site Editor, you can see the whole editable layout right away. Whatever block you click on, a toolbar will appear to give you some quick options.
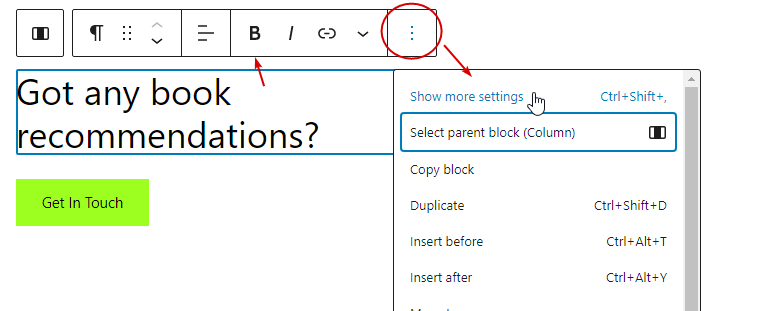
The three-dot icon on the right, for the active block or group, will open the style options in the right sidebar where you can see the options corresponding to the type of element you clicked.
Depending on the theme, some parts you will see will be grouped as “template parts.” In our example, it’s the header and footer. If, for example, you click on the footer area, an edit button will appear that will take you to the footer edit page.

You can view the template parts anytime if you click the WordPress icon on the upper left.
There you can also view the ready-to-use templates of the theme.
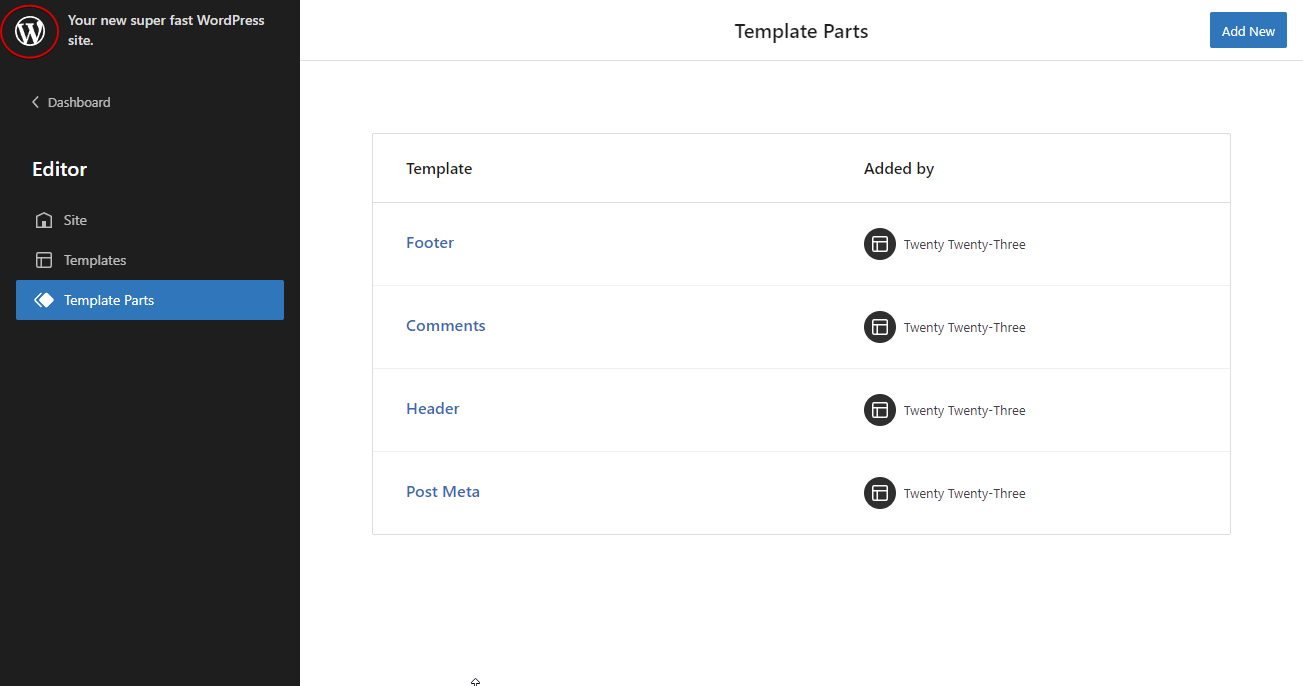
You can select any and enter its edit page as you did before.
New template
Using the upper right button, you can add your own template. Start by choosing from a preset or custom template, and modifying or adding blocks in the edit area. Use the upper left plus button to reveal the available options.
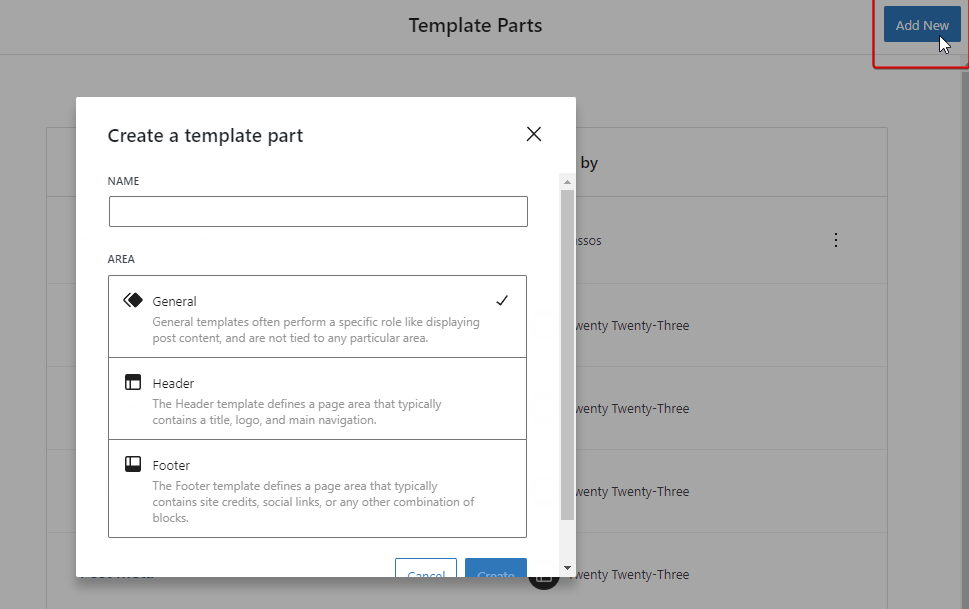
You can build custom layouts and designs without using any third-party add-ons.
Try our Award-Winning WordPress Hosting today!

The data of the template you added will be stored in the database as it is not part of the default template suggestions that come with the theme. We will come back to this later and see how you can add a template to the default options.
Navigator
You can reveal the navigator in the upper left area.
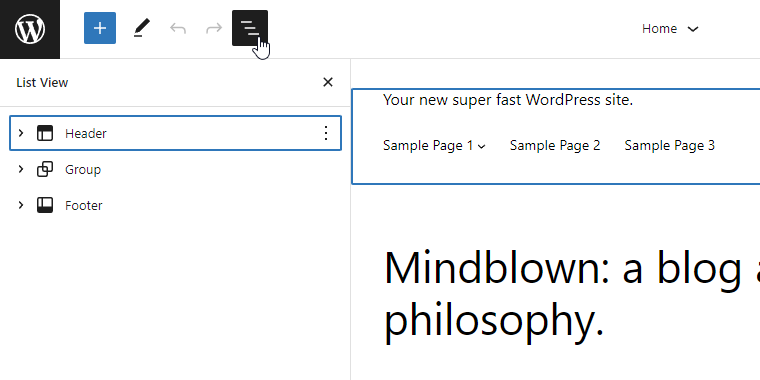
Whether you are editing an existing layout or making a new one, it is very helpful to be able to quickly select the area you want and benefit from Gutenberg‘s functionality.
Global Styles
In the upper right corner, you can enable the style options for the layout. You can personalize the typography, color, or layout globally or customize the appearance of specific blocks for the whole site.
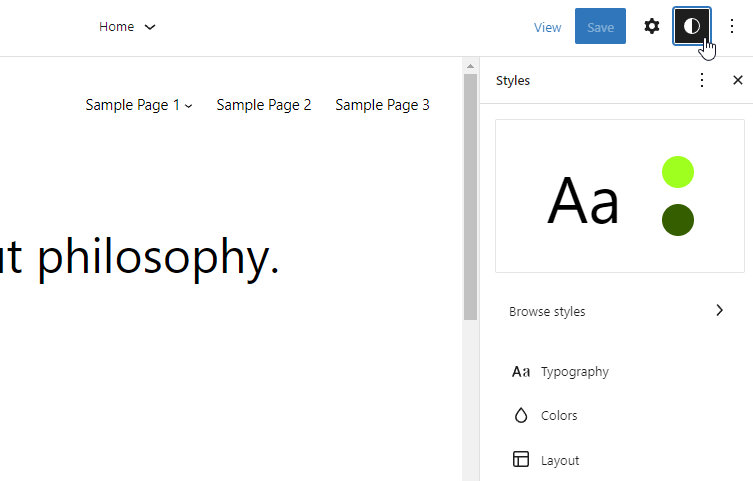
Whatever you change there will apply to all the similar pieces of the page. The great thing is that you have the freedom to override these settings for any block individually.
For example, if we set the post date color to green, and then click on a specific post date to change the color; all the rest will remain intact.
Pretty cool, right?
The themes.json file
What you see as default options in the global styles, templates, template parts of the editor is set through the themes.json file. It is located under the main folder of the theme you are using and is a new, more user-friendly way to replace the old theme customizer settings. its greatest advantage is that it is a system that applies to all themes.

If you open it with your favorite editor, you will see that the array is separated into four main parts: customTemplates, settings, styles, and templateParts.
Let’s talk about each one of them.
customTemplates and template Parts
The customTemplates section is the same as the list of templates you see when you click the Templates item on the Editor menu.
Examining the array part of the themes.json file, we see that each template is given a unique name, a display title, and, optionally, a setting for which post types can use the template.
The list of template names you see here also corresponds to the files in the templates folder of the theme.
"templateParts": [
		{
			"area": "header",
			"name": "header",
			"title": "Header"
		},
		{
			"area": "footer",
			"name": "footer",
			"title": "Footer"
		},
		{
			"area": "uncategorized",
			"name": "comments",
			"title": "Comments"
		},
		{
			"area": "uncategorized",
			"name": "post-meta",
			"title": "Post Meta"
		}
	]
So if you are at the position where you want to add a default template to the list, you have to edit the array like this:
The templateParts section of the code is essentially the same. In our case, the corresponding folder with the html files is the parts folder, again, under the theme’s main folder.
Settings
This is where you define your block theme’s global styles.
Typography: Here you can see and modify the font properties of text for links, headings, buttons, and paragraphs.
Color palette: Same for the color properties
Layout: The width of the main content area, padding, and block spacing.
It is basically what you see as options when you click the Styles icon in the upper right area of your FSE. take your time and experiment with changing these values.
Styles
In the Styles part of the themes.json file contents, you can see or change things like the default background color, default fonts, and font styles, or even customize these values for specific parts of the layout.
Should you switch to full-site editing?
Whether or not you should use full-site editing depends mostly on how much control you want over how your website is run. Smaller businesses seem to prefer FSE as it allows them to play around with all the style elements quicker and easier and therefore brainstorm the aesthetic result more efficiently.
If, however, you already run a website and are considering switching to a theme with a full site editor, take your steps carefully.
Create a backup first, and then make sure that your plugins are compatible with the new theme. You can just do some research or, ideally, try your plugins in a testing environment.
Conclusion
There is no doubt that the full site editor provides more flexibility and control over a website’s design.
However, as with all features, it should be used wisely and only when really needed, as it has its own learning curve.
In the end, it is one more improvement for WordPress usability and one more tool to choose from when it comes to customizing a website.
Start Your 14 Day Free Trial
Try our award winning WordPress Hosting!


