

In the second episode of our Gutenberg Editor series, we are going to break down the new Gutenberg Editor interface. We will compare the old edit post screen with the new one, and show you how each UI element has changed.
Gutenberg breakdown
According to the official Gutenberg design documentation the new edit screen consists now of 4 main areas:
- The editor bar holds post-related actions: The editor mode, save status indicator, global actions for undo/redo/insert, the settings toggle, and the publish options.
- The content area holds the post content itself.
- The settings sidebar holds document metadata, both for the document itself (tags, categories, schedule etc.), and for the blocks located in the Block tab.
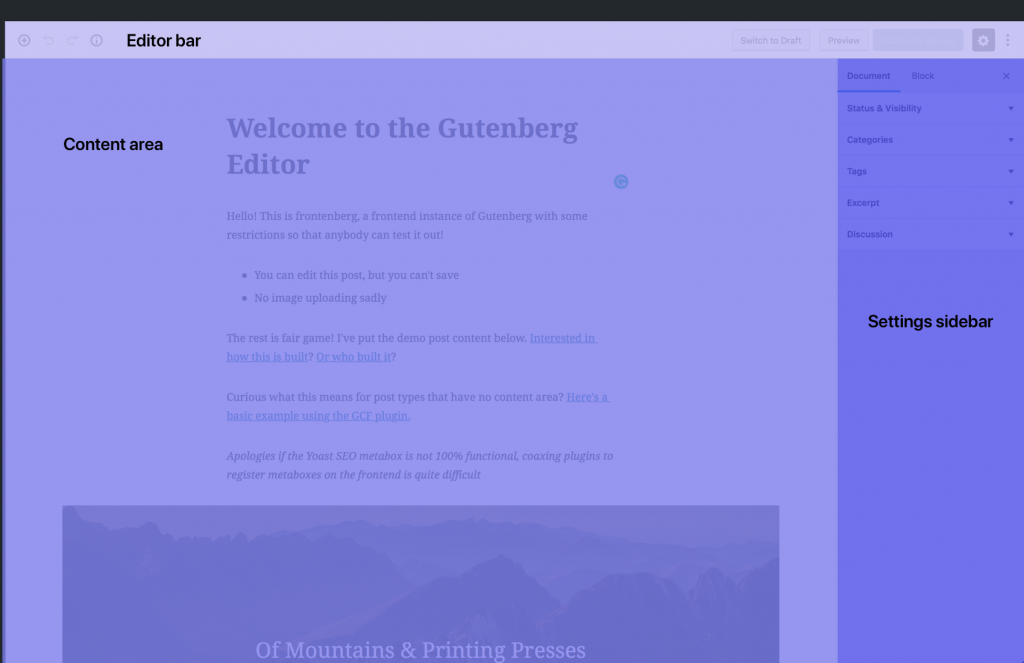
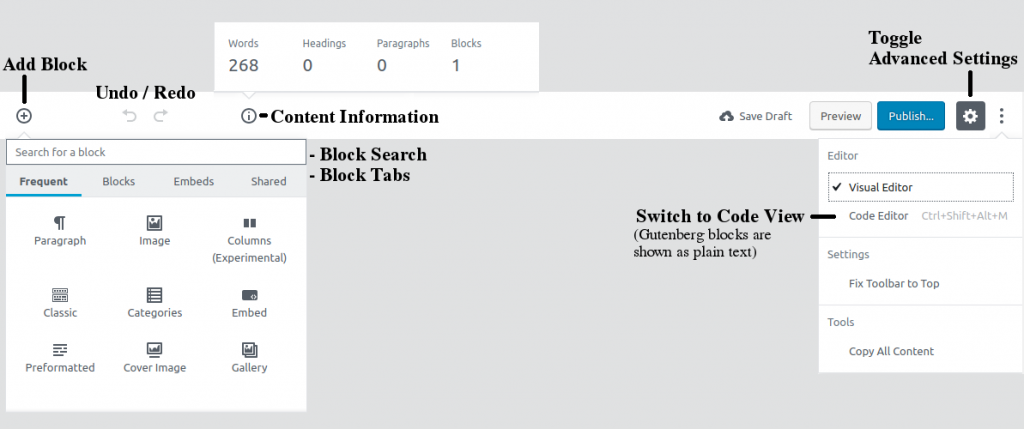
Editor bar
The editor bar contains the Publish button you use to save and publish content. It’s fixed on top so you can always perform these actions, without scrolling to the top of the page. It also contains the Add Block button, allowing you to quickly access the block library and add new content to your page.
Note:
The Code Editor on the right, displays blocks in their ‘raw’ text format. Editing them without knowing what you’re doing can cause blocks to misbehave or even break. Note that it’s not the same as the Text tab in TinyMCE. There is a separate “View as HTML” option inside each block, which we will present in detail, shortly below.
Content area
The post title and body look the same, but they are two different sections inside the editor content area. The permalink is now hidden inside the title section, and is revealed only when you focus on the title element.
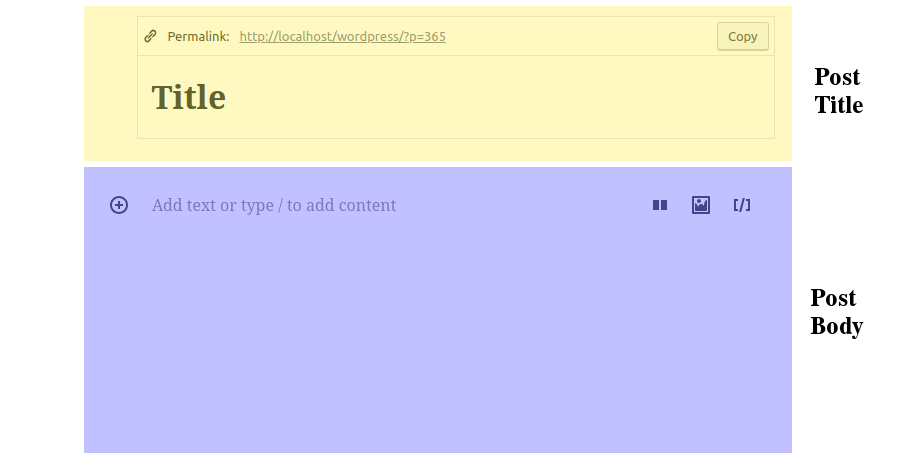
The post body, is just a collection of blocks. The paragraph block is the most basic one, and the one you will be working with the most.
There are many ways to insert a new paragraph block:
- Press the Enter key, inside another block.
- Click below or above another block.
- Click the Add Block button.
Clicking the Add Block button allows you to choose any kind of block. Let’s take a look at one and its available controls.
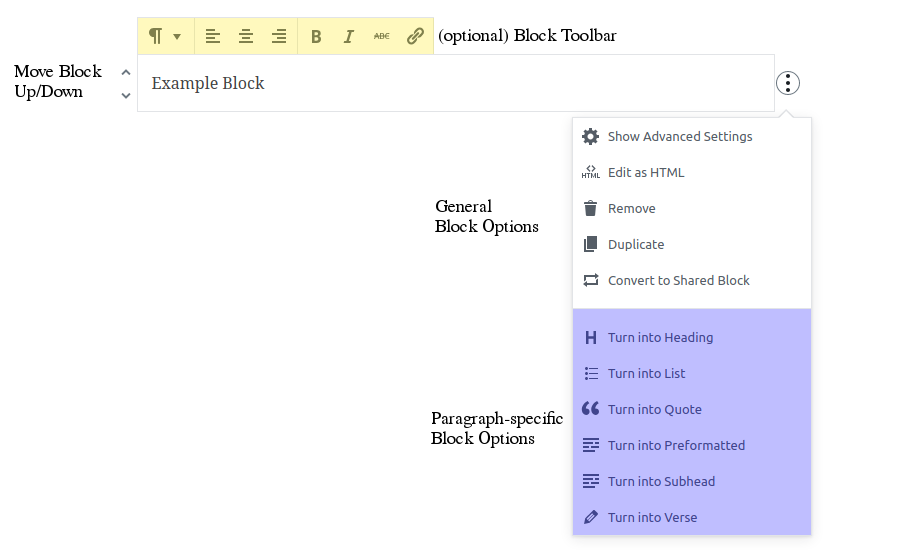
Notice the Edit as HTML option. Use this if you’re searching for the ‘View as HTML’ functionality of TinyMCE, and not the Code Editor inside the toolbar.
Settings sidebar
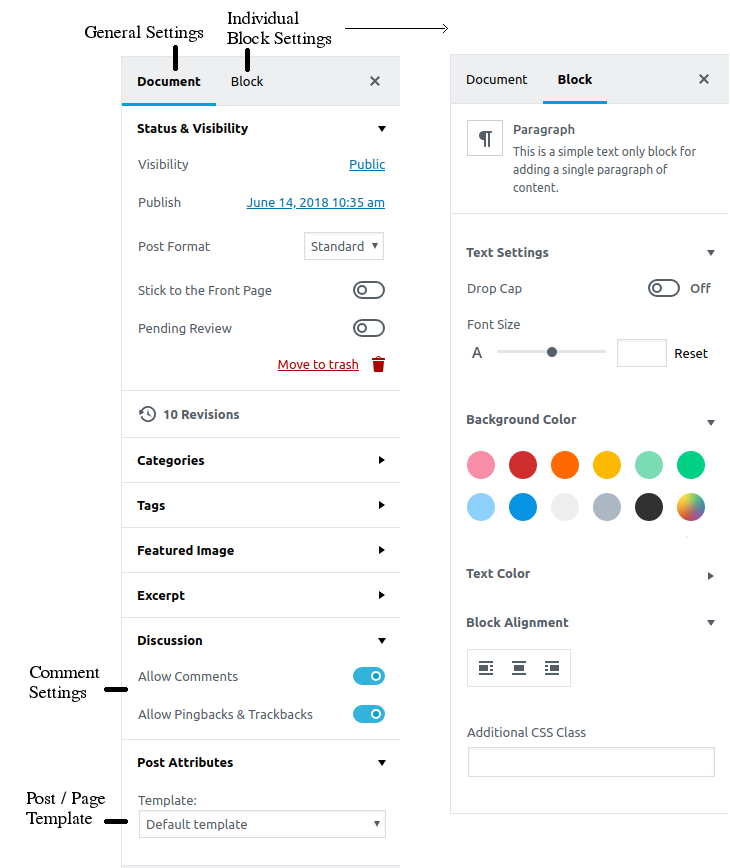
Each time you select a particular block, the individual Block Settings tab changes and displays the block’s configuration options.
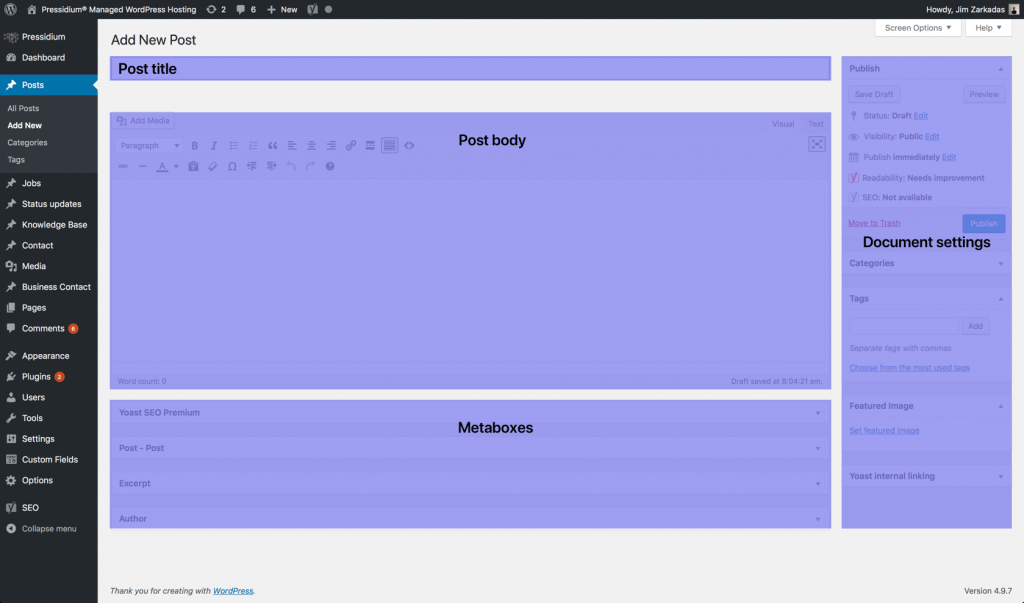
Comparison to TinyMCE
This is how the edit post screen looks like with TinyMCE editor. We have highlighted all the main areas below.
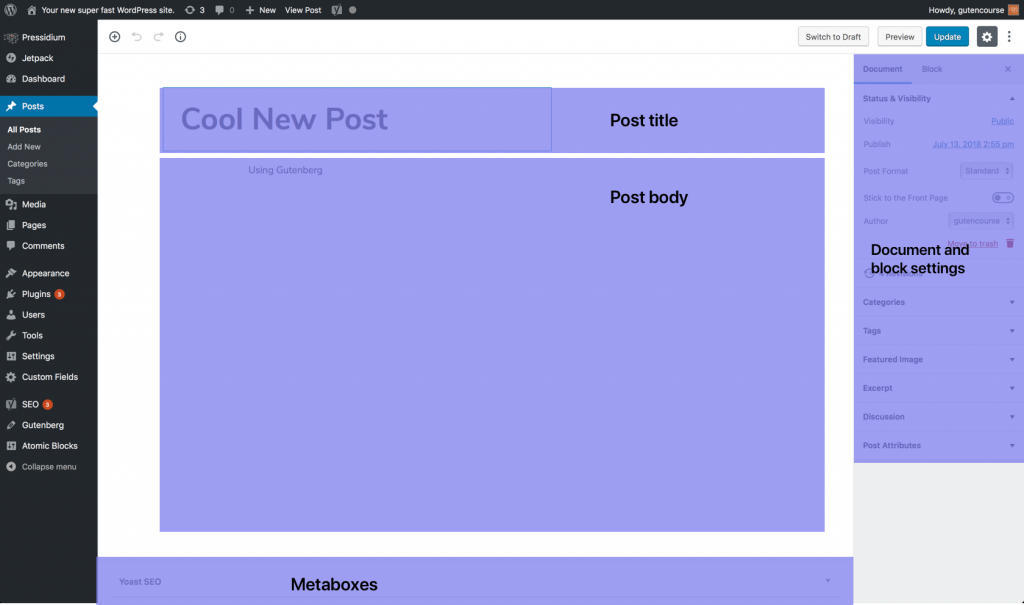
And this is how it looks like with Gutenberg.
Play around and get prepared for the next episode
Now it’s time for you to visit Fronteberg and start experimenting with the new Gutenberg editor. Frontenberg is a frontend, and a Gutenberg playground that lets you test out the new WordPress editor instantly. No login is necessary, just visit the site and you are ready to go. It’s the quickest and simplest way to get started! 🙂
In the next episode we will show you how blocks work and what your new post editing workflow will look like, so stay tuned!
Start Your 14 Day Free Trial
Try our award winning WordPress Hosting!


