

Have you ever updated your WordPress theme only to find that all the custom changes you’d made to the theme itself had been lost? A WordPress Child theme is the solution to avoiding this problem and in this article we’re going to show you exactly how to create one.
Let’s get going!
What is a WordPress Child Theme
A WordPress child theme is not considered a complete theme like the ones that can be found in the WordPress theme directory. Instead, it completely depends on another theme (called the Parent Theme) in order to be able to be activated and work properly.
When activated, it inherits all the functionality, features, and code of its parent theme without making any changes to the parent theme files.
WordPress will serve the code of the parent theme except the parts that are overridden by the child theme which will be served from the child theme’s folder. The result of this means that when the parent theme is updated, any modifications/additions and so on made in the child theme are not lost.
Creating a Child theme (Step-by-Step)
Before proceeding, make sure:
- You have access to your website’s files via an FTP client (like WinSCP or Filezilla)
- You have a text editor available(like notepad++) .
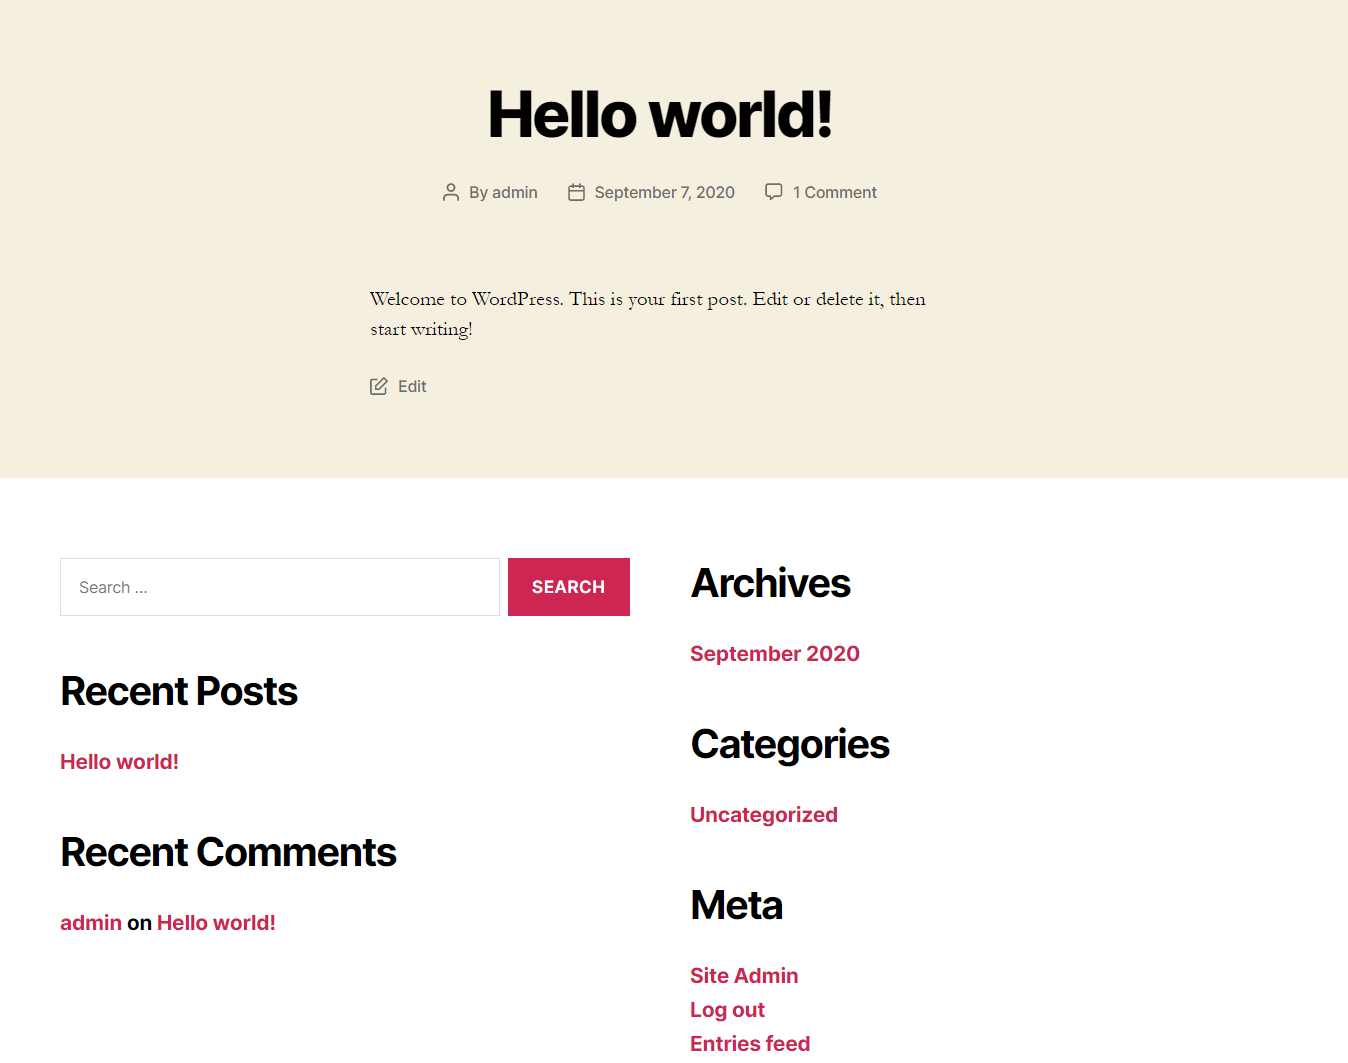
To begin, we’ll activate a default theme which is also referred to as the Parent Theme. In this example that’s going to be the Twenty Twenty theme. If we head to the front end of our website we’ll see something like this:
Now let’s create and activate a ‘Twenty Twenty’ child theme.
Add the Directory
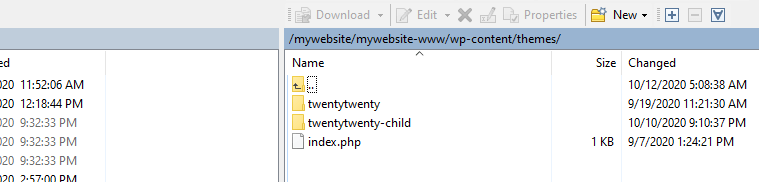
First, we have to create a new ‘twentytwenty-child”‘ directory inside /wp-content/themes. Note that the child folder could be named whatever you like as long as you do not use spaces or punctuation.
Add the style.css file
Next, we have to create a style.css file and add the appropriate theme headers. Before proceeding let’s take a look at the style.css of the parent theme.

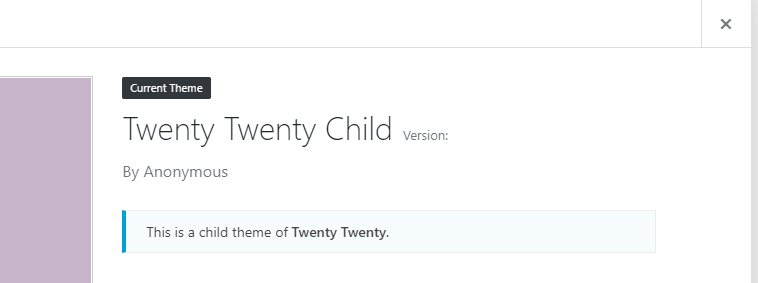
Let’s see where this information reflects in the admin area.
First, open the theme details on Appearance > Themes and take a closer look at the right column.
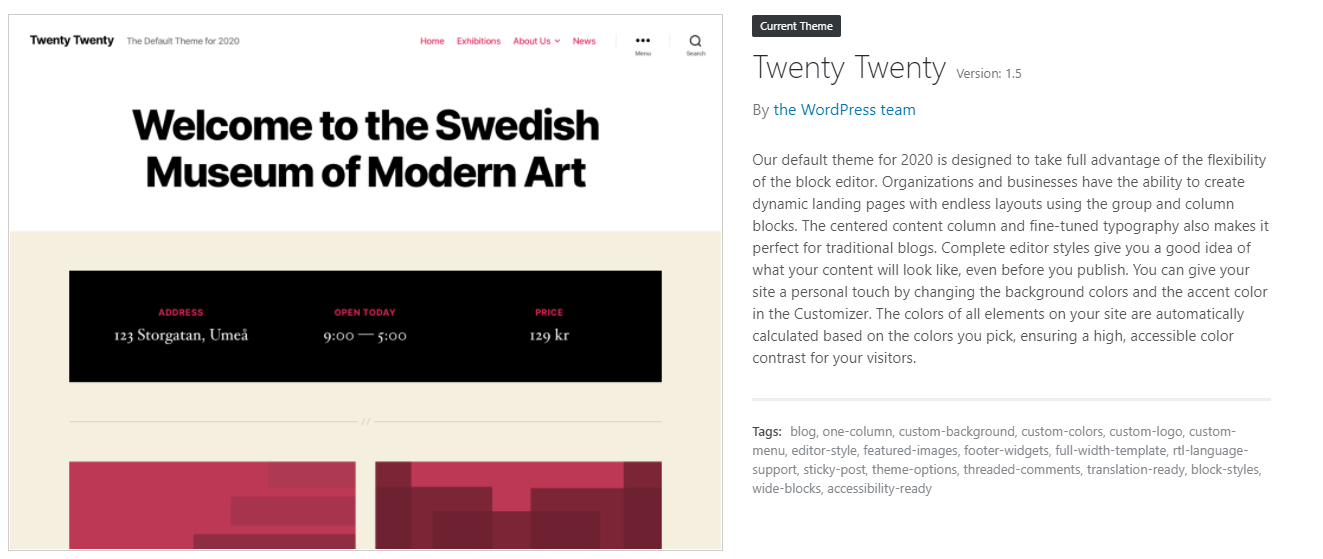
If we compare this to the stylesheet we’ll see where various elements of this information are pulled from.
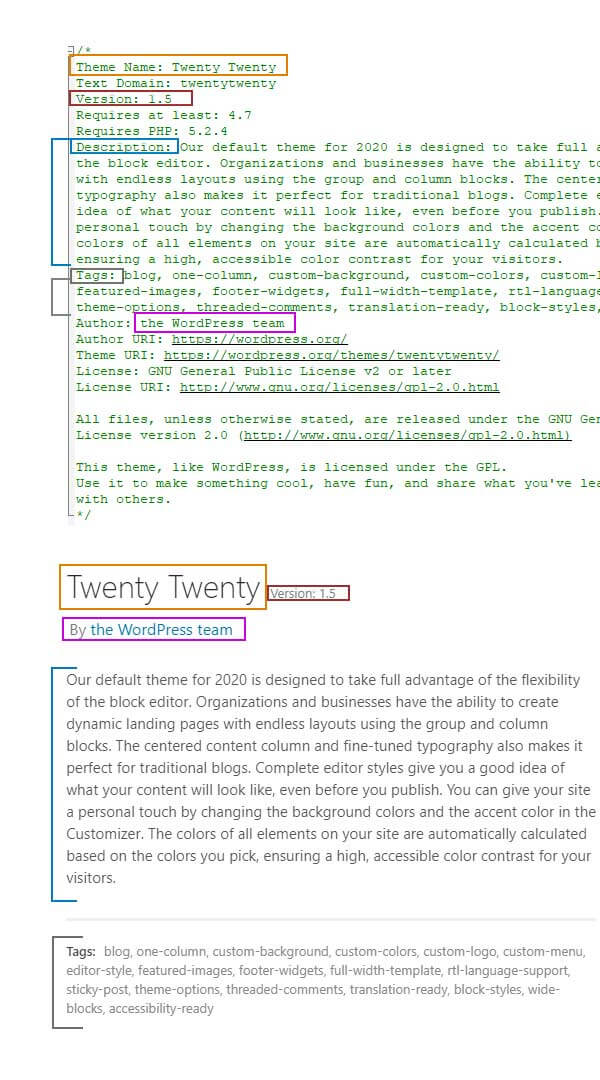
We need to begin adding some of this information to our child theme stylesheet. The minimum information required that should be inserted as headers are the ‘Theme Name’ and ‘Template’.
/*
Theme Name: Twenty Twenty - Child
Template: twentytwenty
*/- Theme Name: The desired name of your Child Theme that will be displayed in the back end of WordPress.
- Template: This should be identical to the directory name of the parent theme. It is the most important header for the child theme as it actually tells WordPress what theme is the parent and thus defines the dependency. Without it, your child theme won’t work.
Once the child theme is activated, what you will see in the backend is this:
You can additionally enter the following optional information:
- Version (theme’s version)
- Requires at least (minimum required WP version for the theme to work properly)
- Requires PHP (minimum WP PHP version for the theme to work properly)
- Description (details related to the theme)
- Tags(theme’s tags)
- Author(Theme’s developer’s name)
- etc.
At this point, if you open up the front end of your website you might find it’s broken and looks something like this:
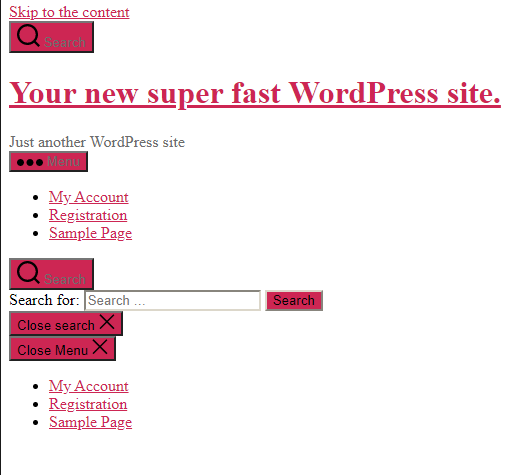
This is entirely normal as the stylesheet (style.css) that WordPress is now referencing is now from the child theme and this stylesheet is empty, bar the information you entered above.
Try our Award-Winning WordPress Hosting today!


You can either start your own style from scratch or load the parent theme’s style and start there. If you want to import the parent theme stylesheet you can do this in one of two ways.
Option One: Import the Parent Style sheet the Classic Way
All you have to do is simply add this line to you child theme’s style.css file:
@import url('../twentytwenty/style.css');This command tells WordPress where to look in order to retrieve the original CSS file from. Now if you refresh your homepage it looks like back to normal. Whatever you add now in the style.css will override the imported parent style. Try for example to add a different font size for h2 title “Hello world!”.

Refresh the page and look at the elements inspector of the developer’s tabs.
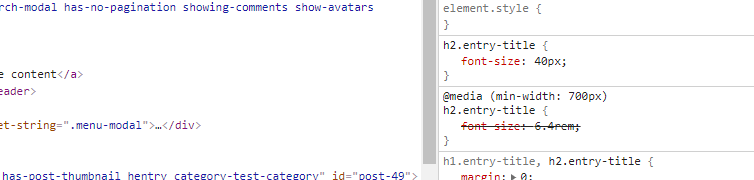
You will notice that the added value is counted and the default(parent style) “font-size: 6.4rem;” has been overridden.
What you have to take into consideration though is that using this method has a negative influence on your site speed as the files are forced to load one after another and not in parallel. More specifically, the browser has to download, parse, and execute the first file before it is “informed” that it needs to download the second file.
For these reason, importing the parent style.css file in this manner is no longer recommended.
Option Two: Import the Parent Style Sheet the Right Way
In order to import the parent style.css file ‘the right way’ we fist need to add an empty functions.php file inside your child theme’s folder.

Once you’ve done this, open it with your editor and add an opening PHP tag (<?php), after which you can add the following PHP code:
function twentytwenty_scripts() {
    wp_enqueue_style('parent-theme-style', get_template_directory_uri() . '/style.css');
}
add_action('wp_enqueue_scripts', 'twentytwenty_scripts');
If you check your browser’s developer tools now, you will notice that the results are the same as with the ‘traditional’ way outlined in Option One above, except now it is much faster.
Some further notes on the PHP code:
- The
'parent-theme-style'is the handle name and must be unique - The
get_template_directory_uri() . '/style.css'tells WordPress the source location of the parent style.css location - The
get_template_directory_uri()retrieves the template directory URI for our parent theme. In our case it outputs ‘http://mywebsite.onpressidium.com/wp-content/themes/twentytwenty’
Add Functionality to Your Child Theme
Now you’ve created a Child Theme you can begin to add some additional functionality. Let’s first look at how you’d go about editing the functions.php file in your child theme and how this works in practice.
Child Theme functions.php
Unlike the style.css file, when you put functions.php in the child theme, the parent theme’s functions.php code will still be running. Whatever you add in the child’s functions.php will be executed in addition to the parent’s functions.php content.
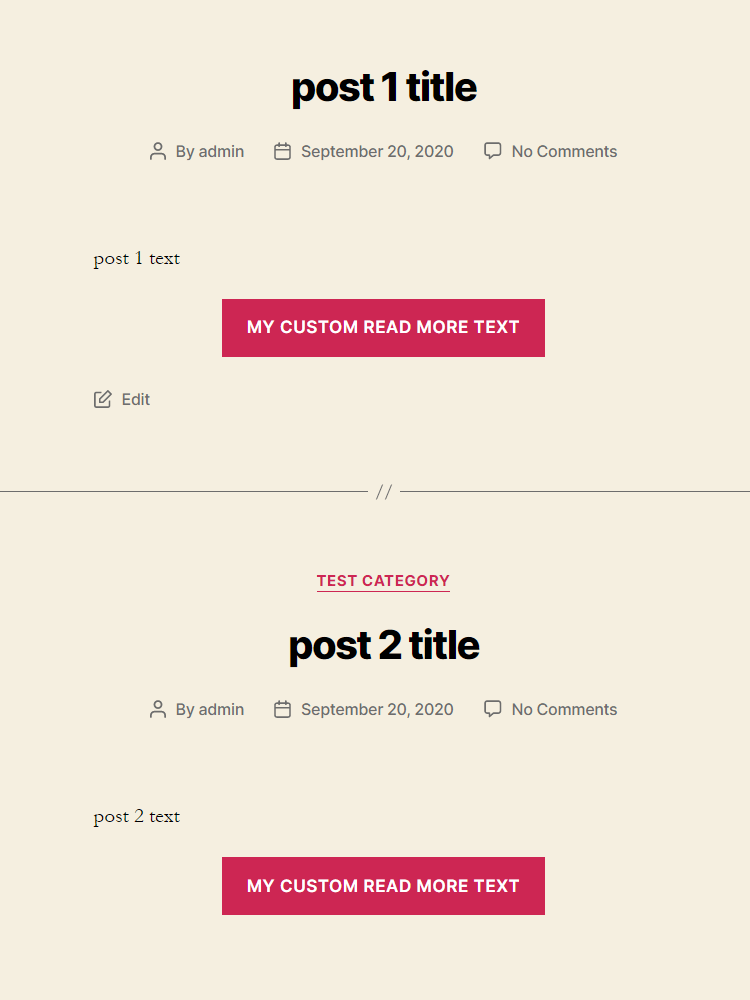
For example, let’s see how we can change the “Read More” Text for the posts view:
Step One: Create a test post category:

Step Two: Create two new posts under this category. Let’s add in some example content. At this point, If you visit the category page you will see this:
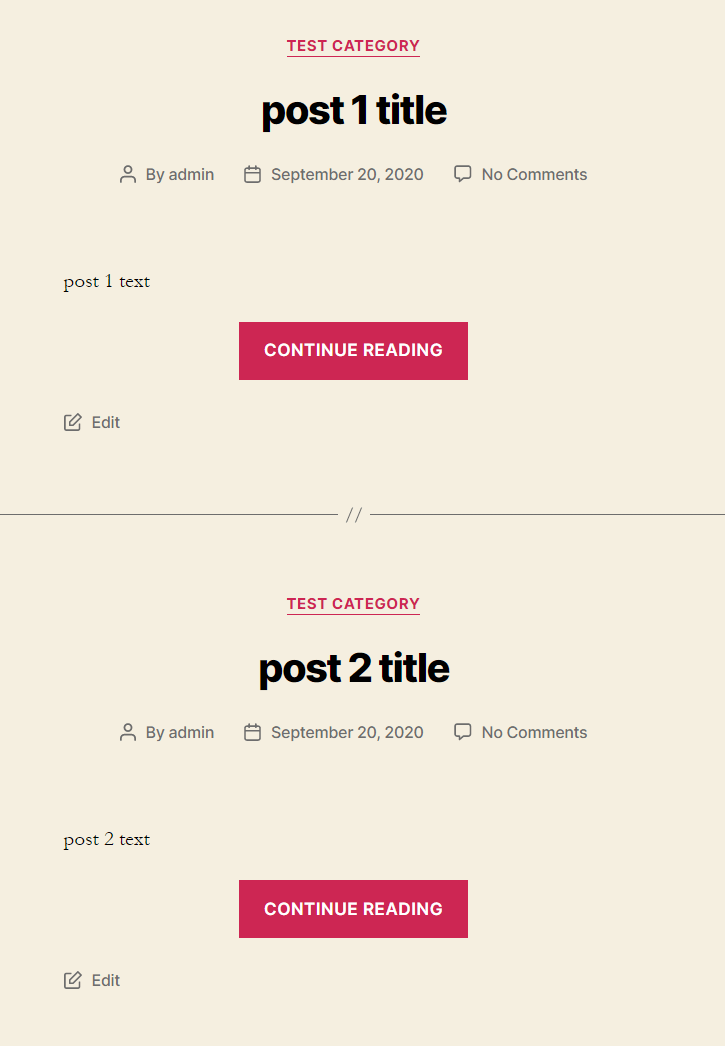
In this example, we want to change the ‘Continue Reading’ text displayed in the button that loads the full post.
Let’s step back for a while to understand how this text is displayed. In WordPress, in order to modify a certain function, we use filters.
In this example to get what we want we have to customize ‘the_content_more_link‘ filter which is initially introduced in the wp-includes/post-template.php core file in line 369 like this:
$output .= apply_filters( 'the_content_more_link', ' <a href="' . get_permalink( $_post ) . "#more-{$_post->ID}\" class=\"more-link\">$more_link_text</a>", $more_link_text );This is currently overridden by the twentytwenty parent theme in its function.php file (line 571) by this piece of code:
function twentytwenty_read_more_tag( $html ) {
    return preg_replace( '/<a(.*)>(.*)<\/a>/iU', sprintf( '<div class="read-more-button-wrap"><a$1><span class="faux-button">$2</span> <span class="screen-reader-text">"%1$s"</span></a></div>', get_the_title( get_the_ID() ) ), $html );
}
add_filter( 'the_content_more_link', 'twentytwenty_read_more_tag' );
So, if you want to change the ‘Continue Reading’ text in the button, this can be overridden in your child theme’s functions.php if you add this piece of code:
function modify_read_more_link() {
    return '<a class="more-link" href="' . get_permalink() . '">My Custom Read More text</a>';
}
add_filter( 'the_content_more_link', 'modify_read_more_link' );
The ‘’the_content_more_link’’ hook is common between those files in which case the child’s hook always prevails.
Then refresh the page and voilà:
How to Customize PHP Templates
The above screenshot shows the content of the twentytwenty theme’s template for the post category view. So, how can we change its design or add/remove information using the child theme?
Here is how you can do this:
- Find the related php file
- Copy the appropriate file to child theme folder and edit
- Customize it as you see fit
The first and most common issue here is that we have to find which php file contains the output that we want to edit. Something that will definitely help you find your way around this is the WordPress template hierarchy.
In a nutshell, the only files a WordPress theme actually requires are the index.php and style.css files. The extra files and folders are actually files called from inside index.php. They are the fragments of what you will eventually see as an output of the index.php file.
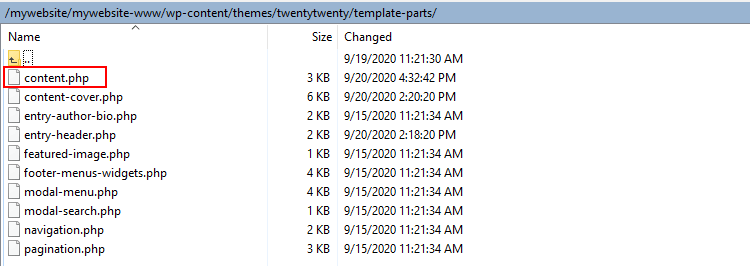
With regards to the Twenty Twenty theme, if we view its index.php file, we can see in line 79 that, when the content is one or more posts, then the php files in the template-parts/ directory are used.
if ( have_posts() ) {

    $i = 0;
    while ( have_posts() ) {
	$i++;
	if ( $i > 1 ) {
	    echo '<hr class="post-separator styled-separator is-style-wide section-inner" aria-hidden="true" />';
	}
	the_post();
	get_template_part( 'template-parts/content', get_post_type() );
    }

}
In our case we will have to copy the content.php file from inside the template-parts theme’s subfolder.
Also, be sure you copy only the PHP files that you plan to customize. Do not copy every PHP file in the parent theme.
NOTE: The folder structure should be the same in the child theme in order for the changes to reflect on the front end.
So, we first create the ‘template-parts’ subfolder and put a copy of content.php in it.

You can now open the file in your editor and customize it.
Try changing something trivial at first to make sure all works fine, for example, change a div class and refresh your frontend to check the results.
Customize the Post Category Template
We already have two posts under the category ‘test category’. You can now create a “’Post Category”’ item menu and link it to the ‘test category’. If you click the new menu item you should see the post category view page.
Now you can further modify the content.php file and change the post category view to your own style. As a hint, find the references of the extra included files like in line 23:
get_template_part( 'template-parts/featured-image' );This means that the file that outputs the featured image is template-parts/featured-image.php
So, you can copy the file in your child theme directory and edit it. Fantastic!
Conclusion
A child theme allows users to modify the layout, styling, and functionality of the parent theme without losing the ability to update the parent theme. Frequently, web designers are reluctant to update their website’s theme as they know if they do, they will lose changes made directly in the parent theme. This is a serious problem as it’s as important to keep your theme up-to-date as it is your plugins and WordPress core. Working with a child theme from the outset removes this issue and allows you to update the parent theme as required without fear of overwriting all the edits you have made to the theme as a whole.
Start Your 14 Day Free Trial
Try our award winning WordPress Hosting!


