

Whether you use WooCommerce or not, you may already be aware that it’s one of the most popular open-source eCommerce solutions available today. As with any software however, it does have certain limitations and drawbacks. In this article we’re going to address one of these… the inability to fully customize and/or separate the login and registration pages.
One of the most common requests from WooCommerce users is to be able to update and customize both the login and registration pages. Ideally, many users would also like to be able to separate these pages rather than have them as an ‘all in one’ page. In this article we’re going to look at how you can achieve both of these things… a fully customized AND separated login/registration page for your WooCommerce website.
Let’s get started!
Using a Plugin
Perhaps unsurprisingly, the easiest way to solve the logon/registration page customization dilemma is by using a plugin. We’ve selected a few of the best that you might like to consider using. Let’s take a look at them.
Woocommerce Login / Signup Lite
Go to your WordPress admin menu and in the “Plugins -> Add New” area, install and activate the plugin.
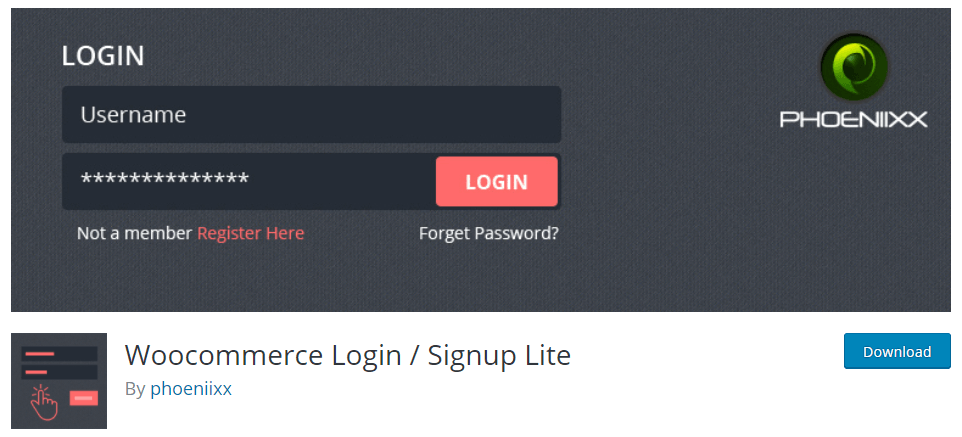
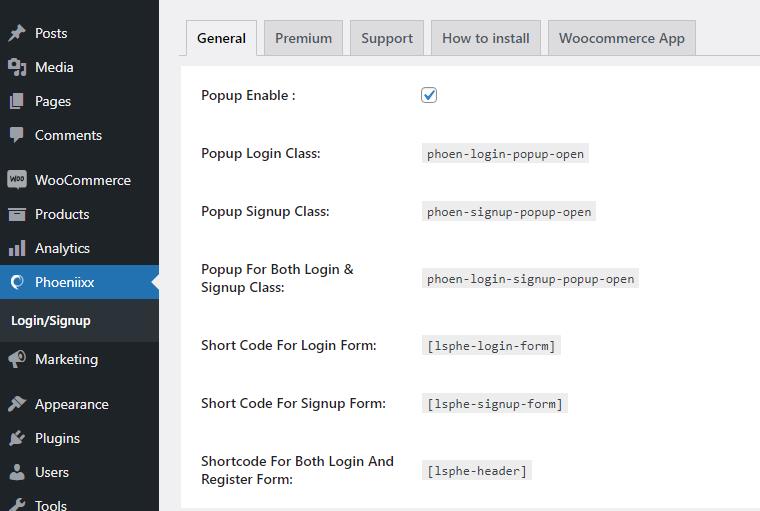
The Woocommerce Login / Signup Lite plugin is a free plugin that also offers a premium version. For our needs however the free version should be just fine. It’s pretty easy to use. Once installed, you’ll be able to create shortcodes that correspond to the kind of form you require (e.g. a login or registration form). You’re then able to paste this shortcode onto any page you wish. Shortcodes include:
- The
[lsphe-login-form]shortcode to create a login form. - The
[lsphe-signup-form]shortcode to create a registration form. - The
[lsphe-header]shortcode to create a form that will include both login & registration forms.
You can see the available Shortcodes in the plugin’s admin area.
One other great feature this plugin offers is the ability to create a popup login/registration window from a menu item. This looks pretty neat and provides further flexibility when it comes to offering login options to your customers. To create on of these follow these steps:
- Click Appearance > Menus to enter the menu admin screen.
- Use the arrow in the top right to open the screen options and enable the ‘CSS classes’ in the ‘Show Advanced Menu properties’.

- Create a Custom link Menu item and give a “#” URL. Name the item whatever you want and add it to the menu.
- Once it appears in the menu list, open its accordion section and, in the CSS class, add the following:
phoen-login-popup-open
To do the same for a registration popup, follow the same steps and use the phoen-signup-popup-open class and to display both forms use the phoen-login-signup-popup-open class.
User Registration
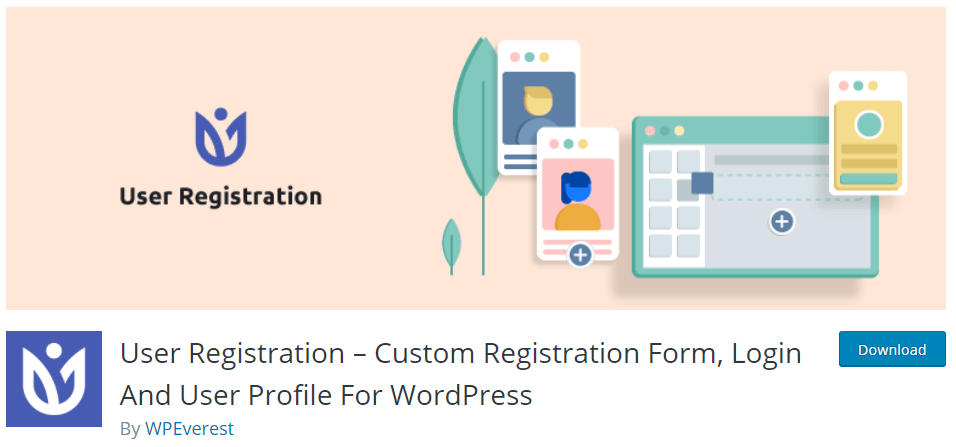
The User Registration plugin allows you to create frontend forms using drag ‘n’ drop fields which allow for easy form design and reordering.
After you’ve installed the plugin head to the ‘User Registration’ where you can get started building your bespoke registration form for your WooCommerce store. You will notice there is a pre-built form that has a shortcode you can copy and paste into your website at a location of your choice. The form will look something like this:
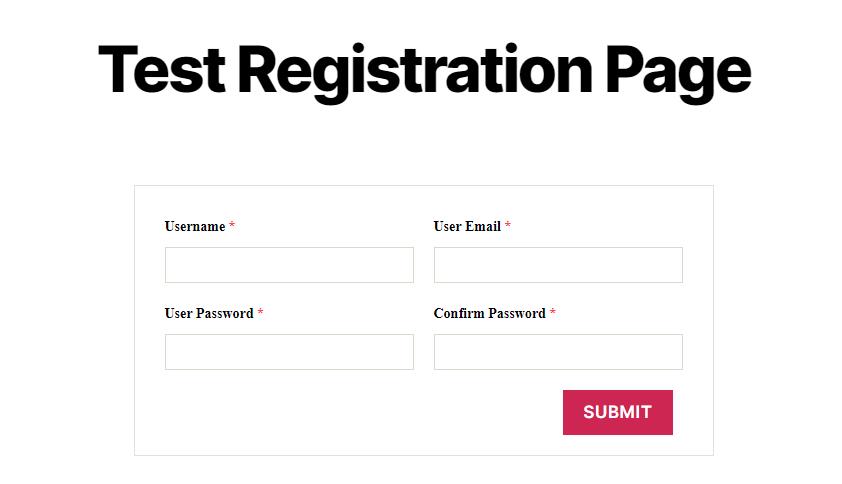
You can of course edit the form or create a new one really easily. Just follow the prompts within the plugin and you’ll be up and running with a form of your choice in no time.
Login/Signup Popup

Another plugin that is worth considering is the Login/Signup Popup (Inline Form + Woocommerce). Rather than on-page forms, the plugin (as the name suggests) helps you create popup login forms that can be triggered from a link or button on your website. Popups can be great and can help save space on the page as well as give people the oportunity to login from any point on your site without being redirected to a specific login or registration page.
As with all the plugins listed, you are free to fully customize the design of the forms. Other notable features include things like ‘Social’ logins which allow users to login using their Google or Facebook logins. This is done with a paid Custom Registration Field addon.
Code Your Own WooCommerce Registration & Login Pages
If you don’t want to use a plugin to create your own WooCommerce login/registration pages then why not code your own! As always, coding provides the ultimate in control over features, design and function and so is the perfect option if you need to achieve a specific task or want to avoid the potential bloat that comes with a plugin.
Try our Award-Winning WordPress Hosting today!


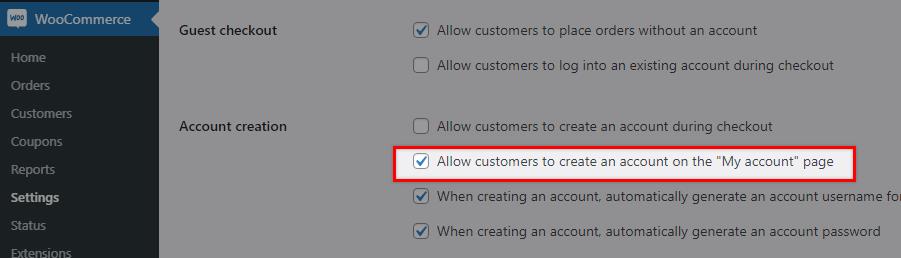
To get started with this tutorial first setup a menu item that links to the standard WooCommerce ‘My Account’ page. Now if you visit this menu link on the front end of the website you will either see the login form or a two column layout which contains both the registration form and the login form. Which will depend on what you’ve set in the WooCommerce Account creation option shown below.
Using a SFTP Client, login to your web server so you can see your website folders. Under /wp-content/plugins/woocommerce/templates/myaccount/ you ‘ll find the form-login.php file. Open that file with your favorite editor.
The code in this file includes both the login and registration forms. You can see the content of this file on the official git page. There you will notice that there is an if condition <?php if ( 'yes' === get_option( 'woocommerce_enable_myaccount_registration' ) ) : ?> which refers to the admin option in the screenshot above.
Using this we’ll be able to separate the login and registration pages as well as customize the forms with just a few tweaks.
Customize the Login Form
To begin, you’ll want to make sure any changes you make to the login/registration form are done in a safe way so they cannot be reverted when future updates take place.
If you are already logged in via your SFTP client, go to wp-content/themes/__my__theme__. and create a ‘woocommerce’ folder. Inside this folder, create a copy of the Woocommerce templates. It is important that you keep the file structure but remove the /templates/ subdirectory. For example, we have the Twenty Twenty theme installed and the WooCommerce form-login.php is under plugins/woocommerce/templates/myaccount/. That means that in order to override the form, we have to create an hierarchy like this: /themes/twentytwenty/woocommerce/myaccount/ and inside place the form-login.php file.
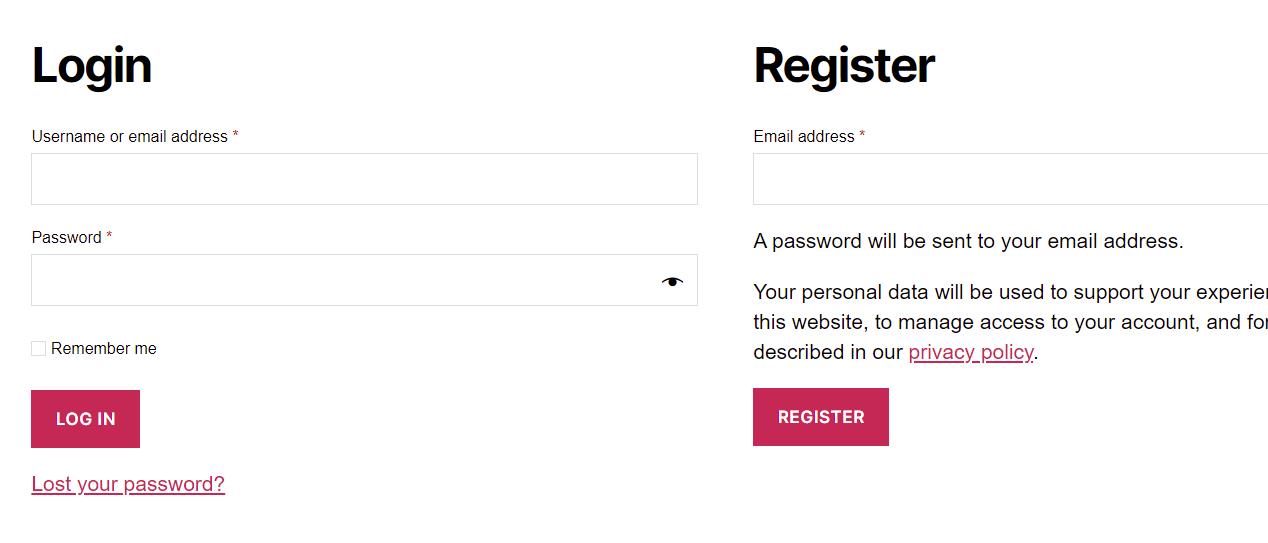
Let’s test it. At this point we see this output when visiting the Account page on the front end of our website:
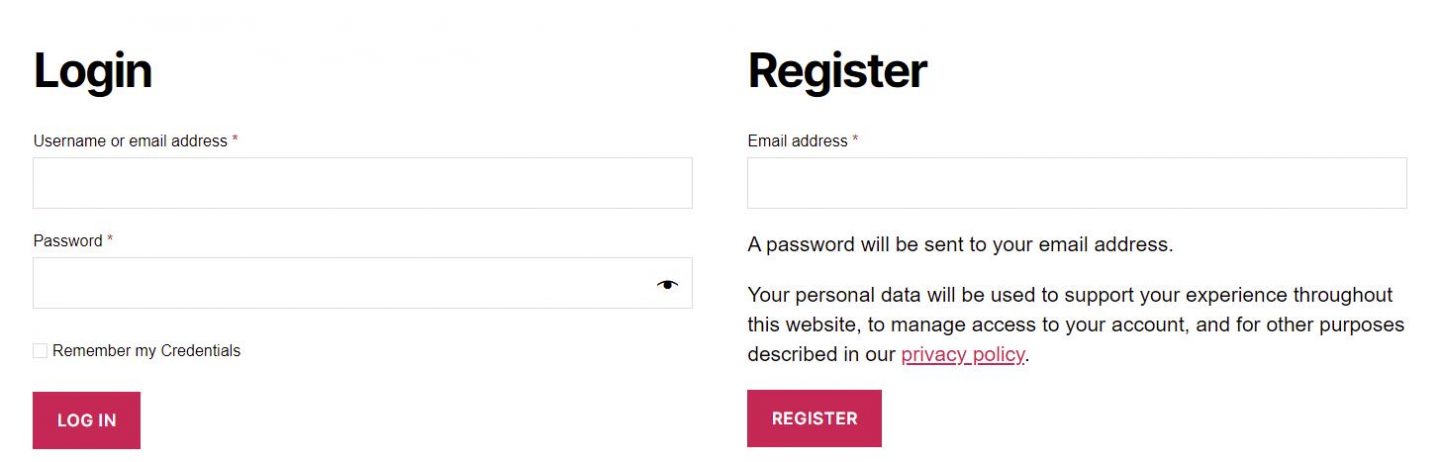
Now if we try to change anything in the code inside the form-login.php duplicate, we will notice that it will affect the layout as expected. Let’s try a minor change just to check this is working. We’ll change the ‘Remember me’ text to ‘Remember my Credentials’ and voila, if we refresh the front end page we should see that update has taken effect.
Separate Login/Registration
Here are the steps you need to follow in order to separate login and register pages:
To begin we will register a new custom template. To do this, create a new file called register.php and place it in the templates folder. Inside this file we will insert the following code:
<?php
/*
* Template name: Registration Form
*/
?>
<?php if(is_user_logged_in()){
wp_redirect(get_permalink(get_option('woocommerce_myaccount_page_id')));
} ?>
<?php get_header();?>
<?php do_action( 'woocommerce_before_customer_login_form' ); ?>
<div class="custom-registration">
<h2><?php esc_html_e( 'Register', 'woocommerce' ); ?></h2>
<form method="post" class="woocommerce-form woocommerce-form-register register" <?php do_action( 'woocommerce_register_form_tag' ); ?> >
<?php do_action( 'woocommerce_register_form_start' ); ?>
<?php if ( 'no' === get_option( 'woocommerce_registration_generate_username' ) ) : ?>
<p class="woocommerce-form-row woocommerce-form-row--wide form-row form-row-wide">
<label for="reg_username"><?php esc_html_e( 'Username', 'woocommerce' ); ?> <span class="required">*</span></label>
<input type="text" class="woocommerce-Input woocommerce-Input--text input-text" name="username" id="reg_username" autocomplete="username" value="<?php echo ( ! empty( $_POST['username'] ) ) ? esc_attr( wp_unslash( $_POST['username'] ) ) : ''; ?>" /><?php // @codingStandardsIgnoreLine ?>
</p>
<?php endif; ?>
<p class="woocommerce-form-row woocommerce-form-row--wide form-row form-row-wide">
<label for="reg_email"><?php esc_html_e( 'Email address', 'woocommerce' ); ?> <span class="required">*</span></label>
<input type="email" class="woocommerce-Input woocommerce-Input--text input-text" name="email" id="reg_email" autocomplete="email" value="<?php echo ( ! empty( $_POST['email'] ) ) ? esc_attr( wp_unslash( $_POST['email'] ) ) : ''; ?>" /><?php // @codingStandardsIgnoreLine ?>
</p>
<?php if ( 'no' === get_option( 'woocommerce_registration_generate_password' ) ) : ?>
<p class="woocommerce-form-row woocommerce-form-row--wide form-row form-row-wide">
<label for="reg_password"><?php esc_html_e( 'Password', 'woocommerce' ); ?> <span class="required">*</span></label>
<input type="password" class="woocommerce-Input woocommerce-Input--text input-text" name="password" id="reg_password" autocomplete="new-password" />
</p>
<?php else : ?>
<p><?php esc_html_e( 'A password will be sent to your email address.', 'woocommerce' ); ?></p>
<?php endif; ?>
<?php do_action( 'woocommerce_register_form' ); ?>
<p class="woocommerce-form-row form-row">
<?php wp_nonce_field( 'woocommerce-register', 'woocommerce-register-nonce' ); ?>
<button type="submit" class="woocommerce-Button woocommerce-button button woocommerce-form-register__submit" name="register" value="<?php esc_attr_e( 'Register', 'woocommerce' ); ?>"><?php esc_html_e( 'Register', 'woocommerce' ); ?></button>
</p>
<?php do_action( 'woocommerce_register_form_end' ); ?>
</form>
</div>
<?php do_action( 'woocommerce_after_customer_login_form' ); ?>
<?php get_footer();?>What we’ve done initially in this code is defined the template name in the Template name: Registration Form comment. Then we check if the user is already logged in. The rest of the code is essentially a copy of the part of the login-form.php content that is related to the registration form wrapped within a <div class="custom-registration"> element.
Next, we add a new Page in the wp-admin Pages screen and name it what we like. It would perhaps make sense to call it something like ‘Registration Page’. Then, make sure you select the right template (the one we just created) using the template selector in the right sidebar.

Now all we have to do is to provide a way for uses to access this page. You could create a ‘Register’ menu item and link it to the Registration Page you just created or you can edit the form-login.php and replace the registration code with just a link to the Registration Page.
If we did this we’d modify the form-login.php file under themes/twentytwenty/woocommerce/myaccount/ so that is content looks like this:
<?php
/**
* Login Form
*
* This template can be overridden by copying it to yourtheme/woocommerce/myaccount/form-login.php.
*
* HOWEVER, on occasion WooCommerce will need to update template files and you
* (the theme developer) will need to copy the new files to your theme to
* maintain compatibility. We try to do this as little as possible, but it does
* happen. When this occurs the version of the template file will be bumped and
* the readme will list any important changes.
*
* @see https://docs.woocommerce.com/document/template-structure/
* @package WooCommerce\Templates
* @version 4.1.0
*/
if ( ! defined( 'ABSPATH' ) ) {
exit; // Exit if accessed directly.
}
do_action( 'woocommerce_before_customer_login_form' ); ?>
<h2><?php esc_html_e( 'Login', 'woocommerce' ); ?></h2>
<form class="woocommerce-form woocommerce-form-login login" method="post">
<?php do_action( 'woocommerce_login_form_start' ); ?>
<p class="woocommerce-form-row woocommerce-form-row--wide form-row form-row-wide">
<label for="username"><?php esc_html_e( 'Username or email address', 'woocommerce' ); ?> <span class="required">*</span></label>
<input type="text" class="woocommerce-Input woocommerce-Input--text input-text" name="username" id="username" autocomplete="username" value="<?php echo ( ! empty( $_POST['username'] ) ) ? esc_attr( wp_unslash( $_POST['username'] ) ) : ''; ?>" /><?php // @codingStandardsIgnoreLine ?>
</p>
<p class="woocommerce-form-row woocommerce-form-row--wide form-row form-row-wide">
<label for="password"><?php esc_html_e( 'Password', 'woocommerce' ); ?> <span class="required">*</span></label>
<input class="woocommerce-Input woocommerce-Input--text input-text" type="password" name="password" id="password" autocomplete="current-password" />
</p>
<?php do_action( 'woocommerce_login_form' ); ?>
<p class="form-row">
<label class="woocommerce-form__label woocommerce-form__label-for-checkbox woocommerce-form-login__rememberme">
<input class="woocommerce-form__input woocommerce-form__input-checkbox" name="rememberme" type="checkbox" id="rememberme" value="forever" /> <span><?php esc_html_e( 'Remember me', 'woocommerce' ); ?></span>
</label>
<?php wp_nonce_field( 'woocommerce-login', 'woocommerce-login-nonce' ); ?>
<button type="submit" class="woocommerce-button button woocommerce-form-login__submit" name="login" value="<?php esc_attr_e( 'Log in', 'woocommerce' ); ?>"><?php esc_html_e( 'Log in', 'woocommerce' ); ?></button>
</p>
<p class="woocommerce-LostPassword lost_password">
<a href="<?php echo esc_url( wp_lostpassword_url() ); ?>"><?php esc_html_e( 'Lost your password?', 'woocommerce' ); ?></a>
</p>
<?php do_action( 'woocommerce_login_form_end' ); ?>
</form>
<a href="/?p=202">Sign Up</a>
<?php do_action( 'woocommerce_after_customer_login_form' ); ?>The number 202 is the id of the custom registration page. As a quick reminder, you can see the page id in the URL when it is open in the backend editor.
Now if you take a look at the page from the front end, you should see something like this when you visit the account details page:

If you click on the Sign Up link you should be redirected to the registration page we created like the one shown below:
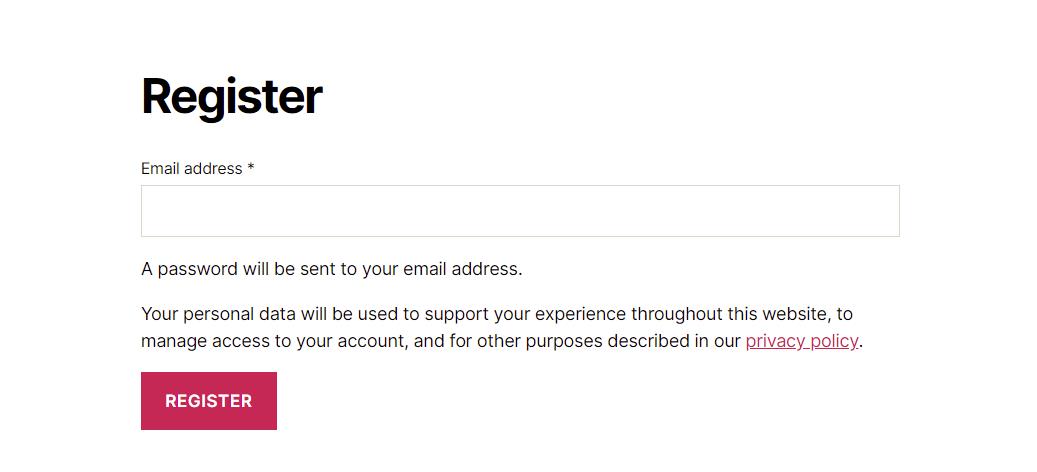
Pretty easy isn’t it?
Creating a Shortcode
The WooCommerce account page contains the [woocommerce_my_account] shortcode which can be used to outputs the forms using the form-login.php file. In this section we will see how we can create our own shortcodes, one for the login form and one for the registration form that we created above.
WooCommerce Registration Shortcode
Open your theme’s functions.php file with your editor and insert the following lines:
// REGISTRATION SHORTCODE
function wc_registration_form_function() {
   if ( is_admin() ) return;
   if ( is_user_logged_in() ) return;

 // OUR REGISTRATION FORM CONTENT

}
add_shortcode( 'wc_registration_form', 'wc_registration_form_function' );
By doing this we avoid the need to use a separate custom template. Instead, we will include the contents of the template we created earlier like this:
// REGISTRATION SHORTCODE
function wc_registration_form_function() {
if ( is_admin() ) return;
if ( is_user_logged_in() ) return;
ob_start();
do_action( 'woocommerce_before_customer_login_form' );
?>
<form method="post" class="woocommerce-form woocommerce-form-register register" <?php do_action( 'woocommerce_register_form_tag' ); ?> >
<?php do_action( 'woocommerce_register_form_start' ); ?>
<?php if ( 'no' === get_option( 'woocommerce_registration_generate_username' ) ) : ?>
<p class="woocommerce-form-row woocommerce-form-row--wide form-row form-row-wide">
<label for="reg_username"><?php esc_html_e( 'Username', 'woocommerce' ); ?> <span class="required">*</span></label>
<input type="text" class="woocommerce-Input woocommerce-Input--text input-text" name="username" id="reg_username" autocomplete="username" value="<?php echo ( ! empty( $_POST['username'] ) ) ? esc_attr( wp_unslash( $_POST['username'] ) ) : ''; ?>" /><?php // @codingStandardsIgnoreLine ?>
</p>
<?php endif; ?>
<p class="woocommerce-form-row woocommerce-form-row--wide form-row form-row-wide">
<label for="reg_email"><?php esc_html_e( 'Email address', 'woocommerce' ); ?> <span class="required">*</span></label>
<input type="email" class="woocommerce-Input woocommerce-Input--text input-text" name="email" id="reg_email" autocomplete="email" value="<?php echo ( ! empty( $_POST['email'] ) ) ? esc_attr( wp_unslash( $_POST['email'] ) ) : ''; ?>" /><?php // @codingStandardsIgnoreLine ?>
</p>
<?php if ( 'no' === get_option( 'woocommerce_registration_generate_password' ) ) : ?>
<p class="woocommerce-form-row woocommerce-form-row--wide form-row form-row-wide">
<label for="reg_password"><?php esc_html_e( 'Password', 'woocommerce' ); ?> <span class="required">*</span></label>
<input type="password" class="woocommerce-Input woocommerce-Input--text input-text" name="password" id="reg_password" autocomplete="new-password" />
</p>
<?php else : ?>
<p><?php esc_html_e( 'A password will be sent to your email address.', 'woocommerce' ); ?></p>
<?php endif; ?>
<?php do_action( 'woocommerce_register_form' ); ?>
<p class="woocommerce-form-row form-row">
<?php wp_nonce_field( 'woocommerce-register', 'woocommerce-register-nonce' ); ?>
<button type="submit" class="woocommerce-Button woocommerce-button button woocommerce-form-register__submit" name="register" value="<?php esc_attr_e( 'Register', 'woocommerce' ); ?>"><?php esc_html_e( 'Register', 'woocommerce' ); ?></button>
</p>
<?php do_action( 'woocommerce_register_form_end' ); ?>
</form>
<?php
return ob_get_clean();
}
add_shortcode( 'wc_registration_form', 'wc_registration_form_function' );As you can see, we named the Shortcode [wc_registration_form] and wrapped our HTML in an ob_start() function. This way we turn on output buffering so that the HTML is stored and returned as a string.
We are now ready to go into our admin area and edit our Registration page. When you’ve opened the Registration page, just insert the [wc_registration_form] shortcode. In this instance you can use whichever template you wish as we’re not reliant on the template itself to generate the registration form.
Now, when you open the Registration page on the front end you should see the registration form.
Using shortcodes provides us with more flexibility that using a templated page as we can change the design of the overall page on the fly without having to re-code the template file. This in itself explains why shortcodes are so popular in WordPress.
WooCommerce Login Shortcode
Now we’ve got a shortcode for the registration form we can move on and create one for the login form. Once again, open the functions.php file and insert the following code:
// LOGIN SHORTCODE
function wc_login_form_function() {
if ( is_admin() ) return;
if ( is_user_logged_in() ) return;
ob_start();
?>
<form class="woocommerce-form woocommerce-form-login login" method="post">
<?php do_action( 'woocommerce_login_form_start' ); ?>
<p class="woocommerce-form-row woocommerce-form-row--wide form-row form-row-wide">
<label for="username"><?php esc_html_e( 'Username or email address', 'woocommerce' ); ?> <span class="required">*</span></label>
<input type="text" class="woocommerce-Input woocommerce-Input--text input-text" name="username" id="username" autocomplete="username" value="<?php echo ( ! empty( $_POST['username'] ) ) ? esc_attr( wp_unslash( $_POST['username'] ) ) : ''; ?>" /><?php // @codingStandardsIgnoreLine ?>
</p>
<p class="woocommerce-form-row woocommerce-form-row--wide form-row form-row-wide">
<label for="password"><?php esc_html_e( 'Password', 'woocommerce' ); ?> <span class="required">*</span></label>
<input class="woocommerce-Input woocommerce-Input--text input-text" type="password" name="password" id="password" autocomplete="current-password" />
</p>
<?php do_action( 'woocommerce_login_form' ); ?>
<p class="form-row">
<label class="woocommerce-form__label woocommerce-form__label-for-checkbox woocommerce-form-login__rememberme">
<input class="woocommerce-form__input woocommerce-form__input-checkbox" name="rememberme" type="checkbox" id="rememberme" value="forever" /> <span><?php esc_html_e( 'Remember me', 'woocommerce' ); ?></span>
</label>
<?php wp_nonce_field( 'woocommerce-login', 'woocommerce-login-nonce' ); ?>
<button type="submit" class="woocommerce-button button woocommerce-form-login__submit" name="login" value="<?php esc_attr_e( 'Log in', 'woocommerce' ); ?>"><?php esc_html_e( 'Log in', 'woocommerce' ); ?></button>
</p>
<p class="woocommerce-LostPassword lost_password">
<a href="<?php echo esc_url( wp_lostpassword_url() ); ?>"><?php esc_html_e( 'Lost your password?', 'woocommerce' ); ?></a>
</p>
<?php do_action( 'woocommerce_login_form_end' ); ?>
</form>
<?php
return ob_get_clean();
}
add_shortcode( 'wc_login_form', 'wc_login_form_function' );Now, as for the registration page, you can go ahead and create a ‘Login’ page, insert the shortcode [wc_login_form] and you’re good to go.
If you want to take things a step further and dictate the page users are directed to when they log out of your site you could use a wp_logout hook like this:
add_action('wp_logout','my_redirect_after_logout');
function my_redirect_after_logout(){
         wp_redirect( '/?p=207' );
         exit();
}
The /?p=207 URL used above references the ID of the page we want to direct people to on logout. Substitute this for the ID of your chosen logout page.
An Important Note!
It’s worth remembering that anyone can visit your new login and/or registration pages… and by anyone we mean bots too! It’s therefore really important that you protect your website from fake registrations and brute force logins. For more information on how to protect your site we strongly recommended you take the time to read our guide on How to secure your WordPress website and also How to Deal With Spam Activity on Your WordPress Website.
Hopefully this article has given you some ideas on how you can re-imagine your WooCommerce registration and login pages and given you the tools to make changes where you see fit.
Start Your 14 Day Free Trial
Try our award winning WordPress Hosting!


