

You might have heard of the .htaccess file before but not had a clue what it is or what it does. In this article we’re going to throw the spotlight on the .htaccess file and reveal its mysteries once and for all. By the end of this article you will understand that the .htaccess file is, what the .htaccess file does and how you can use the .htaccess file to achieve certain tasks. Let’s get going!
What is the .htaccess File?
Let’s begin by looking at exactly what an .htaccess file is. ‘htaccess’ stands for ‘hypertext access’. This name describes what the file was used for when it was first developed. In short, it was used to control user access to certain files and directories. Things have moved on since .htaccess first appeared on the scene and it is now used in a number of different ways in WordPress which we will look at in detail.
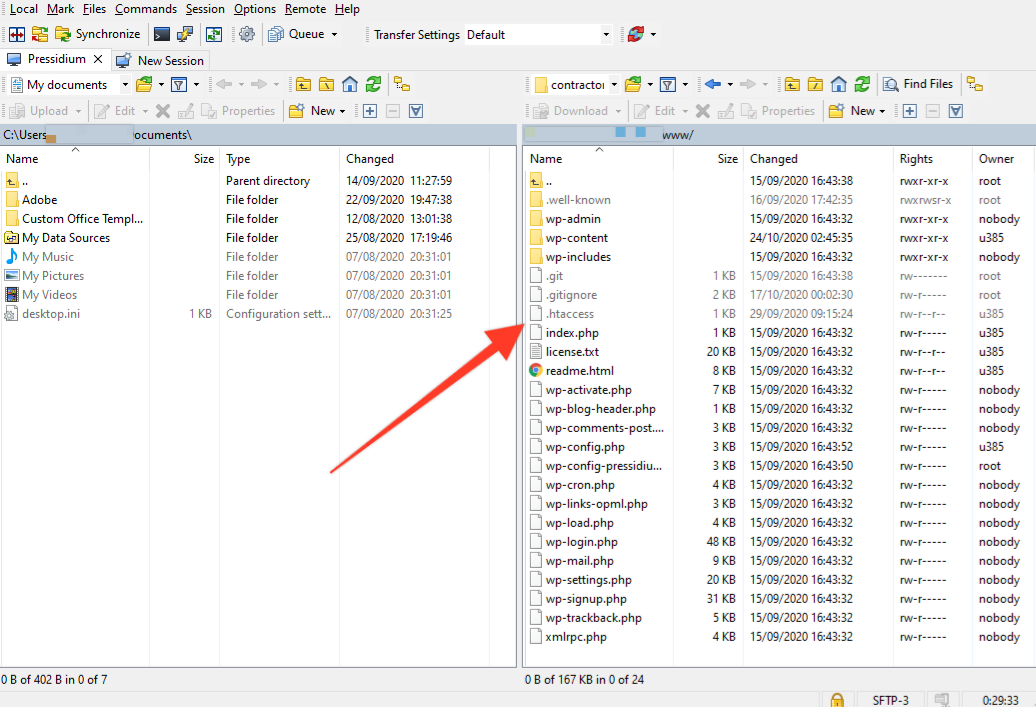
The .htaccess is a configuration WordPress core file that is used to override specific settings of the Apache Web server (Apache is a software commonly used on web servers) or to implement various other functions that affect how your website works. It is included in all WordPress installations right after you enable permalinks and is usually located in the installation’s root directory. You can see or edit it by accessing the installation files via an FTP client like FileZilla or WinSCP.
Note: Make sure your FTP Client’s preferences are modified so that hidden files are shown.
By default, the contents of an .htaccess file of a WordPress website, once permalinks are enabled, looks like this:
# BEGIN WordPress
<IfModule mod_rewrite.c>
RewriteEngine On
RewriteBase /
RewriteRule ^index\.php$ - [L]
RewriteCond %{REQUEST_FILENAME} !-f
RewriteCond %{REQUEST_FILENAME} !-d
RewriteRule . /index.php [L]
</IfModule>
# END WordPress
In case you are not already aware of, the “#” at the beginning of a line is a comment. # BEGIN WordPress and # END WordPress comments lines are used so that content remains organized when more rules are applied later on by plugins or by yourself. Any future addition to the .htaccess file should be placed outside these lines.
The .htaccess file is mostly used in WordPress for controlling the permalinks on your website. It can also be used as powerful tool for various other tasks however such as controlling access to certain files, enhancing security and performance, sending custom headers and many more.
Note: It’s important that any changes made to your website’s .htaccess file are done carefully. Even a simple typo in this file could result in your website crashing. As such, if you’re unsure about any changes you’re making you should ideally test these on a staging server before then applying to your live website.
Things You Can Do With Your .htaccess File
So let’s see how you can take more control of your website with the help of the .htaccess file.
Redirecting Between ‘www’ and ‘non-www’
A common use of the .htaccess file is setting a permanent redirect from your “naked domain” (non-www version) to its www version or the other way around.
Before proceeding, make sure that both domains are set in your DNS to resolve to the correct server’s IP address.
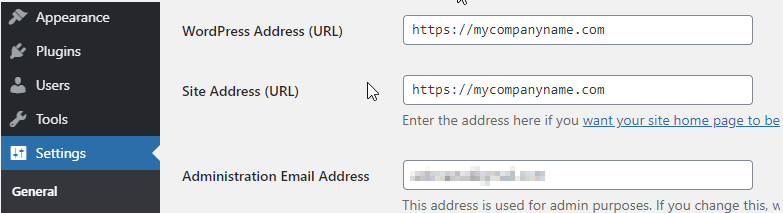
Also, in your WordPress admin area, check if the naked domain is set as primary.
You can redirect the www domain to the naked one by adding the following code into the .htaccess file, below the default content.
RewriteEngine on
RewriteCond %{HTTP_HOST} ^www\.mycompanyname\.com [NC]
RewriteRule ^(.*)$ http://mycompanyname.com/$1 [L,R=301]
To accomplish the exact opposite (if the www is set as primary) and redirect from a ‘non-www’ domain to ‘www’ you would need to insert this code:
RewriteEngine on
RewriteCond %{HTTP_HOST} ^mycompanyname.com [NC]
RewriteRule ^(.*)$ http://www.mycompanyname.com/$1 [R=301,L]
If you are not familiar with the regular expressions used in the code and you would like to understand more about the syntax, feel free to take your time and read more about REGEX. HT Access Cheat Sheet is another very useful tool
301 Redirect (permanent redirect)
A 301 Redirect tells search engines that a URL has been permanently replaced with another and also redirects a user to that visitor to a new (correct!) url. .
Here is the piece of code that when placed in a .htaccess file does the trick:
RewriteEngine on
RewriteCond %{HTTP_HOST} ^mycompanyname.com [NC,OR]
RewriteCond %{HTTP_HOST} ^www.mycompanyname.com [NC]
RewriteRule ^(.*)$ http://example.com/$1 [L,R=301,NC]
In the example above we’ve redirected users from the website ‘mycompanyname.com to ‘example.com’. Of course, you’ll want to replace these sections with your own urls.
This will also apply for all the paths under the domain. Which means that for example mycompanyname.com/new.html will redirect to example.com/new.html
302 Redirect (temporary redirect)
When a content is temporarily moved to another location a 302 redirect is used. The syntax is the same as in 301. For example:
Redirect 302 /old.html http//www.mycompanyname.com/new.htmlFrom a practical perspective the result is exactly the same but with one important difference. With a 301 redirect, search engines are told that the page is no longer live and in doing so, will encourage search engines to drop this page from the search results. In the case of a 302 redirect, the original URL will still be crawled by Google will continue to index instead of the new URL. As such, it’s the ideal solution for a redirect when you only want to redirect to alternate content temporarily.
Force to HTTPS
Securing your website with an SSL certificate is very important to do these days. Websites which don’t do this will now display a warning in the browser bar which can undermine trust in your website. In addition, Google actually penalizes websites that don’t deliver content via HTTPS and as such your search rankings could suffer.
Try our Award-Winning WordPress Hosting today!


Even when you install an SSL certificate on your website, you could still find that users can visit the non-HTTPS version of your site. If they do this they’ll still receive the warning in their browser despite the fact that you have an SSL certificate installed. To stop this happening you need to force all traffic from the insecure HTTP version to the secure HTTPS version. This is super easy to do using your .htaccess file by adding the following code:
RewriteEngine On
RewriteCond %{HTTPS} off
RewriteRule ^(.*)$ https://%{HTTP_HOST}%{REQUEST_URI} [L,R=301]
Block IP Addresses
If you’re receiving spam traffic or your website is suffering from abuse/hacking attempts from certain IP addresses you can take action using your .htaccess file by blocking traffic from that IP address using the following code in your .htaccess file.
Deny from 94.66.58.135If you want to learn how you can block an IP address in other ways, please read this guide.
Prevent Image Hotlinking
Image hotlinking is where someone embeds an image on your website into their own. This can be problematic (and not just from a Copyright perspective) as it means your server is having to potentially work overtime to serve up image(s) on someone else’s website. You can stop this by using the .htaccess file to block someone from embedding your images in their website with the following code:
RewriteEngine on
RewriteCond %{HTTP_REFERER} !^$
RewriteCond %{HTTP_REFERER} !^http(s)?://(www\.)?mycompanyname.com [NC]
RewriteCond %{HTTP_REFERER} !^http(s)?://(www\.)?google.com [NC]
RewriteCond %{HTTP_REFERER} !^http(s)?://(www\.)?yahoo.com [NC]
RewriteRule \.(jpg|jpeg|png|gif)$ - [F]
Do not forget to replace ‘mycompanyname.com’ with the URL of your website!
This code blocks ALL websites from hotlinking images on your site. Because you don;t want to stop search engines hotlinking images you’ll need to manually whitelist these. The section of the code that achieves this is this part here:
RewriteCond %{HTTP_REFERER} !^http(s)?://(www\.)?mycompanyname.com [NC]
RewriteCond %{HTTP_REFERER} !^http(s)?://(www\.)?google.com [NC]
RewriteCond %{HTTP_REFERER} !^http(s)?://(www\.)?yahoo.com [NC]
You can of course include any other websites that you want to whitelist. Finally, the last line in the code (RewriteRule .(jpg|jpeg|png|gif)$ - [F]) dictates what media types are blocked.
Protect Plugin and Theme Files
Plugin and theme PHP files can sometimes be the target of hackers who try and inject malicious code into them. You can use your .htaccess file to help prevent access to these files by using the following code:
RewriteCond %{REQUEST_URI} !^/wp-content/plugins/file/to/exclude\.php
RewriteCond %{REQUEST_URI} !^/wp-content/plugins/directory/to/exclude/
RewriteRule wp-content/plugins/(.*\.php)$ - [R=404,L]
RewriteCond %{REQUEST_URI} !^/wp-content/themes/file/to/exclude\.php
RewriteCond %{REQUEST_URI} !^/wp-content/themes/directory/to/exclude/
RewriteRule wp-content/themes/(.*\.php)$ - [R=404,L]
Protect WordPress Core Files
It is highly recommended that some WordPress core files should be made inaccessible to non-admin users. This is something that most hosting providers take care of for you but it is not always the case. If you wanted to prevent access to sensitive WordPress files you could use the following code in your .htaccess file:
<IfModule mod_rewrite.c>
RewriteEngine On
RewriteBase /
RewriteRule ^wp-admin/includes/ - [F,L]
RewriteRule !^wp-includes/ - [S=3]
RewriteRule ^wp-includes/[^/]+\.php$ - [F,L]
RewriteRule ^wp-includes/js/tinymce/langs/.+\.php - [F,L]
RewriteRule ^wp-includes/theme-compat/ - [F,L]
</IfModule>
Prevent Bad Bots From Crawling Your Website
Bots are basically automated web scripts that can scan millions of websites a day. Google uses bots to scan websites and takes the data from these scans to update their massive search databases. Hopefully a Google bot is entirely harmless! There are other bots though that you might not want scanning your website. Some of these ‘bad’ bots may do nothing more than just consume unnecessary server bandwidth whist others may be actively searching for exploitable weaknesses in your website. Your .htaccess file can be used to block these ‘bad’ bots.
The first thing to find out is what bots you want to block? You may already know but if not, you could check out a updated list of blacklisted bots that are considered suspicious. When you have your list you can add them to your .htaccess file like this:
#Block bad bods requests
SetEnvIfNoCase user-Agent ^FrontPage [NC,OR]
SetEnvIfNoCase user-Agent ^Java.* [NC,OR]
SetEnvIfNoCase user-Agent ^Microsoft.URL [NC,OR]
SetEnvIfNoCase user-Agent ^MSFrontPage [NC,OR]
SetEnvIfNoCase user-Agent ^Offline.Explorer [NC,OR]
SetEnvIfNoCase user-Agent ^[Ww]eb[Bb]andit [NC,OR]
SetEnvIfNoCase user-Agent ^Zeus [NC]
After saving your changes, any bots on the list that now visit your website will get a 403 Forbidden page.
Protect wp-config.php
It is generally recommended that you restrict access to the wp-config.php file as it contains the database access credentials.
To do this via .htaccess simply copy and paste the following lines into your .htaccess file:
<files wp-config.php>order allow,denydeny from all</files>Disable PHP execution
A very efficient way to be protected from hack attempts is to prevent PHP execution in specific directories where it is not needed. For example /wp-includes/ and /wp-content/uploads/ directories are popular locations used by hackers in order to place code that allows unauthorized access to the server (known as backdoor files). Disabling PHP execution in these directories will not erase those files but instead stops them executing their code. To do this, add the following code to your .htaccess file.
<Files *.php>deny from all</Files>You will also find that many hosting providers, Pressidium included, have already by default disabled PHP execution in these directories in order to enhance their security level for their customers.
Disable XML-RPC Access
It’s a common problem often seen by support teams at hosting companies where a WordPress installation is receiving thousands of “POST /xmlrpc.php HTTP/1.1” requests that are often related to an attack from a single or multiple IP addresses. One solution to this is to disable XML-RPC.
To disable XML-RPC for your website add these lines of code to oyur .htaccess file:
# Block WordPress xmlrpc.php requests
<Files xmlrpc.php>
order deny,allow
deny from all
</Files>
# END protect xmlrpc.php
It’s worth noting that xmlrpc.php is necessary if you’re updating your content using mobile apps or remote connections. So if you are considering disabling it permanently, make sure that it is not needed for your work.
Force Files to be Downloaded
It can be hugely annoying as a website user that, when you want to download a file from a website (for example a PDF), the file instead opens in the browser window. If you have files on your website that are provided as downloadable items for your users then you can edit your .htaccess file and add a line of code that can force specific file types to be downloaded and not displayed directly from within the browser. You’ll see this code below along with some examples of file types that you’d like users to be able to directly download.
AddType application/octet-stream .avi .mpg .mov .pdf .xls .mp4Send Custom HTTP Headers
Advanced users might want to be able to send customer HTTP headers by taking advantage of the Apache’s Header directive. To do this, add the following code to your .htaccess file.
Header add my-custom-header "my custom header value"The example above would tell Apache to add a header named “my-custom-header” for every request to the server. If we implement this update and then check our network tab in our browser’s tools we can confirm its response as shown below.
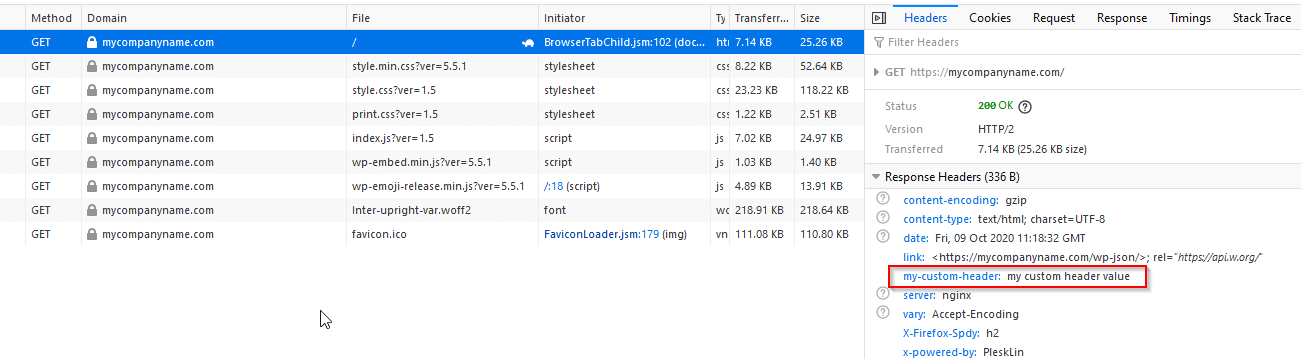
This technique is very common for adding cache and security headers or adding a language character set. Take a look at this article for some popular uses. You can also find a detailed list of headers for you to experiment with on in this list.
Conclusion
Hopefully this article has given you some insights into the things that can be achieved with the .htaccess file. Sure, many of these things can be accomplished by using a plugin but it’s always helpful to understand what exactly is going on ‘under the hood’ especially if a plugin fails to operate the way you expect. Mastering how to edit the .htaccess file rather than relying on a plugin also helps enhance your levels of WordPress expertise… and that’s always a good thing!
Start Your 14 Day Free Trial
Try our award winning WordPress Hosting!


