

The digitalization of content (such as music, books and of course images) has been a true gamechanger over the last couple of decades. It’s transformed our world in many positive ways but one huge downside has been the ease with which people can copy (or steal!) your content. In this article we’re going to look at image theft and what you can do to protect your website images from being downloaded and used elsewhere without your permission.
Let’s get started!
Digital Content Theft
Content theft is a well known problem online. Infamous examples include websites like Napster that allowed music and video downloads were headline news back in early 2000s. Napster was ultimately shut down but and many, many more followed suit (and still operate today). Downloading movies and games via a so-called Torrent service normally requires software and a degree of know-how. Image theft however is very much easier… in most cases a simple right click is enough to see that image on its way to your hard drive.
Perhaps due to its ease, image theft is rife online. It perhaps goes less noted than other types of digital theft (such as movies), maybe in part due to the ease with which it is done. Another factor is undoubtedly people’s ignorance around the subject. Thanks to the very ease with which you can download an image it’s perhaps assumed that this is perfectly acceptable (and legal) to do so. Whilst in some cases this assumption will be correct, it’s definitely not a given. Copyright laws differ from country to country and in reality, the assumption, unless clearly stated, should be that the image is copyright protected and not free for you to download and use as you wish.
Try our Award-Winning WordPress Hosting today!


Although the copyright laws in your location might in theory protect your images, it is ultimately up to you to a) protect your images online and b) if necessary, undertake enforcement action to assert your right as the owner and in doing so prevent others from using your images.
The first step in this ‘battle’ if you already have your images published on your website is to work out whether or not they are in fact already being used by others online. To do that might sound like an impossible task but actually there are some nifty tools you can use to help you track down unauthorised usages of your images.
Find Your ‘Stolen’ Images Online
There are billions, if not trillions of images published online. It’d be an impossible job to manually search for these. Fortunately you don’t have to. We’ve listed a few tools that can quickly help you track down images with just a few clicks.
Google Image Search
You could kick off by simply Googling the name / style of your image and seeing what comes up. Odds are probably fairly low that you’d get a hit this way as the image title/file name has probably been altered.
Fortunately Google has a dedicated Image Search tool called a ‘Reverse Image Search‘. You use this by uploading your image to Google and then their systems hunt for a match. It’s quite incredible how they do this and certainly one of the easiest ways you can hunt down if your image(s) is published anywhere online, especially if it’s a distinctive image.
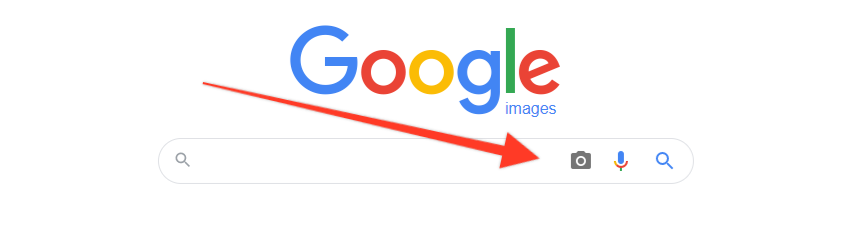
To get started, click the camera icon and you’ll then see a new search bar appear which allows you to either paste a url that points to the image you want to search for or you can upload the image.

TinEye
TinEye was on of the first and still one of the most used reverse search engines using image search and recognition technology.
It is easy to use and allows you to save your searches if you register for a free account. The free version offers 150 searches per week and can further integrate with the most popular browsers via extensions.

The results their system generates can be filtered (for example by best match or newest) which can help in your image hunt. You can also take advantage of their ‘Compare Match’ function which is a very useful option to quickly compare each result image with the original one.
So, if you’ve found instances of your images used elsewhere you’ll need to decide if you want to challenge their usage. Or, perhaps you’ve turned up no instances of your images elsewhere (congratulations!). Either way you’re likely to want to protect your images so they can’t be copied in the future. Let’s take a look at how to do this.
How to Protect Your Website Images
Although not an exhaustive list, we’ve got 5 possible ways you can protect your images from theft that you might want to consider. It’s not necessary to implement all of them if you don’t wish. Just undertaking even one of the options can help reduce the risk of your images being used without your permission.
Disable Right-Click on Images
One of the easiest ways for people to download images from your website is by right clicking on them and saving them directly to their computer. By disabling this right click functionality you can go a long way towards ensuring your images are protected.
If you are running WordPress (and if not, why not!), there are various plugins that can help you disable right click easily. One such plugin is WP Content Copy Protection & No Right Click.
Once the plugin is installed and activated, head to the Settings to tweak how you want it to work and straight away you’ll see that you can no longer right click images. Result!
Add a Copyright Notice
Having a suitable Copyright notice somewhere on your website can help ensure people think twice before trying to download your images. A simple plugin you can use to do this is the Footer Putter plugin.
When installed and activated, an additional widget and a widget position will be available in the admin widget area.
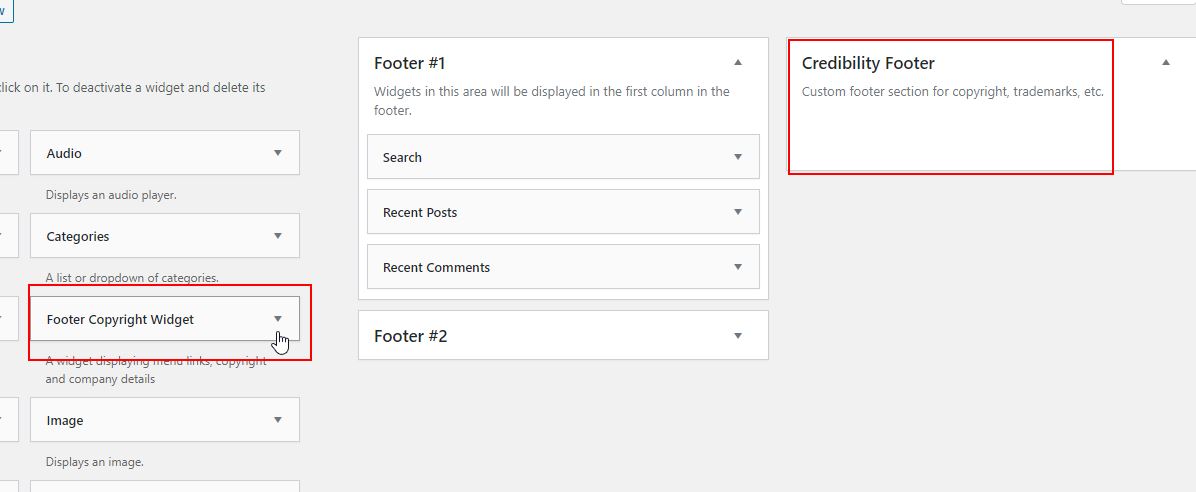
Drag the widget to a location of your choice and then open it up and edit the settings to include a suitable Copyright notice. The copyright contents can be set in menu Footer Putter > Footer Credits.
Enable Hotlink Protection
Hotlinking is where someone uses the url of an image that’s saved on your server to embed the image on their own website. This is doubly annoying as not only are they ‘stealing’ your image for their own use but they are also consuming your server resources to display it! Fortunately there are plugins that can help stop this and one such plugin is the All in One WP Security Plugin.
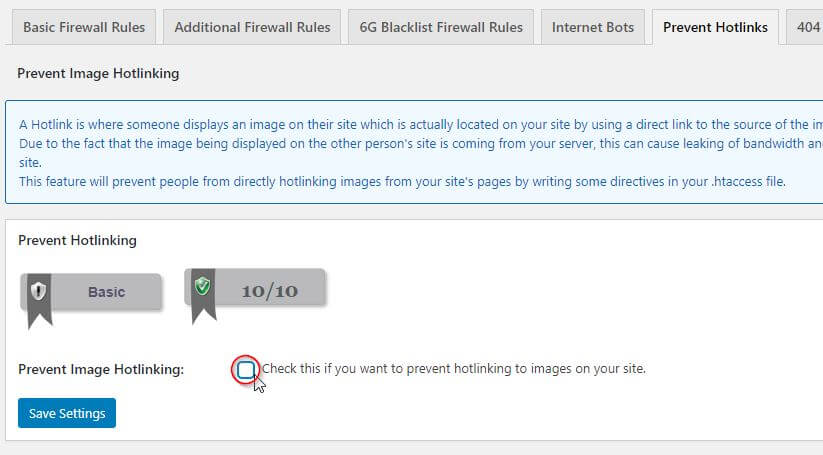
This plugin is a quite popular plugin and offers a range of security features, one of which of course is hotlinking protection. You can find settings for this is in WP Security >Firewall under the ‘Prevent Hotlinks’ tab. To enable, tick the ‘Prevent Image Hotlinking’ checkbox.
Alternatively, you can accomplish the same thing by editing the .htaccess file of your WordPress installation as we’ve already described in our article ‘What is the .htaccess File and How Do You Use It in WordPress‘.
To recap, you’ll need to open your .htaccess file with your favorite text editor and under the current content add the following code:
RewriteEngine on
RewriteCond %{HTTP_REFERER} !^$
RewriteCond %{HTTP_REFERER} !^http(s)?://(www.)?mycompanyname.com [NC]
RewriteCond %{HTTP_REFERER} !^http(s)?://(www.)?google.com [NC]
RewriteCond %{HTTP_REFERER} !^http(s)?://(www.)?yahoo.com [NC]
RewriteRule .(jpg|jpeg|png|gif)$ - [F]
You will have to replace ‘mycompanyname.com’ with the URL of your website.
This code blocks ALL websites from hotlinking images on your site but allows some exceptions like the search engines (for obvious reasons) and also dictates what media types are blocked.
Now, if someone tries to hotlink to one of your images they’ll simply see a broken thumbnail and a 403 Forbidden message.
Watermark Images
A further step you can take to protect your images is to watermark them. There are (unsurprisingly!) WordPress plugins that will do this for you including Image Watermark and Easy Watermark.
Watermarking isn’t necessarily suitable for everybody as it does alter the overall visual appeal of the image but it can be an effective deterrent. Most Watermark plugins will allow you to specify where to place the watermark on an image and can be configured to add this as a default whenever you upload a new image to your Media Library. This is great as it’s a case of ‘set and forget’ which makes life easier.
Add a DMCA Badge
The DMCA (The Digital Millennium Copyright Act) is a 1998 United States copyright law that implements two 1996 treaties of the World Intellectual Property Organization (WIPO). To enforce this law, an organization also called the DMCA runs a scheme whereby website owners can place a free DMCA badge on their website which helps deter theft. They state that ‘If your content is stolen while protected with our badges, we will do a takedown for no charge’. In other words, they’ve got your back!
Adding a badge is super easy thanks to the dedicated DMCA plugin designed for the purpose.
In WordPress admin area, go and install/activate the DMCA Protection Badge plugin. Under Settings >DMCA Badge you will find the form to create a free account. After that, you will be asked to choose your badge.
Finally, under the settings tab, you can integrate with your theme by selecting where the badge should be displayed, in what post types and how it will be adjusted. There is also an extra option for disabling right click.
Although these tools can go a long way towards helping protect your images, no method is foolproof. Nonetheless, this doesn’t mean that you shouldn’t implement them. Ultimately, thieves are always after easy targets.
Do what you can to make sure you’re getting credit for the images you create. Find the method of protecting them that works best for your needs and use them to keep your images where they belong: on your site!
Take Image Protection Further
You work hard to create original content. Guarding your images is one step, but real peace of mind comes when your whole site is protected and performing at its best.
That’s where Pressidium EDGE comes in. It doesn’t just stop image hotlinking or scrapers. It delivers every page of your site faster, keeps traffic spikes from slowing you down, and blocks attacks at the very edge of the network before they can touch your WordPress install.
Because your work deserves more than plugins and patches. It deserves a platform built to keep it fast, secure, and always available.
The best news? You can experience Edge today at no cost.
Click below to start your free trial and see the difference for yourself.
Start Your 14 Day Free Trial
Try our award winning WordPress Hosting!


