

As a WordPress plugin, LearnDash can sometimes be a little daunting to get started with. Fear not! In this introductory guide we will show you exactly how to setup LearnDash allowing you to quickly launch your online course using this top rated LMS WordPress system.
LearnDash Overview
LearnDash is described as ‘The #1 choice of Fortune 500 companies, major universities, training organizations, and entrepreneurs worldwide for creating (and selling) their online courses.’. It is frequently recognized as one of the premier LMS WordPress plugins available and is used by everyone from large businesses and universities right though to individual course creators who want to run their own eLearning course. With the recent release of LearnDash 3.0 it has definitely cemented its position as the ‘go to’ LMS plugin for WordPress.
Unlike some LMS plugins, there is no free version. If you’d like to build your eLearning course using LearnDash then you’ll need to purchase a licence from learndash.com. In the unlikely event that it doesn’t suit your needs then you’ll be able to get a refund within 30 days. There is also an online demo that allows you to road test the system before committing to a purchase.
Building an online course with LearnDash is a two-stage process. It’s important to remember that LearnDash isn’t a stand-alone LMS. Whilst it provides all the functions needed to build an eLearning course it needs to be paired with a WordPress website. It is this WordPress website that will provide the overall ‘home’ for your course. This will include the branding for your eLearning course, information on the course for potential students, a contact page and so on. In other words, you’ll need to build a ‘normal’ website for your eLearning business much as you would for any other business. Once this is setup you can then install the LearnDash plugin and begin setting up LearnDash.
So, the initial setup before you do anything else is to setup a WordPress website complete with hosting that is suitable for running LearnDash. Once this is done you’ll then be free to setup LearnDash and get onto the exiting bit… building your eLearning course!
Step One – Setup your WordPress Website
We’re not going to run through installing WordPress in this guide. Hopefully you’re using a host that makes spinning up a WordPress install nice and easy. As mentioned, you will definitely want to use a WordPress host that can handle LearnDash. By design, LearnDash is a resource intensive plugin and ‘cheap and cheerful’ hosting will be unlikely able to handle LearnDash reliably if you have multiple users accessing your course concurrently. If you are serious about running an eLearning business or are setting up an LMS for a University or other educational establishment then you will need to give proper consideration to your choice of WordPress host. Checkout this article ‘LearnDash Hosting – Pressidium Enterprise, the Perfect LMS Hosting Solution’ for more information.
Once you’ve got your WordPress install up and running we can dive into setting up your WordPress website that will be used to house your eLearning course.
Choosing a Theme
LearnDash works with most WordPress themes that are coded using WordPress standards. This is good news as it increases the design options available to you as well as meaning you could potentially add LearnDash to an existing WordPress website.
If you’re starting from scratch, then choose a theme that closely matches the style that suits your business (or educational establishment etc.). LearnDash recommend a few themes that they know work well with the plugin. If you’re short on time, LearnDash have teamed up with the designers of the Astra Theme, which is touted for its high performance and loading speed. They now offer a LearnDash specific template in their site starter library which is the one we’ll be using in this demo.
Let’s get going!
Step One: Setup your WordPress Website
Once you’ve purchased a copy of the LearnDash plugin, login at https://support.learndash.com/account
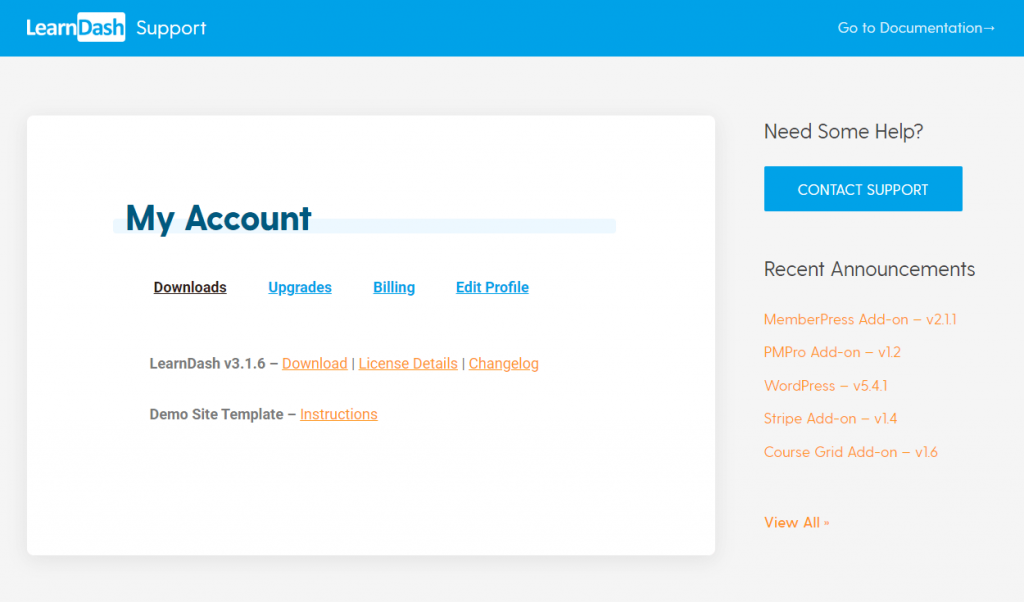
You’ll see the option to download both the plugin and a link to instructions for the Demo Site Template. Download the plugin and keep that to one side for later use.
Next, head to your WordPress install and login to wp-admin.
- Head to Appearance > Themes > Add New.
- In the search bar located top right, search for ‘Astra’.
- Install this free theme and activate it.
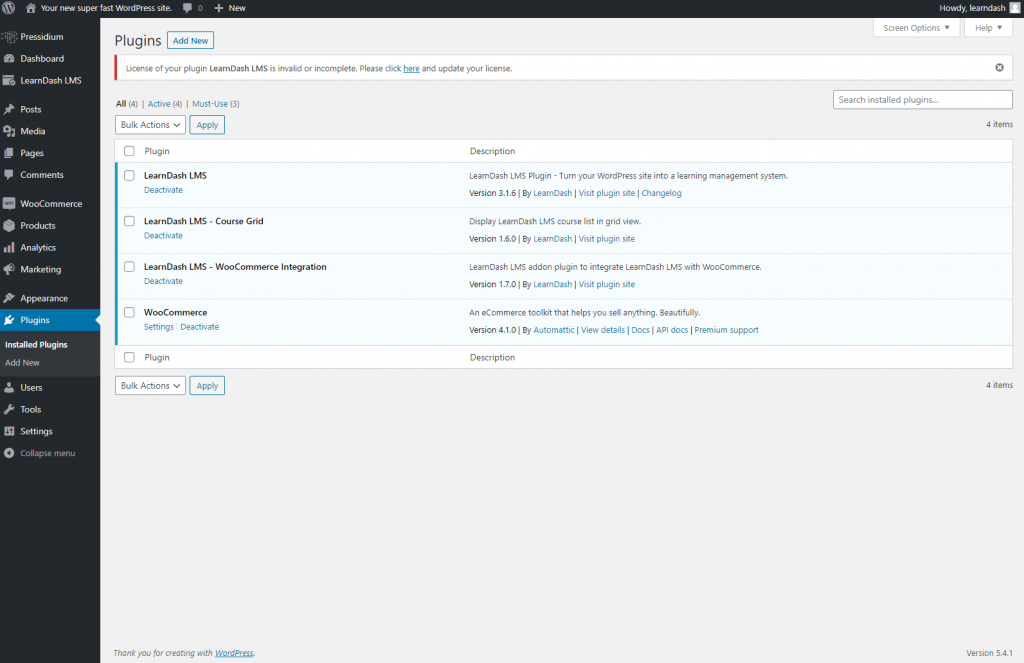
Once that’s done, you’ll now need to install LearnDash along with a couple of other items.
- Head to Plugins and then install LearnDash which you downloaded earlier from your LearnDash account.
- It’s also recommended that you install the LearnDash Course Grid Addon. You’ll need an active licence for this to work. It can be downloaded here.
- Finally install and activate the LearnDash WooCommerce integration (needed if you want to accept payments for your course). Download this from LearnDash here.
- You will also need to install the free WooCommerce plugin. Search for this in the plugin repository and install.
You should end up with a plugin page that looks like this:
Now this has been done the next step is to import the free Astra LearnDash theme which will give you a great headstart in building your website if you haven’t already got one.
- Head to the Appearance tab and click on ‘Astra Options’ in the menu. From within this you’ll see a tab that says ‘Starter Templates’. Click the prompt to activate the starter templates and then you’ll be taken to the Starter Templates page (now accessible via the Appearance menu). If you are asked which website builder you would like to use, you can choose any of the options that you wish. For example, if you’re used to using Elementor then go for that. In this example, we’ll use the default Gutenberg site builder.
- Search for ‘LearnDash’ and you’ll see a template called ‘LearnDash Academy’. Click ‘Import Complete Site’ and then wait whilst this is downloaded and setup. Note: this ONLY applies if you began with a blank site and want to use the Astra LearnDash theme as the design for your eLearning website!
- You’ll get notified when the site has been imported. With very little work on your part you’ll now have a fully designed eLearning website which you can now customize as you wish to meet your own branding and content needs.

It’s beyond the scope of this article to walk through the process required to alter the design of the site. The new Gutenberg editor is pretty intuitive and the Astra theme is robustly designed which makes life a lot easier when it comes to customization. If you don’t want to do much work on the design then simply changing the logo and the text would be enough to leave you with a great looking site from which you could launch your course.

Now the basic website is in place you can now start the fun stuff… setting up your LearnDash course!
Step 2 – Setup LearnDash
LearnDash is a well supported plugin and, beyond the info contained in this article, you’ll find plenty of help when it comes to setting up your LearnDash course either in their support centre or by watching the video tutorials that are provided. These can be accessed via the ‘LearnDash Bootcamp’ which is available by opening the LearnDash LMS menu now accessible from the wp-admin menu on the left hand side of your WordPress site.
Try our Award-Winning WordPress Hosting today!


The first step is to enter your licence key and email address. You can find your licence key from within the ‘My Account’ section in the LearnDash Dashboard.
Once you’ve entered that you can move onto the next steps of setting up LearnDash.
LearnDash Settings
The first thing you’ll probably want to do when you have registered your LearnDash plugin is to head to the ‘Settings’ tab. This is the control centre of LearnDash and where you can configure everything form the colors used throughout your site to PayPal settings. You can even update your site logo here.
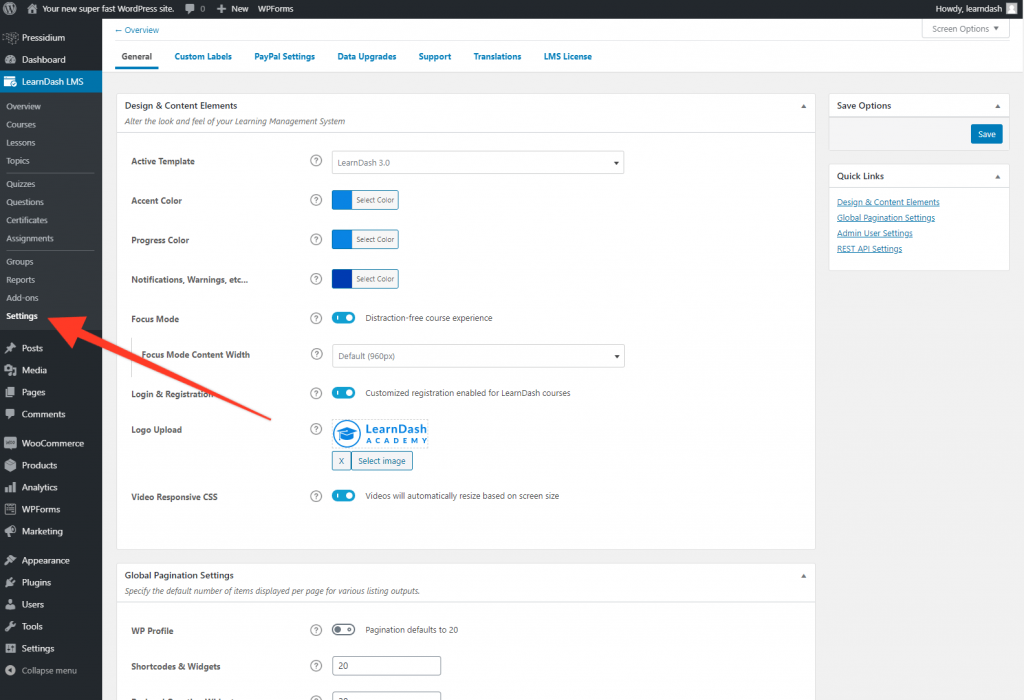
The ‘Custom Labels’ tab is one you might want to check out. We all have different ways of phrasing similar things and the Custom Labels section allows you to tweak how elements of your course are described. For example, the default label for Courses is ‘Courses’. You might however prefer ‘Lectures’. Update as you see fit to suit your specific needs.
Courses, Lessons, Topics & Quizzes Overview
We’re now ready to dive into actually creating your first course. Before we begin, let’s take a look at the terminology used in LearnDash and better understand how this relates in terms of course structure.
Courses: Courses are the ‘container’ that hold lessons, quizzes and topics. You may choose to only ever build one course that covers the subject you want to teach (for example ‘How to read music’). On the other hand you might want to create multiple courses. These multiple courses might cover different subject matter or perhaps just explore the same subject but in different levels of depth. Courses are also useful as you can choose to allow free access to one course whilst charging for access to another. Offering a free ‘teaser’ course is a great way to get people to initially sign up on your website and offers you the opportunity to demonstrate the quality of your course material without the prospective customer having to pay at the outset.
Lessons: Lessons are the place where you actually build your course content. This course content can comprise of a wide range of material including images, text, PDF files, audio files and video. You might have just one or two long lessons or may choose to have multiple lessons. These lessons are arranged within your course in a way that leads the student through each one until the course has been completed.
Topics: If your lessons are complex and contain a lot of content then you might want to break these down further by using Topics. Topics must be added to lessons (you can’t have a course that comprises entirely of topics). If adding another layer of hierarchy seems too complex then you could of course just sub divide your lessons using section headings.
Quizzes: Quizzes are a great way for you to check the understanding of your students in relation to the material that has been taught. In LearnDash 3.0 there are now lots of quiz variations that can be deployed including multiple choice quizzes, sorting question quizzes, free choice quizzes and more. Quizzes are typically placed at the end of lessons or at the end of a course.
Setting up a LearnDash Course
As discussed, Courses are the container which hold all of your lessons. It’s important to decide how you want to structure your overall eLearning experience before diving in with the actual course creation. For example, do you want multiple courses that cover a topic or perhaps one course with lots of lessons? Once you’ve decided on this it’s time to begin building.
To do this, head to the Courses tab that’s within the LearnDash sub menu in wp-admin. Click on ‘Add New’.
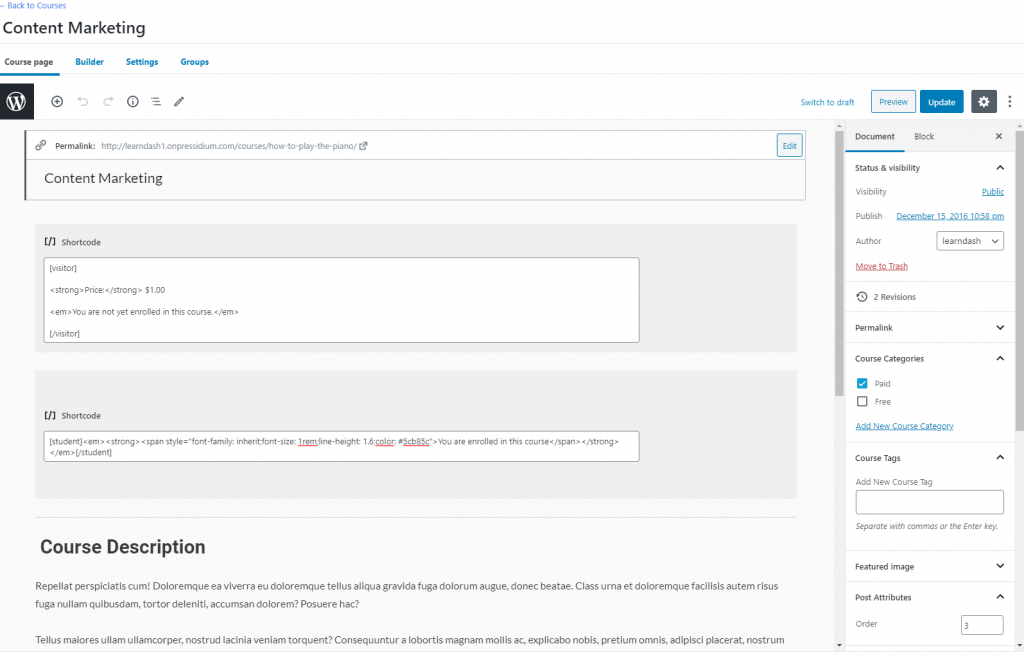
Enter the course name and then a course description. On the right hand side you’ll see various options, one of which is the ability to add course categories. In this example we have Free and Paid course categories.
With the initial course info set out you can now move to the course builder which is accessed via the menu at the top of the course page.
It’s within this section that you will now begin to add Lessons. For now though, click Publish/Update to save your Course and then click the ‘Back to Courses’ hyperlink in the top left of the screen.
Setting up a LearnDash Lesson
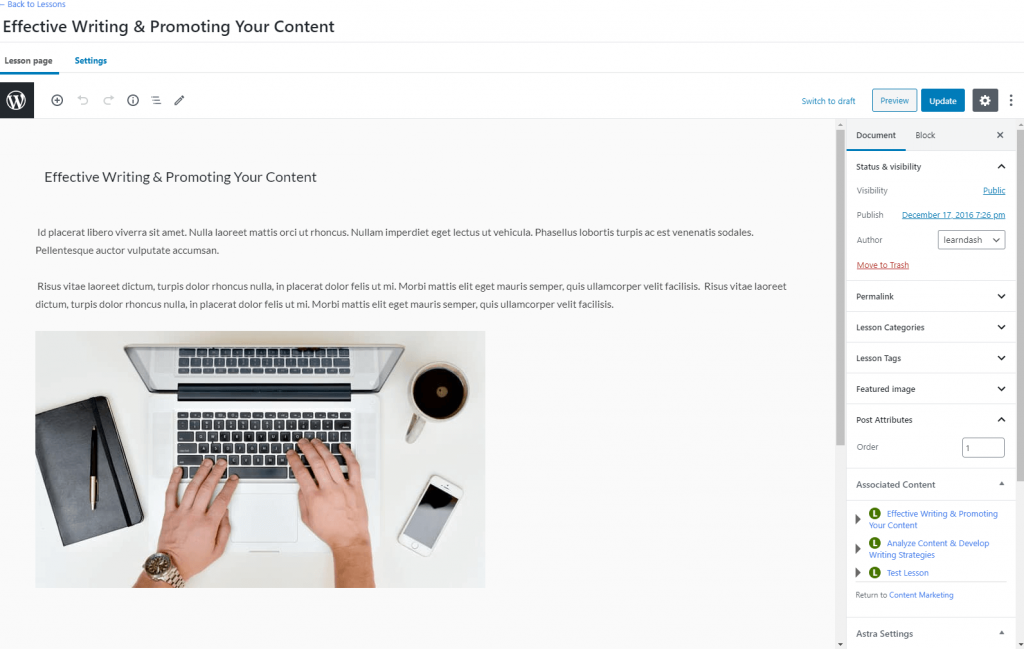
Lessons are where you will actually deliver your course content. Click on ‘Lessons’ in the LearnDash sub menu and then click ‘Add New’. A new post will open and it’s within this that you really can get started. It’s entirely up to you how many lessons you want to structure your course with and the content of each lesson is also entirely up to you. You can add as much text, video (embedded from a hosting service such as Wistia) and images as you need to deliver the information your students need.
There are a range of additional options that can be applied to each lesson via the Settings tab. These include things like a Forced Lesson Timer that stops a student moving to the next lesson until a certain period of time has elapsed. The LearnDash Knowledge Base offers a more complete description of these features.
Once you’ve created your lesson(s), make sure to publish/update these as you would any other WordPress post/page.
Setting up a LearnDash Quiz
As with Courses and Lessons, quizzes can be accessed via the sub menu in the LearnDash menu sidebar. Click on this to open the module and get started. You will want to first create the Questions for your quiz via the ‘Questions’ menu. You’ll need to decide on the question type (e.g. single choice, fill in the blank and so on) and this can be done via the sidebar menu.
Once you’ve got your questions you can build these into a quiz. Click on the Quizzes sub menu, click on ‘Add New’ and then enter some basic info on your quiz in the form of a title and description. Once you’ve done this click on the ‘Builder’ tab. Take a look at the next section in this introductory guide to see how the LearnDash builder works for quizzes and courses.
The LearnDash Builder
Now you have created the lessons and quiz questions that will populate your course it’s time to pull all of these into an overall course structure.
This is made easy by using the Course/Quiz builder than comes with LearnDash 3.0.
To begin, open up your course that was created earlier (LearnDash LMS > Courses > Course Name). Within this course you’ll see a tab near the top of the page which says ‘Builder’. Click on this and you’ll see something like this:
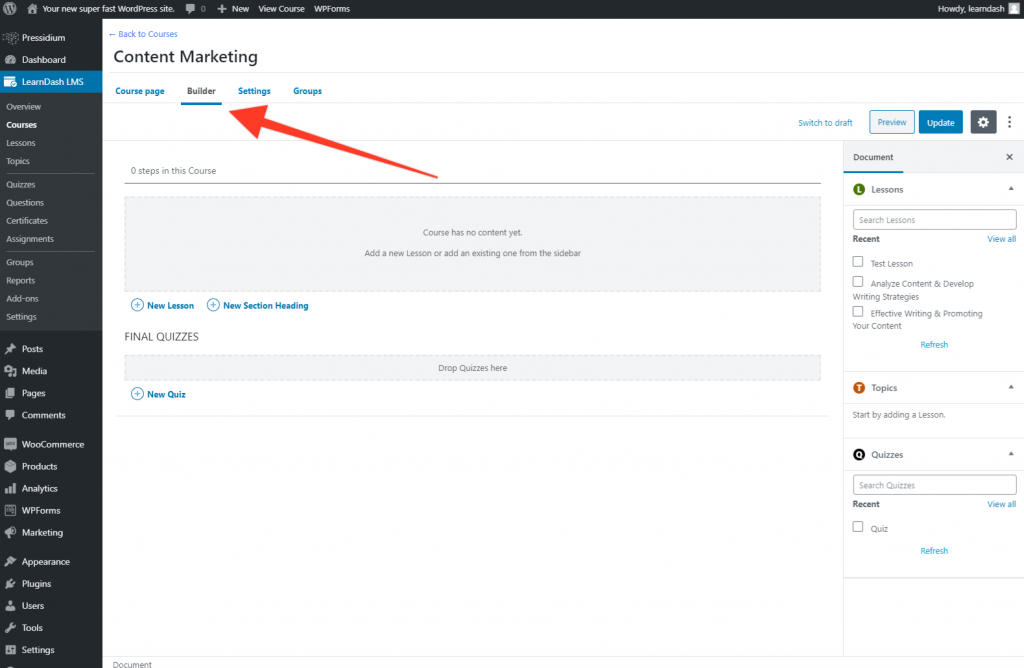
Now, drag and drop your lessons which will show in the Document sidebar into the grey box that says ‘Add a new Lesson or add an existing one from the sidebar’. When you’ve done this you’ll have a page that looks a bit like this:
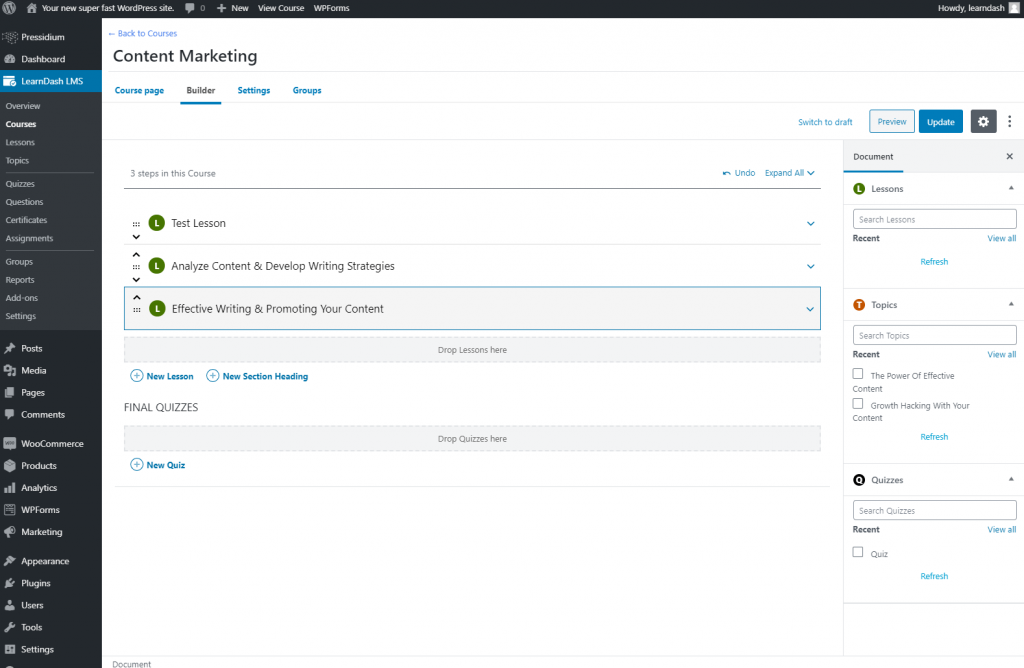
You can drag these lessons up or down in order to re-arrange your lesson order. If you have created Topics to sub-divide your lessons, these can also now be added in the same manner. You’ll need to click on the arrow that is on the right hand side of the Lesson to expand the lesson. It is in these sections that both quizzes and topics can be added. The order of these dictates the order in which your students will move through the course.
Now the course has a structure it’s time to finalize some of the course settings. To do this head to the Settings tab from within the course. It’s here that you can dictate things like whether the course content is available to enrolled students only, whether or not the course is free or chargeable and if certain pre-requisites need to be met before a student can enrol on a course (for example, completing a previous course).
And that’s it! Click Update/Publish and you now have a working course onto which students can enrol.
How to Setup LearnDash – Summary
We’ve only had time to touch on the absolute basics of setting up a LearnDash course in this article. There are TONS of options available to you but, hopefully this article has given you the basic information needed to get you started which is often the hardest part of setting up a LearnDash LMS. Once you understand the basics, more complex options become clearer.
What is exciting about LearnDash though is that, when combined with a starter theme like Astra, you can go from having no eLearning website to a fully functioning LMS system within just a few hours. LearnDash 3.0 is pretty impressive. The number of high profile users is testament to this and, with a little bit of investment, it might offer the perfect LMS system for your requirements.
We’ll be following up this quick introductory guide with a few more detailed articles on using LearnDash so keep an eye on the blog for future updates!
Start Your 14 Day Free Trial
Try our award winning WordPress Hosting!


