

In our previous episode about the WordPress Gutenberg editor, we presented the new edit post screen by comparing it to the old one. You should now be familiar with every function and its location.
In this episode we will focus only on using the new Gutenberg post editor. We will showcase Gutenberg’s more practical changes, the ones related to content editing.
How are you going to create your ideal post? Will you use shortcodes? Or does Gutenberg bring a new, easier and more intuitive approach to content creation? Let’s see!
How Gutenberg post editor blocks work
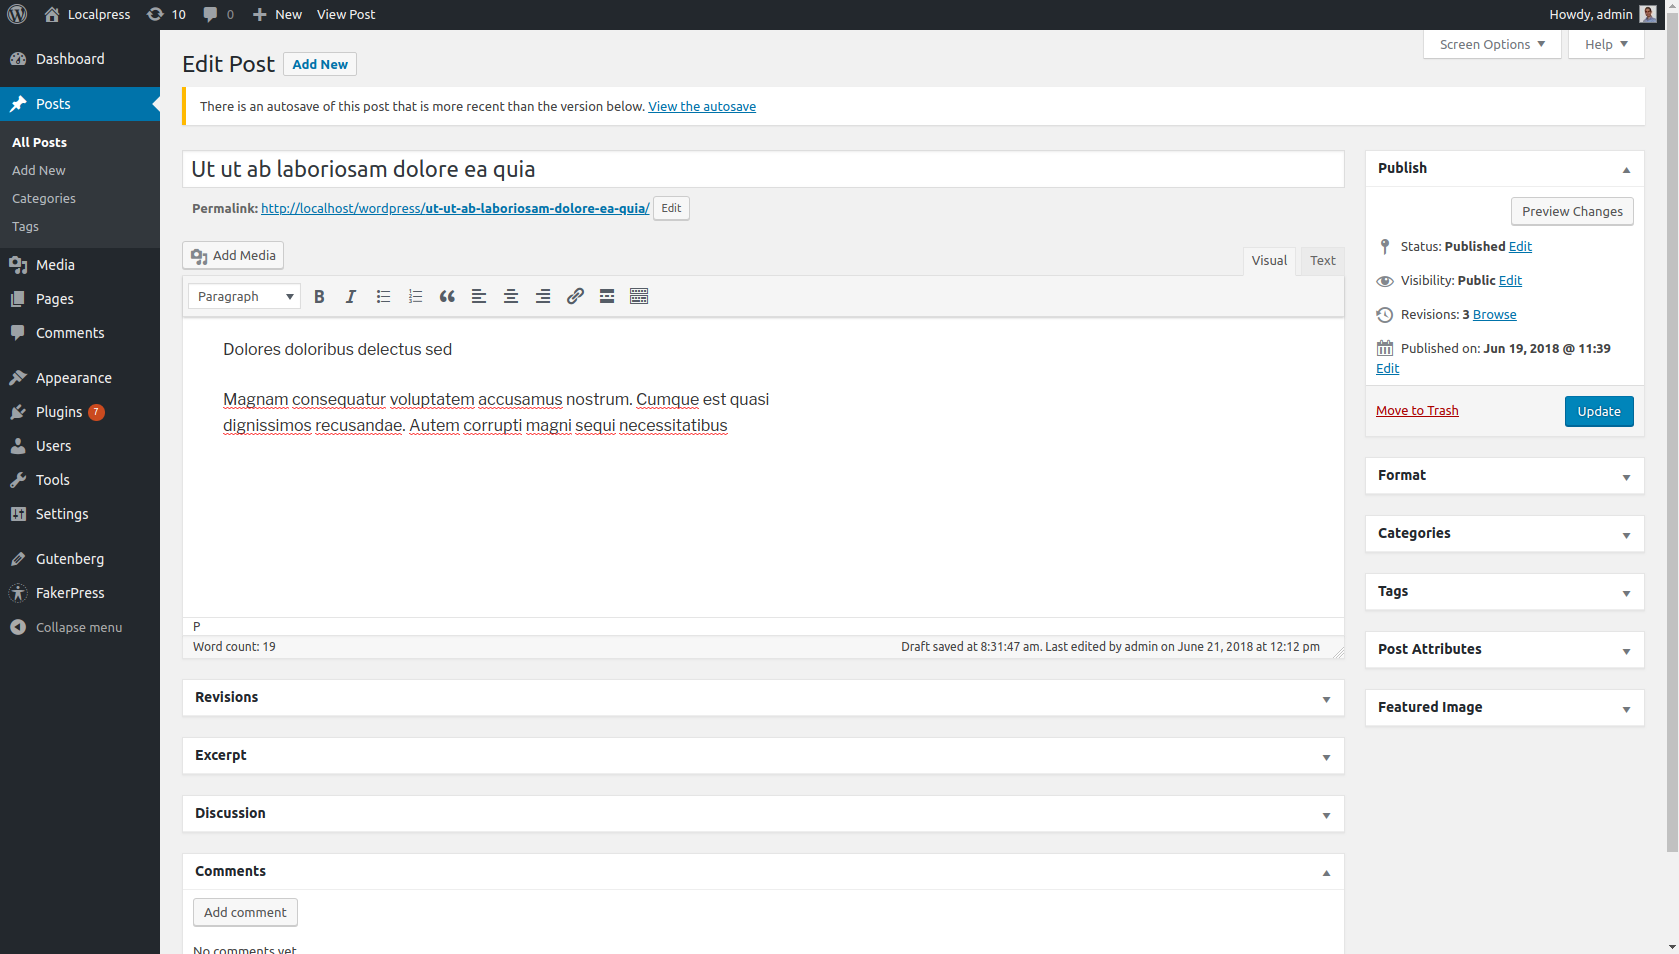
Up until now, text editing in WordPress has been a pretty straightforward task. TinyMCE provided an interface that resembled document editing software (Microsoft Word, LibreOffice Writer, Google Docs etc). There was one single body area, where you would place everything inside (text, headings, lists, images etc), and then use the global toolbar for formatting.
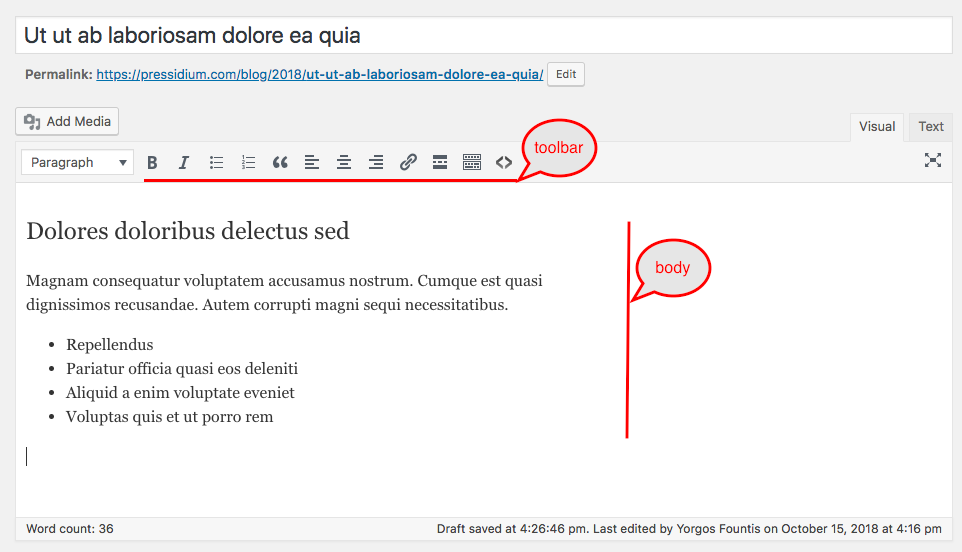
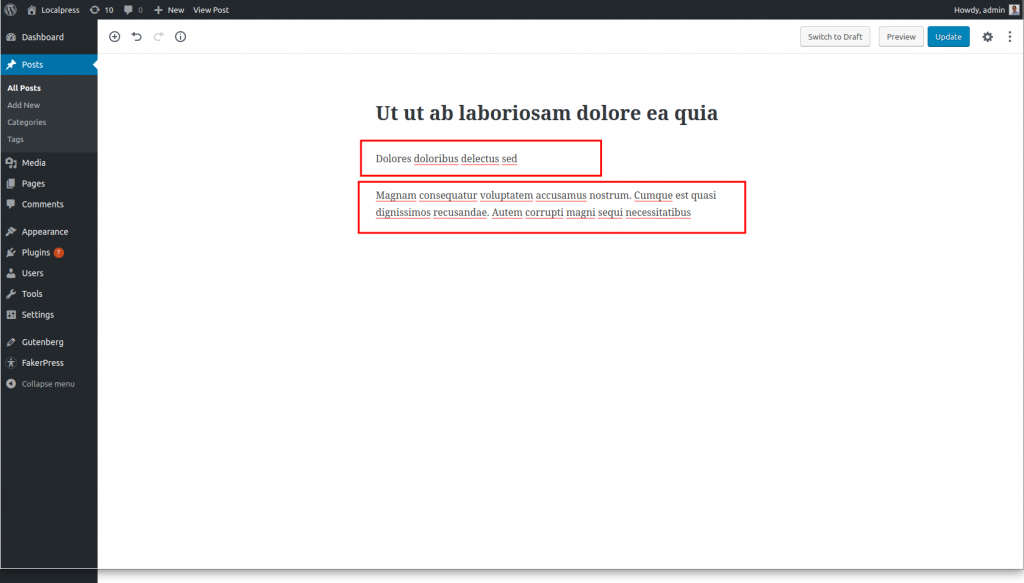
The one remarkable change that Gutenberg editor brings are blocks, or in other words, pieces of content inside a post. Each section of the post body, now becomes a block on its own and makes it easier for authors to work with it.
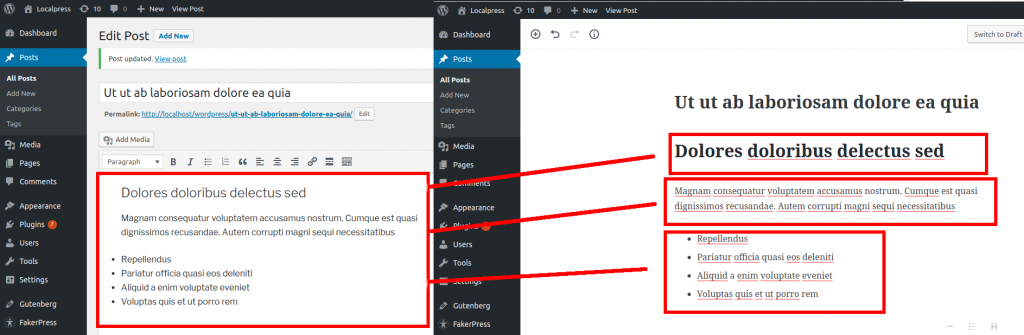
So, instead of adding everything inside one unified text area, you now have the freedom of manipulating your pieces of text as separate entities.
This brings up many possibilities that did not exist before.
1. Easy Reordering
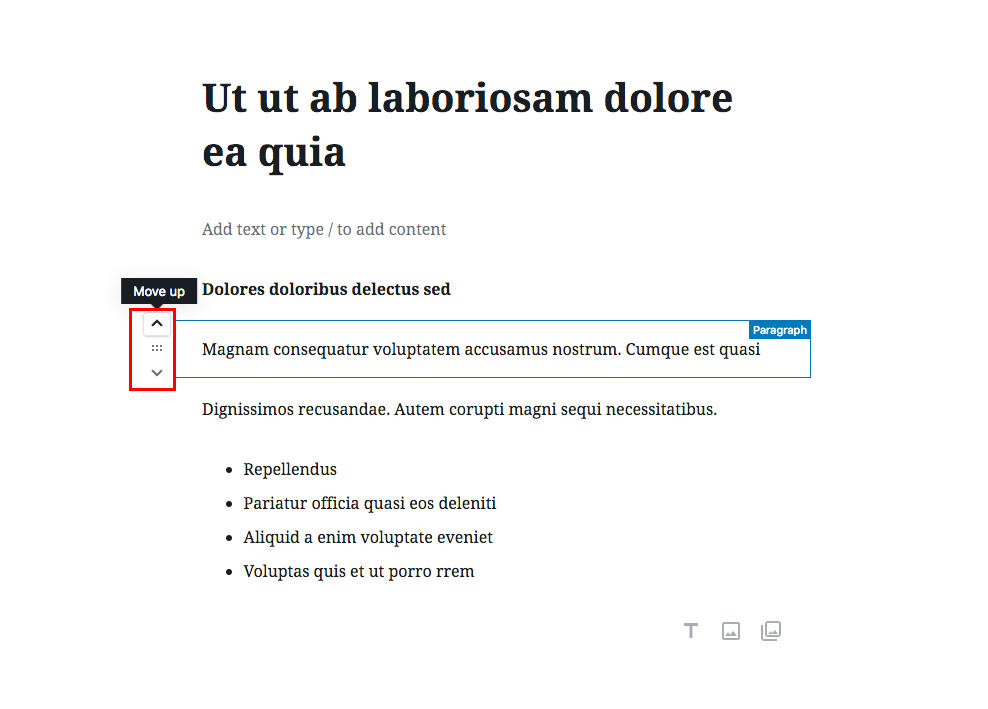
How many times have you looked at your final post, and changed your mind about what goes where? It’s quite common for content authors to re-order parts of their posts as they write or review them.
Well, Gutenberg automatically recognizes each paragraph as a separate block, so you don’t have to cut and paste your text anymore. You can just use the block controls to move it around.
2. Block specific settings and toolbar
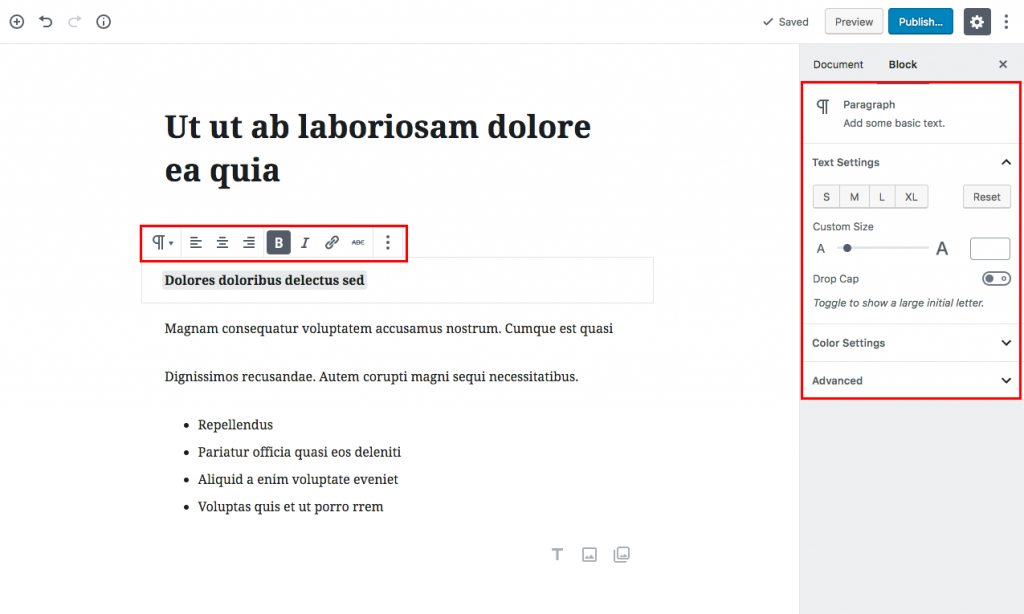
Separate blocks give you the option of formatting each piece of content in your own way. It’s easy to change how parts of your content look, and have that specific setting at hand, all the time. Forget about the time when you had one single toolbar for your whole post body.
3. Block reusability
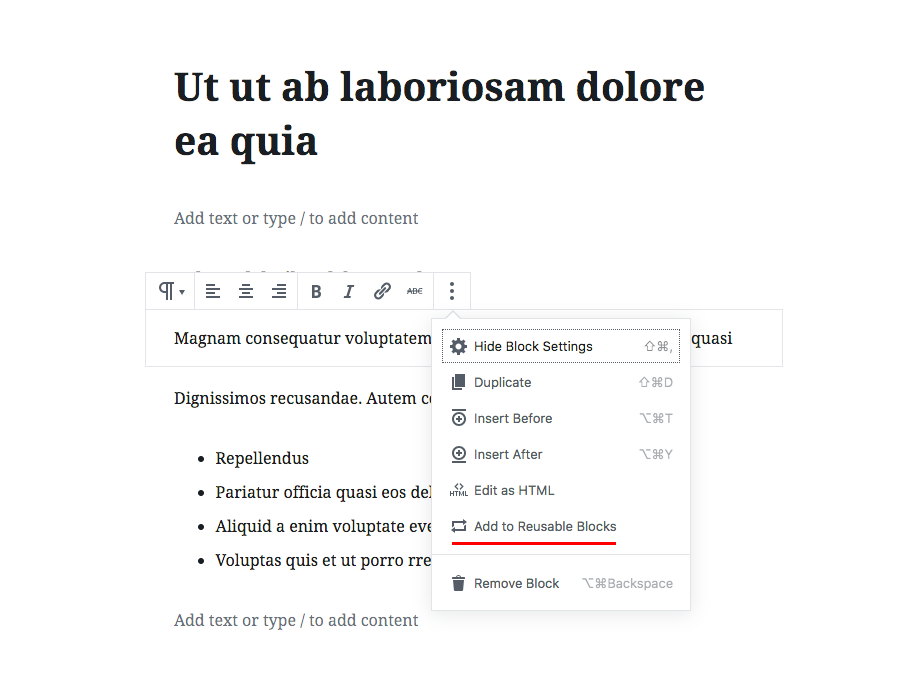
The “Add to Reusable Blocks” option stores a block with its content and configuration inside the database. This makes it re-usable in other posts. Do you have a famous quote you use often? An offer you want to place on top of each post? Or maybe a guest author signature? All of this can be written once, and then quickly repurposed for every post in your website. Also, saved changes to your shared blocks will be applied to every used instance.
Try our Award-Winning WordPress Hosting today!


These features are some of the most basic new functionalities that Gutenberg blocks bring to life. This was partially the goal of many page-builders before Gutenberg; To organize content in reusable chunks, and make it easier for the user to create and manipulate rich text.
Once you understand this mindset and start thinking in terms of post blocks, you will start getting the most out of Gutenberg editor’s workflow. So, moving on, we present some simple examples on how to efficiently use your new Gutenberg block tool.
Adding Rich Text
Suppose you want to write a post that is purely text (admittedly a rare thing to do, but let’s start simple). You’ll only need plain text, a couple of headings, and maybe a list or two. Let’s take a look at how you can do this with the Gutenberg editor.
Converting a heading to block
In TinyMCE you type the heading, paragraph, and everything else in plain text.
And then for example, select the text you want, and change its format to Heading 1.
In Gutenberg editor, the heading and paragraph get their own block in the post layout, as they now are separate pieces of content.
All that’s left to do is transform the first Paragraph block into a Heading block.
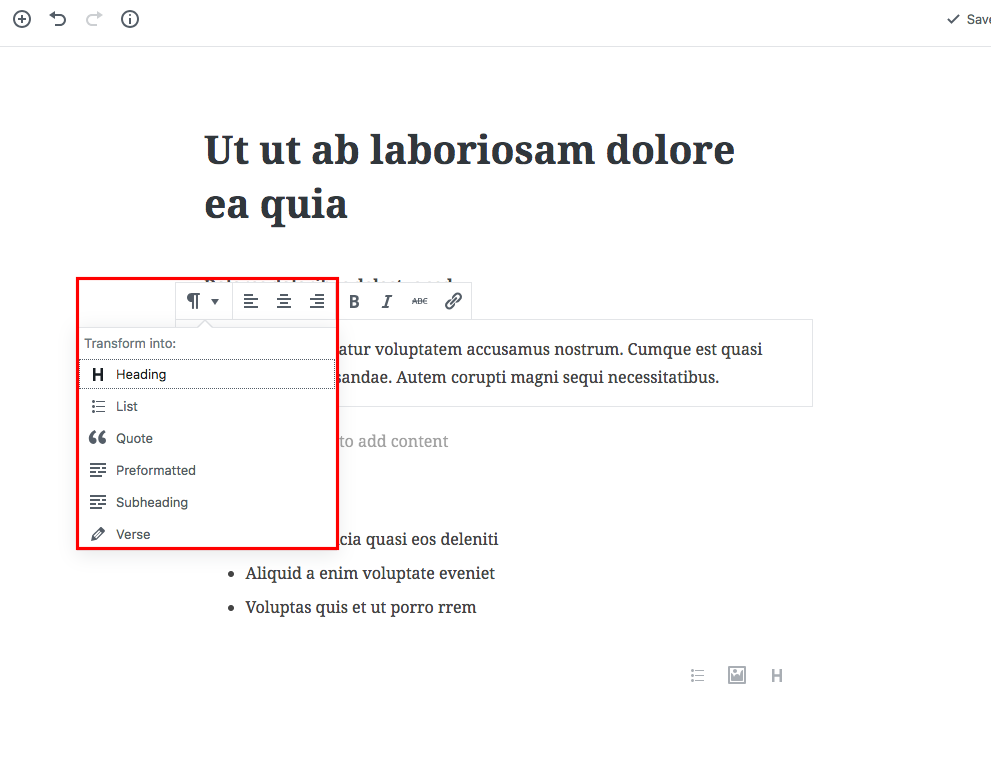
In Gutenberg, a Text block can be transformed to any other Text block, since they are of the same group.
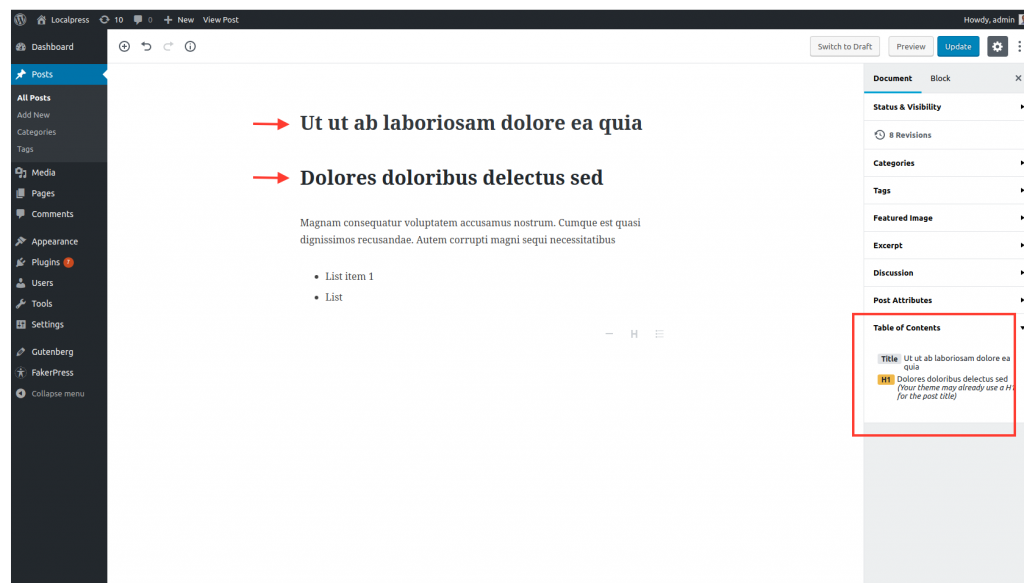
Speaking of headings, you also get to have a Table of Contents based on Title, H1, H2 etc. How cool is that?
Adding a list
Let’s say you want to add a list in your text. In TinyMCE, you click first the ‘List’ button on the toolbar and then start typing. Pressing the [Enter] key adds a new item in the list.
In Gutenberg, to add a new list, you have to think in terms of blocks. This probably means that we need a List block, right?

You can either transform a text block to another in order to change its format (paragraph, list, heading, quote etc), or you can add a new block of this specific type in the first place. It’s not that much different as with TinyMCE, since the steps required are pretty similar. You get rewarded though later when you want to move these blocks around or apply to them specific settings, as we’ve mentioned above.
Adding images and image galleries
Visual content is one of the most engaging ways to liven up your content and not have readers face a huge wall of text. Most of the time, you want to strategically place relevant images throughout your content.
Adding an Image
Not much has changed here. On TinyMCE you click on Add Media and insert your images into the content, and then manipulate them from there.
In Gutenberg you… well you guessed it! You simply add a new Image block like that:
Notice how you can access the Image settings from the sidebar. You can also resize the image and edit the caption on the spot, as you used to do with TinyMCE as well.
Well that wasn’t very different now wasn’t it? Pretty intuitive as well. So let’s dive into something a bit more complex, but also familiar: Shortcodes.
And to do that, we’re going to use the Gallery, another common Image element.
Adding a Gallery
The “Add Media” button, introduced in WordPress 3.5, simplified and made the creation of a Gallery an intuitive process. Here’s how you do it in TinyMCE:
Choose Images, change their order, select the number of columns and boom! ready to go. Pretty convenient, right?
Well yeah, but with a few caveats.
Notice how, after you create the gallery, you are not able to make changes on the spot.
You have to click the Edit icon and go back to the media window, to finish your changes there.
As we hinted above, this happens because the gallery in front of you is nothing else than a shortcode in disguise!
This is a bit limiting since you need to essentially generate a new shortcode each time you want to tweak your gallery.
So, how would you go about this on Gutenberg? First, let’s take a look at how we deal with shortcodes in general.
Shortcodes in Gutenberg
If you thought “Shortcode Block?” then you my friend, are right. Gutenberg has a specialized block that ports the functionality of old Shortcodes. This keeps compatibility without breaking anything.
This will generate the exact same gallery when the visitor views the website.
However, this is not ideal. We already made a big deal of how shortcodes are outdated and clunky, and not fun to work with. So why do we keep using them with Gutenberg?
The answer is simple. The Shortcode block is there for compatibility reasons.
WordPress wants to give time to developers, to migrate their shortcodes into custom blocks. This way, everything will become more intuitive.
There’s actually a Gallery Block that ships with the Gutenberg editor, so let’s use that instead of the shortcode, and see it in action!
Gallery Block in Gutenberg
As you can see, we generate the gallery the same way as before. This time though we can make changes on the fly, like the number of columns, captions, links etc.
Concluding, we will always favour blocks over shortcodes. Only when the block we need doesn’t exist, do we fall back to the shortcode to retain functionality.
Adding Custom Layouts
Column Layout
It’s very common to have columns inside your content. Maybe you want to compare many things side-by-side, or maybe you want to present similar objects together.
Before Gutenberg, you had to rely on external shortcodes to create such layouts. See an example below, using the plugin “Column Shortcodes”:
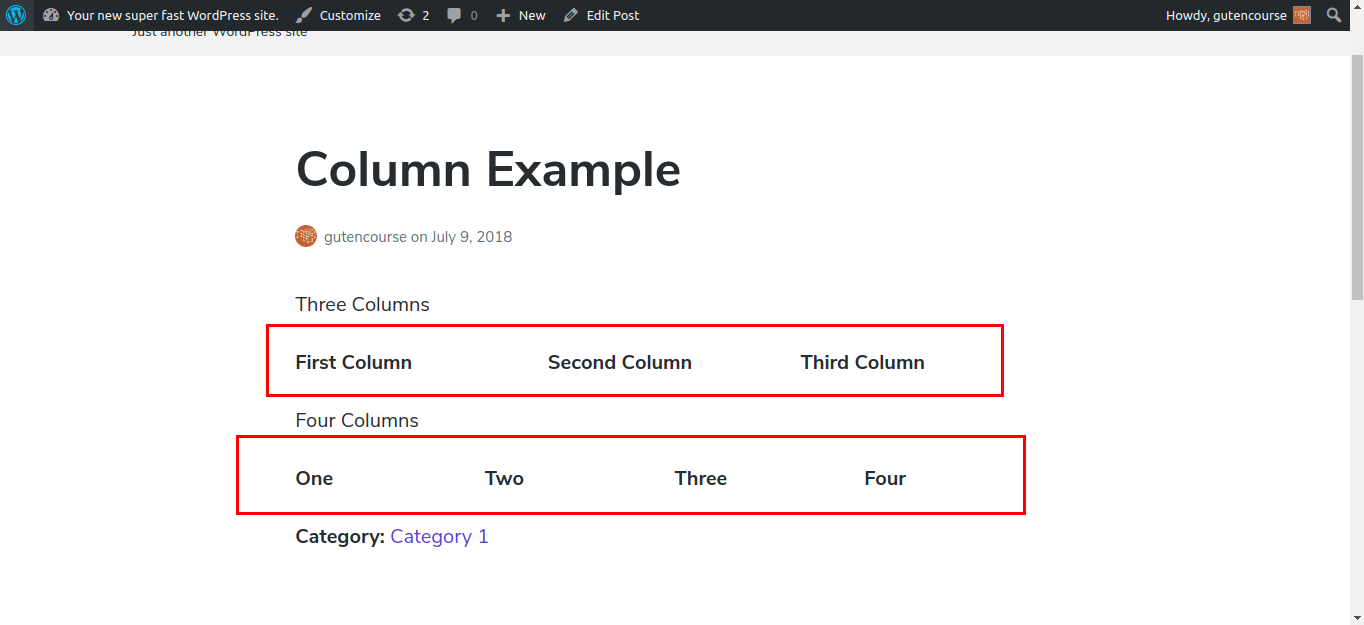
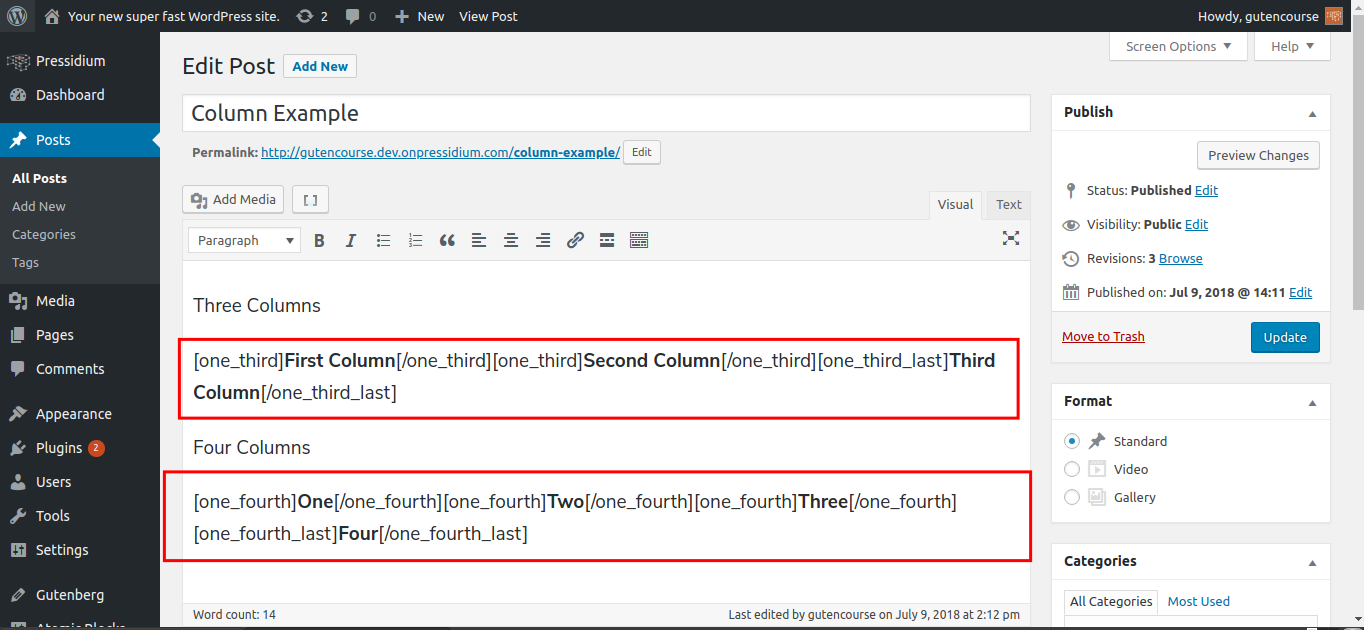
This works well, seeing that it produces the desired result. Does it look good though? Imagine having to edit this whole shortcode mess in order to change something, or change something by mistake. Then the whole thing stops working and you have to look for syntax errors, which doesn’t sound like fun.
Now, let’s take a look at the Gutenberg editor:
By utilizing the “Text Columns” and the “Columns” blocks, Gutenberg enables you to create the exact layout you want without much trouble. It’s easy, it’s intuitive for the end user, and it’s much less error-prone on the user part. Creating content should not feel like writing code 🙂
Adding Custom Fields
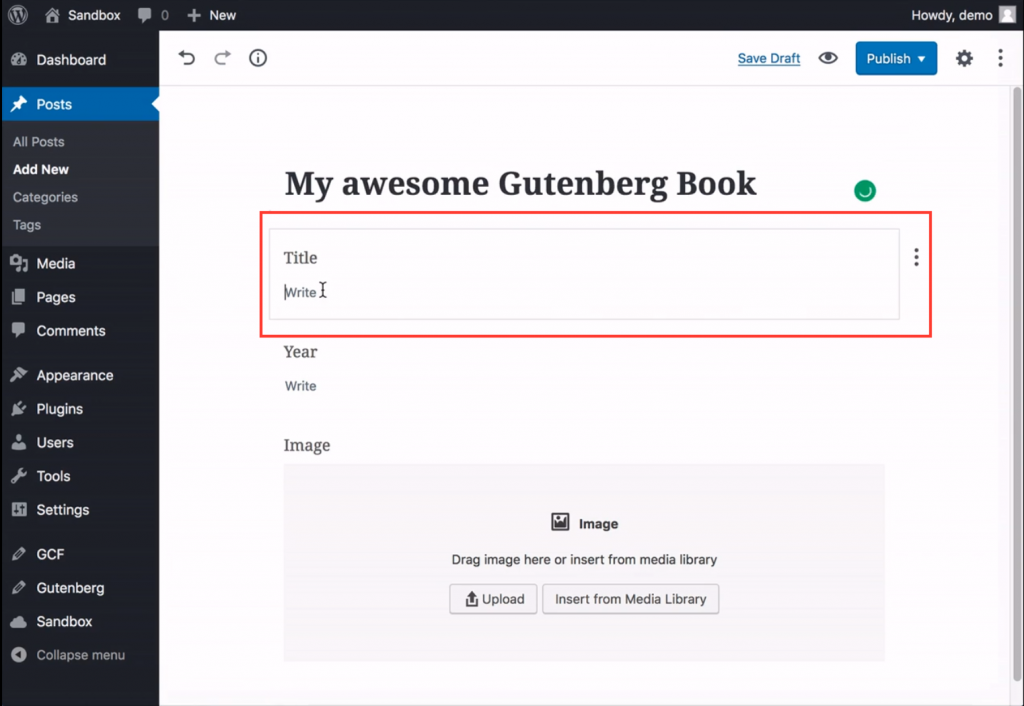
WordPress is not purely a blogging platform anymore. The user has the ability to create a Custom Post Type to add functionality to their WordPress site. A simple example would be Book Reviews, where you create a Custom Post Type named “Book”, adding Custom Fields like “Title”, “Author”, “Publishing Date” and “Rating”.
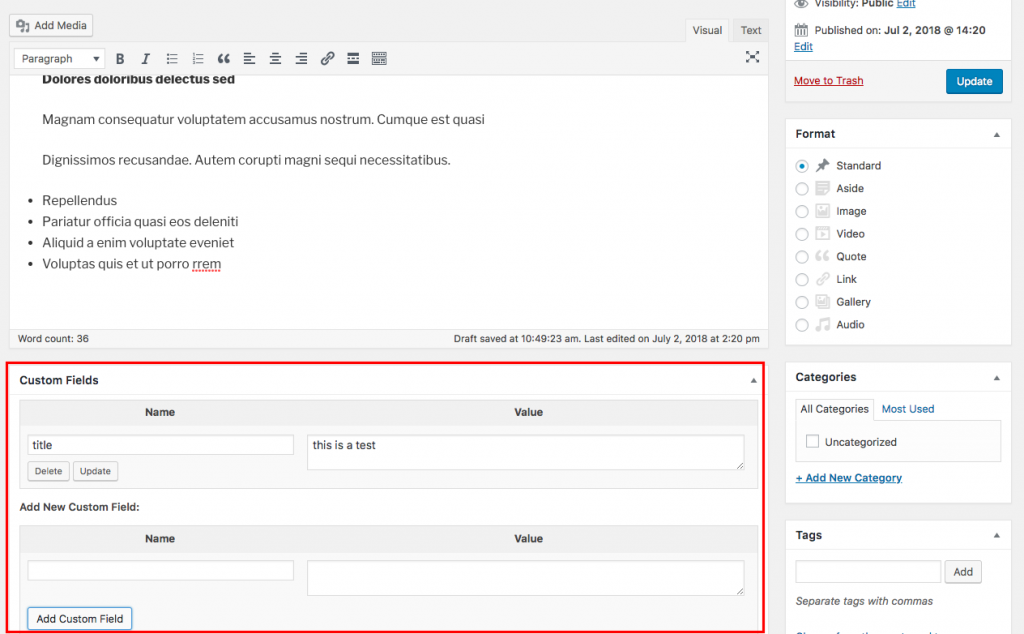
With Custom Fields, you can either use the ones WordPress provides:
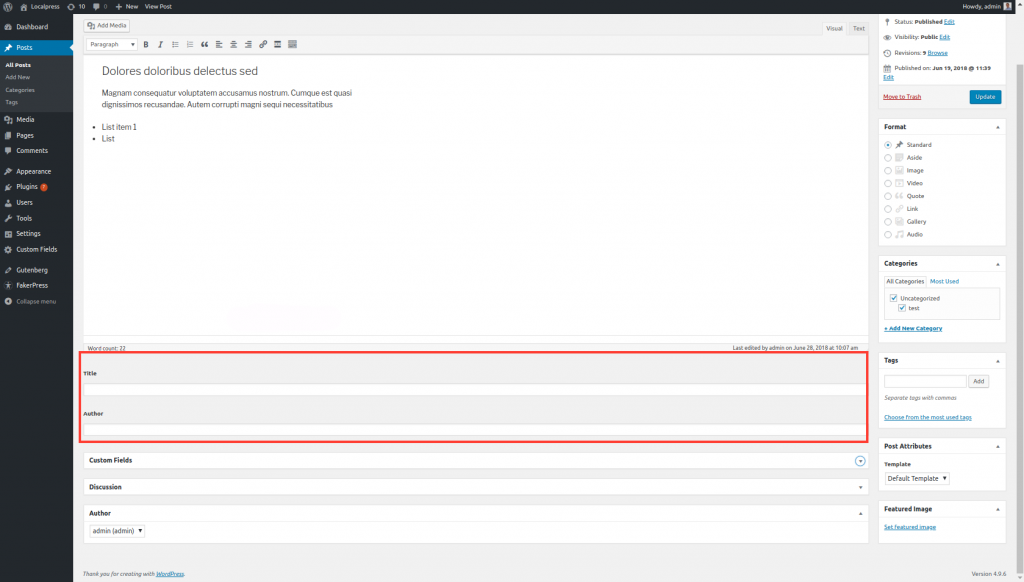
Alternatively, use a third-party plugin like ACF ( Advanced Custom Fields ) or Meta-box. Those can provide more flexibility and are widely used by the developer community.
So, here’s the thing, Gutenberg wishes to move away from such terminology and focus on creating and editing content. Shortcodes, Widgets, Custom Fields, TinyMCE may be familiar terms to you now, but can be quite confusing for newcomers. Gutenberg moves the focus to Blocks instead.
“Yes, that’s all fine and dandy, but how will we have this Custom Field functionality with Gutenberg?”
At the end of the day, a Custom Field is just a value stored in the post_meta table in the database. Well, a Gutenberg block can already do that.
So, as we discussed with Shortcodes, something similar applies here: Custom Fields can still exist in Gutenberg*, but ultimately they should be turned into blocks.
*only with third party plugins. See below.
Custom Fields in Gutenberg
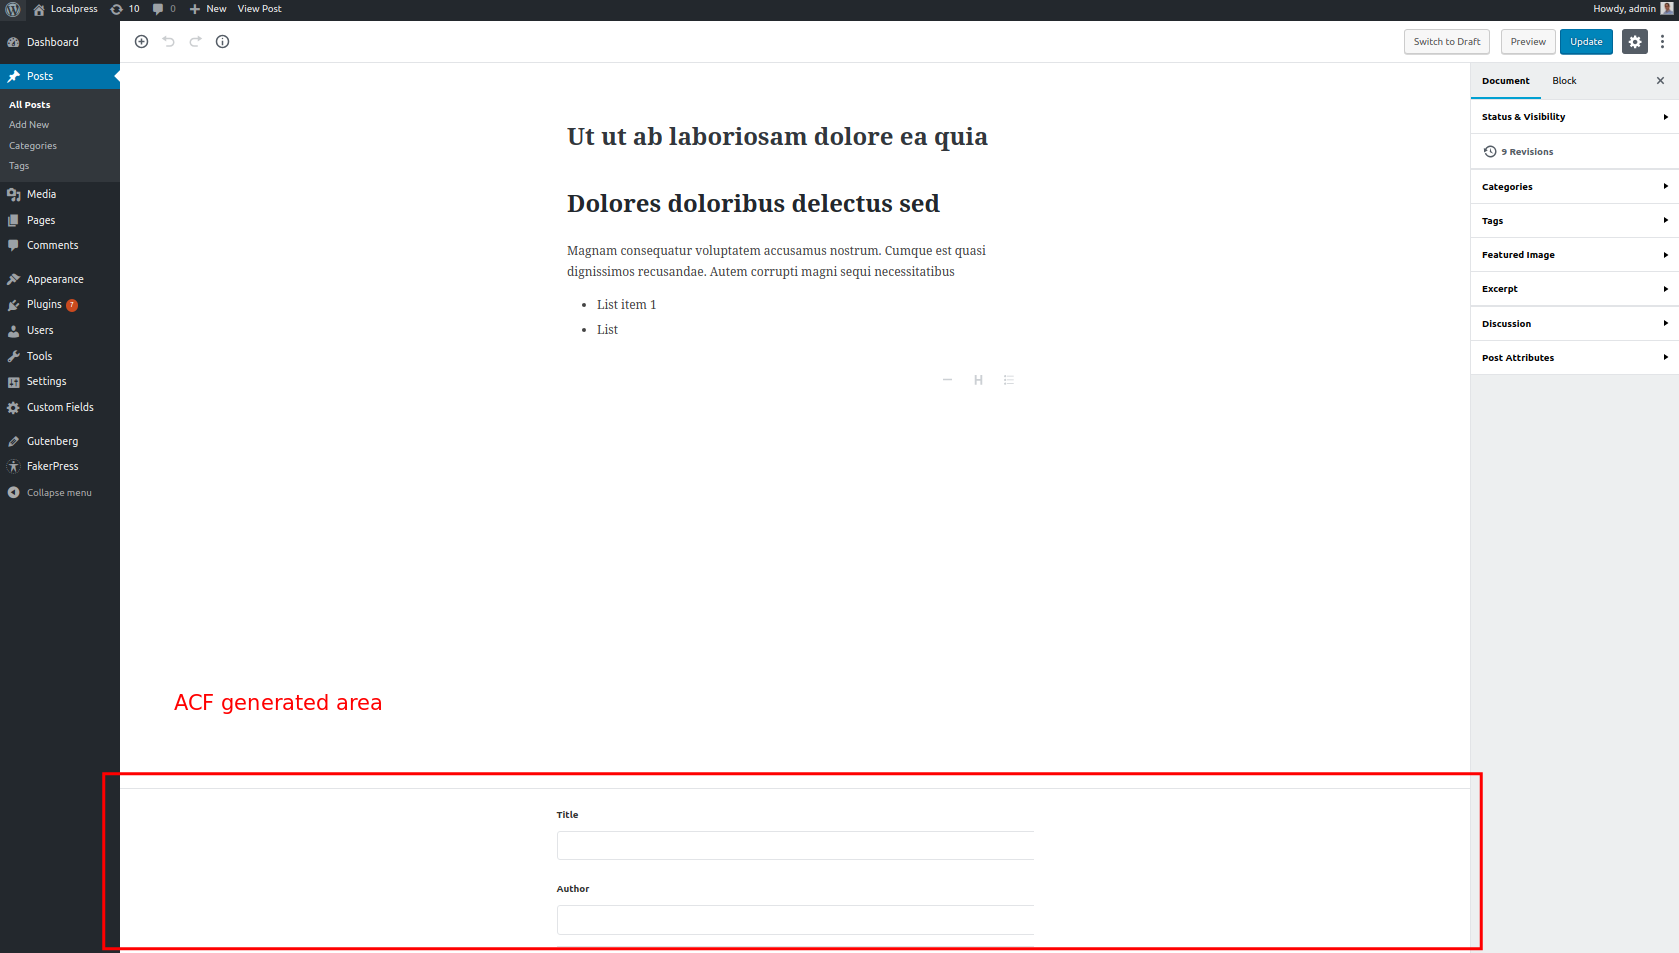
Unlinke shortcodes, the Custom Fields found in WordPress are not supported with Gutenberg. You will have to install a plugin like ACF that supports Gutenberg, in order for those fields to be displayed.
Custom Fields as blocks in Gutenberg
Ultimately, you don’t want to keep working with the old Custom Field logic in mind, but create your own custom blocks instead. These blocks enable the user to create Custom Fields, without knowing what they are, or how they differ from any other block.
Conclusion
Well, if we could summarize this whole episode with one word, it would be”Block”.
If you want to start thinking the Gutenberg way, anytime you’re in doubt about something, think “block”. It’s going to be the building block (pun intended) of your WordPress content from now on.
And since it’s so important, on the next episode we are going to take a better look at the default blocks that Gutenberg provides. See you there!
Start Your 14 Day Free Trial
Try our award winning WordPress Hosting!


