

If you’ve Googled anything to do with your domain name’s DNS, then odds are you probably stumbled across a few references to Cloudflare. Cloudflare is described as an ‘Integrated Global Cloud Platform’. What exactly is this? Well, in short Cloudflare provide a number of tools that help website owners secure their website and boost performance. And, as part of this suite of tools is the ability to use Cloudflare to manage your DNS.
What is DNS? A very brief overview!
DNS stands for Domain Name System. It’s basically the phone book of the internet. Web browsers interact through IP (Internet Protocol) addresses. IPv4 addresses such as 192.168.1.1 or the newer IPv6 addresses such as 2400:cb00:2148:1::c629:d8a2 are not what you’d call memorable! Because of this we use website addresses or domain names (e.g. pressidium.com).
DNS translates these easy to remember domain names into IP Addresses (like 192.168.1.1) which then allows browsers to load the website you were after. This all goes on behind the scenes in a few milliseconds.
Very simply, DNS records tell your browser which IP address it should visit when your web address (domain name) is entered. What that IP address is will depend on where your website is hosted. As such, an important step when you setup website hosting is to make sure your domain name DNS records ‘point’ to the correct server IP Address for your web host. If this information is incorrect then the end-user will just see a ‘This site can’t be reached’ screen. Clearly not what you want!
So, why use Cloudflare to manage your DNS?
In order for your domain name to work, you have to have some way of configuring the DNS. Lots of Domain Name Registrars (like Namecheap) provide their customers with ‘free’ access to their own DNS systems that allow you to upload the appropriate DNS records to get your domain to correctly ‘point’ to your website and email. Commonly these records will include A Records, CNAME Records and MX Records.
The problem with a lot of the free DNS services provided by registrars is that they can lack performance and reliability. If the DNS server provided by your registrar goes down, then your website will become inaccessible (because the address book that your browser relies on to find your web host is no longer working). In addition, updates can take a long time to propagate to the DNS server. Let’s look at what this means.
DNS Propagation Delays
When you make changes to the A records, CNAME records or other records, these changes need to reflect on the DNS Server that you are using. Depending on your provider, these changes can take from minutes to hours to reflect on the DNS Server. Using the address book analogy, this is the equivalent of moving to a new house but taking a few weeks to tell people about your new address. What’s going to happen? Your mail is going to continue to arrive at your old address and not your new one.
The same goes for your DNS. If the old ‘address’ details are left on the DNS server, then any traffic to your website (i.e. your ‘mail’) is going to be sent to the wrong server (or home address).
This can be seriously frustrating! Why? Well, imagine you’ve just built a new website and you now are in the process of updating your DNS records to point to your web host. If your DNS provider takes hours or even days to reflect these changes to your DNS records on their DNS server then you are going to have to wait this time before your domain name successfully ‘points’ to your website. Until these DNS changes have propagated, you’re stuck looking at a ‘This site can’t be reached’ screen.
In the case of a brand-new website this is frustrating. When however this is an existing site and you have moved to a new web host or email provider, this delay can be hugely problematic as the delay means that your website’s users will, for a time, be directed to the wrong servers. The result? They will see a copy of your ‘old’ website on the previous provider’s servers or their emails will bounce. If your old website provider has deleted your website then they’re going to get a 404 error. Because the delay in DNS propagation (provider dependent) can vary so much, this leaves you in limbo with events entirely beyond your control in this regard.
Enter Cloudflare DNS. Cloudflare (according to their website) is ‘the fastest DNS provider in the world, with the fastest speed overall for any DNS provider’. What this means is that any updates made to your DNS records propagate to their DNS servers extremely quickly. The Cloudflare DNS default Time-To-Live (TTL) is 300 seconds (5 minutes). This means any changes or additions you make to your Cloudflare zone file will push out in 5 minutes or less.
Try our Award-Winning WordPress Hosting today!


As such, you can now make changes to your DNS confident that the update will be reflected in the real world sooner rather than later… in other words, your website traffic will get redirected based on your DNS Record changes sooner rather than later! So, even if you make a mistake in entering your DNS records, you can be confident this can be resolved quickly and easily when you host your DNS records with Cloudflare.
How do I setup my DNS in Cloudflare?
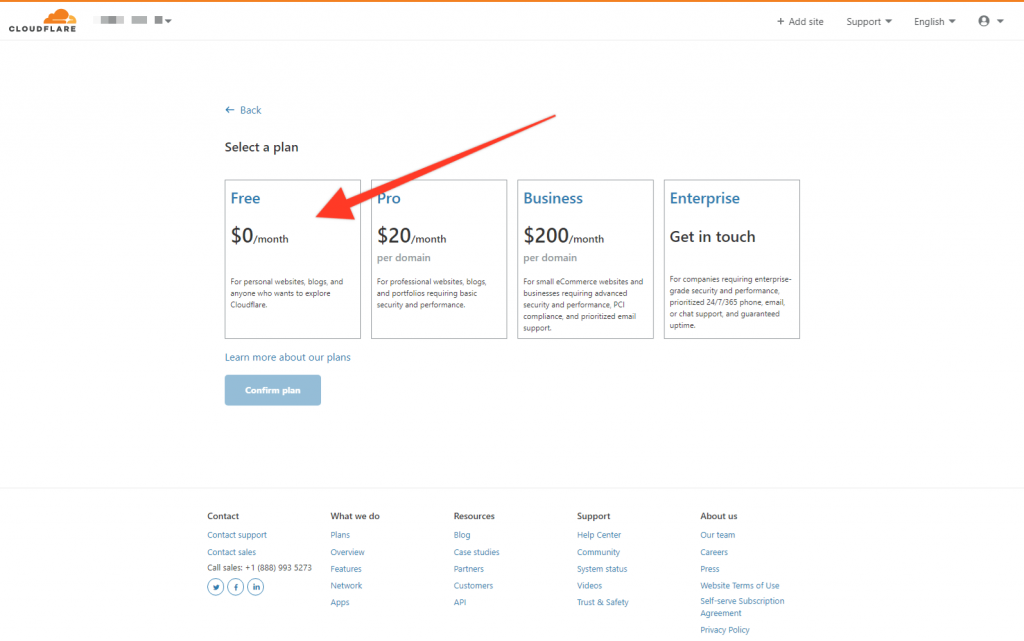
Head to Cloudflare and sign up for a free account. Cloudflare do offer premium services (starting at $20/month per site) but for simply managing your DNS, the free plan is more than adequate.
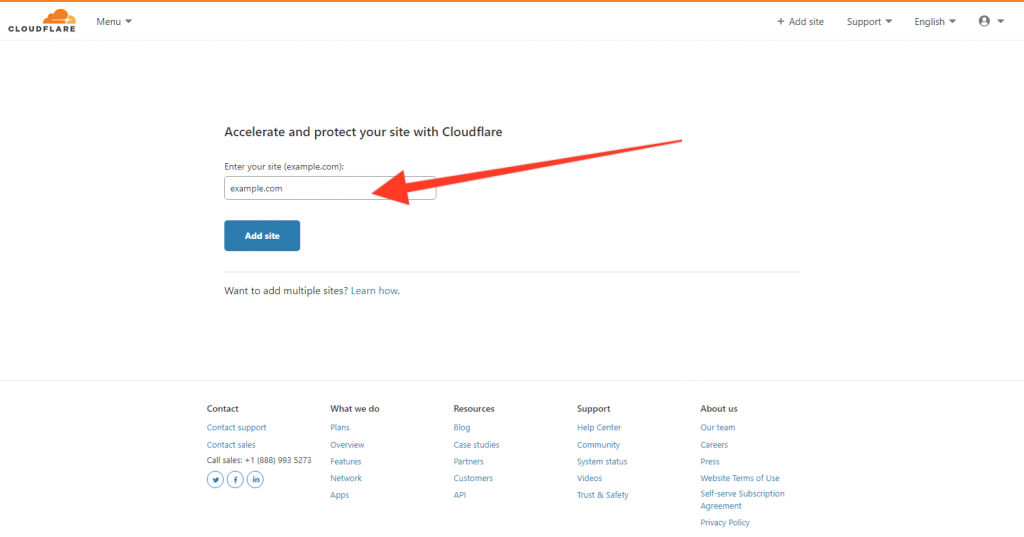
Click on the + Add Site text towards the top right of the screen and then enter your website domain name.
Click ‘Add Site’ and then select the Free plan. Cloudflare will scan your domain name and detect the DNS records currently associated with your domain. At this stage, it’s safe to click on ‘Continue’. You will notice that A Records and CNAME records have an orange cloud next to them… we’ll discuss what this is later.
The next step is important. You will see a screen that lists your current Nameservers. A Nameserver is a server on the internet specialized in handling queries regarding the location of a domain name’s various services. Basically it is the first part of the ‘Address Book’ system in that it defines who your DNS provider is. In this example we are changing our DNS Provider from our Registrar to Cloudflare so we need to update this record.
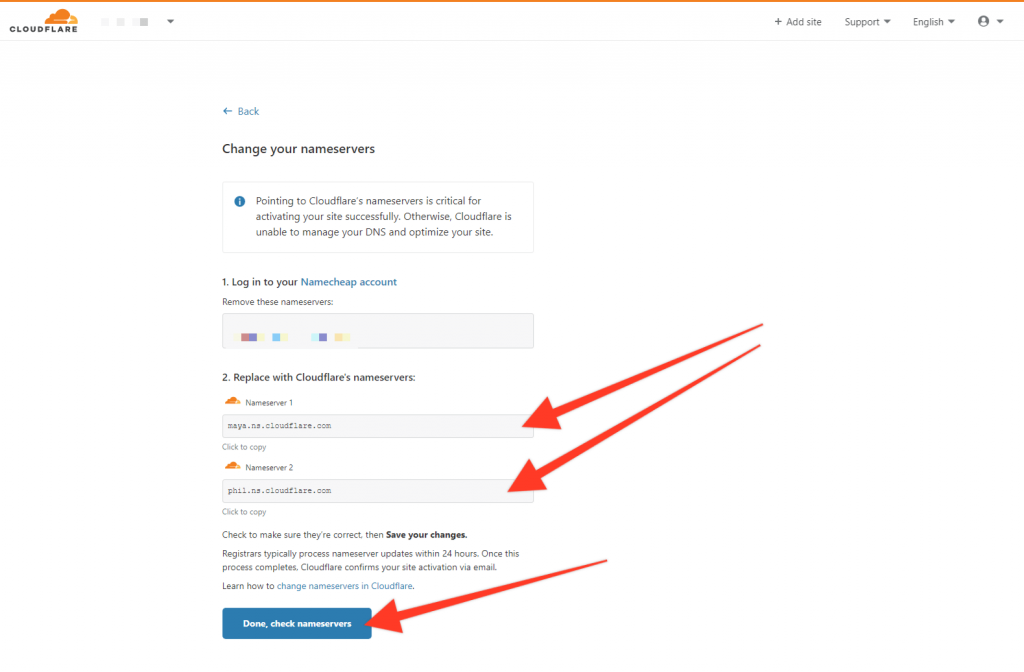
Cloudflare will probably detect who your Domain Name Registrar is. You need to log into your Registrars account and update the Nameservers to the two that Cloudflare provide. If you are in doubt about how to do this, ask your Registrar and they will be able to guide you through the process.
Important note: You are not moving your domain name to a new Registrar so don’t panic! Your domain will still be registered with your chosen Registrar (like Namecheap). The only difference is that your DNS records will be hosted by Cloudflare, not, in this example, Namecheap.
Once you’ve done this click on ‘Done, check nameservers’. Cloudflare will then scan for these updates. Once they are confirmed (this could take a few hours), you will receive an email from Cloudflare confirming that your DNS Records are now controlled by Cloudflare.
Changing your DNS Records
Now that Cloudflare controls your DNS records you are free to make any changes to these as required. If nothing has changed since you setup Cloudflare (i.e. you have stayed with the same host and email provider) then theoretically you don’t need to do anything else. Just check your website and email is still working.

If you need to make changes to your DNS records then click on the DNS tab. From here you will see a full list of your DNS records. Click on these in order to edit as required. As mentioned, now that you are using the fastest DNS provider in the world, any changes you make will be reflected very quickly in the real world. This makes life so much easier, especially when you are moving your website and/or email from one provider to another.
The Orange Cloud – Using the Cloudflare Proxy
Next to A records and CNAME records you will see a small cloud icon. This might be orange or grey. If you click this, it will toggle on and off. So, what’s happening here?
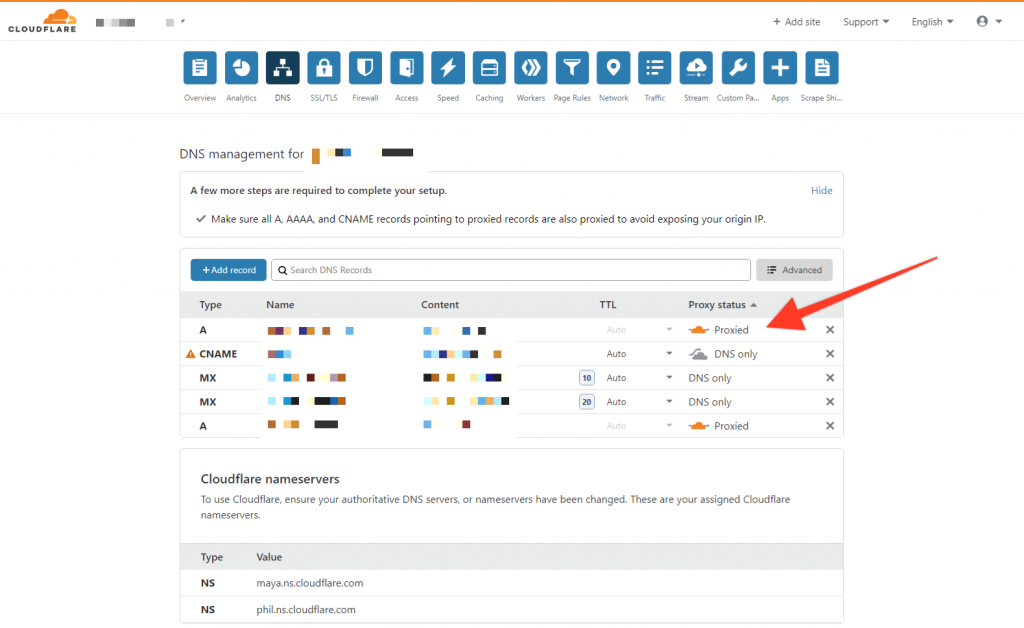
By toggling this could switch you are enabling (orange) or disabling (gray) the Cloudflare Proxy service. When this is enabled it means you are opting to route traffic to your website through Cloudflare’s servers. This has a number of potential benefits:
- Speed: Cloudflare caches elements of your website and serves then up via their own CDN (content delivery network). This should, in many cases, speed up how quickly your website loads. That said, if you are already using a CDN, it just adds another layer for traffic to travel through which might actually slow things down for some visitors.
- Security: Cloudflare stops malicious traffic before it reaches your origin web server. Your origin IP address is masked meaning attackers cannot bypass Cloudflare and directly attack your website. Cloudflare also state that they offer unmetered mitigation of DDoS attacks. A Web Application Firewall (WAF) for additional security is also available but only on the Pro plan (currently $20/month per site).
- Reliability: Traffic is routed through Cloudflare’s Anycast Network which is sent to the nearest Cloudflare data center. The distributed nature of the DNS system improves reliability.
Whether or not you choose to take advantage of these additional Cloudflare features is up to you. As a rule, the cheaper your hosting, the more likely that these security and performance features will be of benefit.
By way of example, Pressidium route all traffic to websites hosted on the Pressidium platform through a Web Application Firewall (a $20 add on for Cloudflare) plus has in place a range of other security measures.
The Pressidium platform also has a raft of features to ensure your website loads incredibly quickly as well as offering a CDN network. This potentially makes using the Cloudflare Proxy unnecessary. If you are a Pressidium client and have any queries about this please feel free to submit a support ticket with your questions.
So, should you use Cloudflare to manage your DNS?
Hopefully this article has helped explain how to use Cloudflare to manage your DNS. Whether or not you choose to use it is entirely up to you. There are numerous providers of DNS services but in my experience, Cloudflare offers one of the very best DNS management systems.
With free accounts, there is no reason not to give their excellent service a try. Head to cloudflare.com to get started!
Start Your 14 Day Free Trial
Try our award winning WordPress Hosting!


