

Have you always wanted to build your own WordPress plugin but not had any idea where to start? In this article we are going to lift the cloak of mystery around plugins and reveal just how easy it actually is to build a WordPress plugin. You’ll be surprised at how quickly you can do this and hopefully excited by the almost limitless possibilities offered to add functionality to your WordPress website with a custom plugin.
One of the main reasons WordPress has proved so incredibly popular as a CMS (Content Management System) is, thanks in part due to its open source nature, the fact that its possible to heavily customize both the design and functionality of websites built using WordPress with almost no limits as to what can be achieved.
You can do this in two ways. First, by writing code which alters the design or function of your WordPress website. The second (and most popular way) is to take advantage of website builder plugins like Elementor to alter the design/appearance of your website and to then to use further plugins to add functionality. Anyone can use plugins… most require very little skill to setup and no coding experience is necessary making them an incredibly powerful tool.
What is a Plugin and Why Should I Create One?
As you may already know (or may have now guessed) plugins in WordPress are used to extend the features of a WordPress website. WordPress comes ‘out of the box’ with a number of useful features that are ready to go. Plugins allow you to either enhance the inbuilt features available or to add brand new ones quickly and easily and with no coding necessary. Think of WordPress plugins as one of the tools that allows you to create a website that is built to your exact requirements.
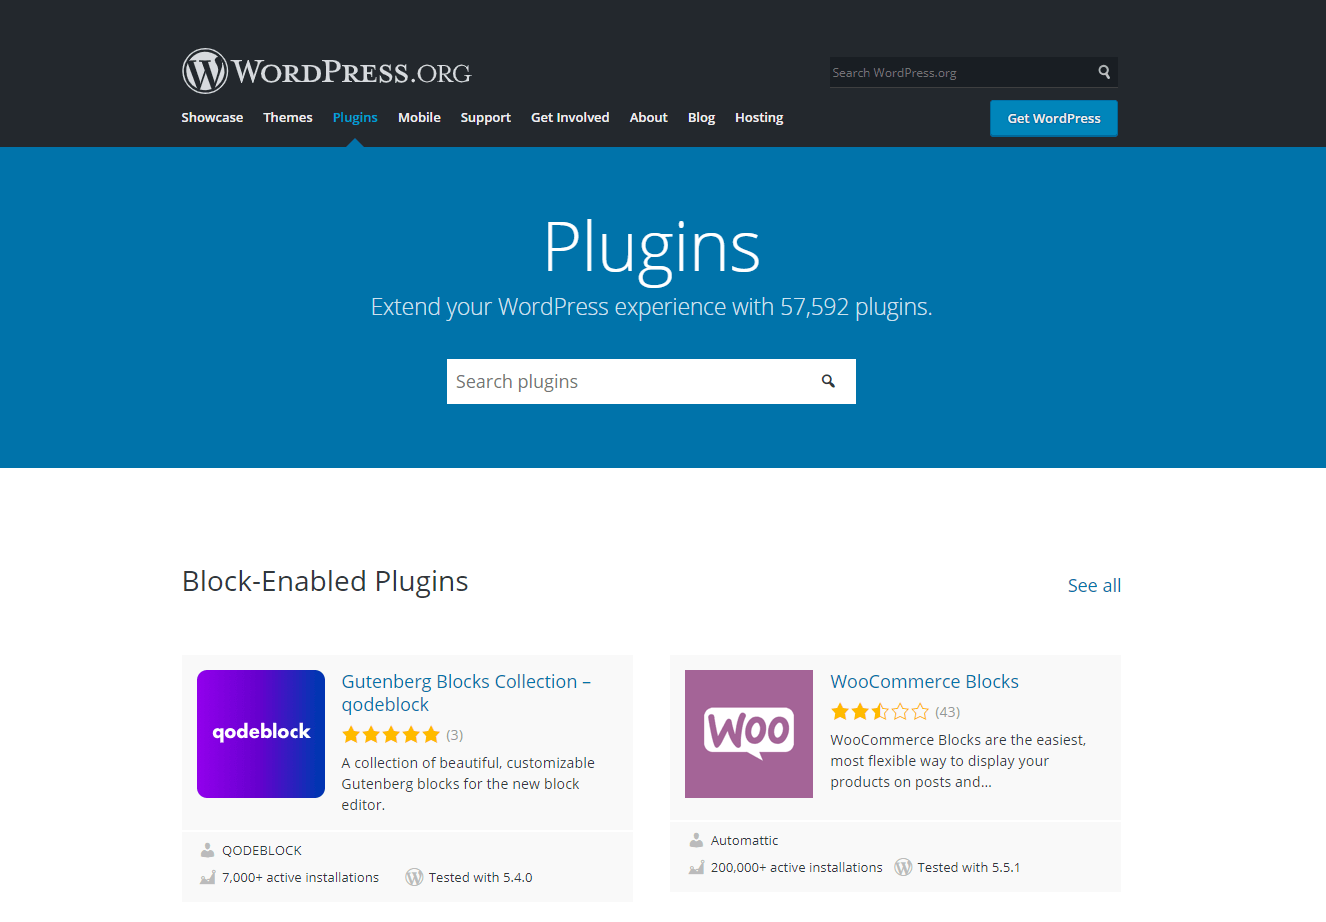
So, where do you get plugins from? Well, one of the best places to start is the WordPress plugin directory which contains (at the time of writing) 57,592 free plugins all designed to allow you to enhance your website in some way or another. Odds are fairly high that, if you need a plugin that offers a specific feature or function, someone has already built a plugin that will do the job and added it to the directory for you to use.
So why would you build your own plugin? Well, there are several reasons. The first is that many third-party plugins will suffer from ‘feature bloat’. In other words they will likely include more functionality than you really need. This can make setting up the plugin and maintaining it more complex.
The second, and perhaps most likely reason why you would build your own plugin is that you are unable to find a third party plugin that provides the exact feature or function that you need. In the absence of a third party offering a suitable plugin your only option is to build your own (or get someone to do it for you). As a bonus, you might well then be able to monetize your new plugin by selling it to others who also want the feature or function you have created for their own website.
Try our Award-Winning WordPress Hosting today!


Building Your WordPress Plugin
Let’s dive right in and run through the steps you need to go through to build your own plugin. It’s a fun process and one that offers up a world of possibilities.
Naming Your Plugin
Before we begin any coding we first need to name our plugin. It’s important that this name is unique. This is so it doesn’t conflict with any other plugins that are installed on your website. In order to ‘future proof’ your plugin, in the event that you choose to upload it to the WordPress plugin directory it’s worth also checking the name won’t conflict with any of the thousands that are already available. You can do this by undertaking a search on the WordPress plugin directory.
It is also highly recommended that the name of the plugin represents what the plugin actually does. This will also increase the probability that others can find it in the WordPress directory if you did publish it.
Deciding on Your Plugin Goals
Before you become too embroiled in the actual process of building your plugin it’s first important to carefully define what it is you want to achieve with your plugin. It’s much easier to design something when the end goal is clear in your mind than to re-engineer your plugin halfway through when it becomes apparent the functionality you want won’t be delivered.
In this tutorial we are going to build a plugin that automatically adds a button at the bottom of every blog article. Whilst of course it would be possible to manually add a button at the bottom of articles, this is moderately time consuming to do each time we add a blog article. On a website with thousands of articles, it would be a huge undertaking to edit each one in order to add such a button.
In this instance, a plugin that does this automatically would save us a huge amount of time. It’s a classic example of the kind of task that would warrant building your own plugin. We’ll call this plugin ‘Under Post Button’.
Now we’ve defined its function and named it we can get to work building it!
Note: Always use a staging server to test your plugin not a live website.
Step 1: Create the Required Files/Folders to Make the Plugin Functional
During this initial step we will create a plugin and register this with our website. We don’t need to worry about adding in any functionality at this stage.
Create the plugin folder
First, access your website via an SFTP client and go to the /wp-content/plugins folder. In this folder create a new folder with a unique name. The name should be similar to your plugin name and contain only lowercase letters and dashes. Our folder will be called ‘under-post-button.
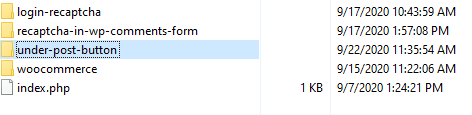
Create the main file
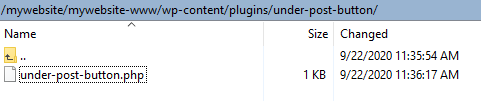
Next, inside this new folder, create a PHP file with the same name as our folder ‘under-post-button.php’.
Let WordPress know about the plugin
The PHP file should include the necessary commented headers that tell WordPress that a file is a plugin and provides information about it. There is a specific standard format you need to follow here. The available header fields according to the WordPress standards are:
- Plugin Name
- Plugin URI
- Description
- Version
- Requires at least
- Requires PHP
- Author
- Author URI
- License
- License URI
- Text Domain
- Domain Path
- Network
The minimum mandatory header comment for a plugin to work is the ‘Plugin Name’. For the purposes of this tutorial that’s all that we will include. The remainder of the headers that would normally be included in a plugin are primarily required when a plugin is distributed (for example uploaded to the WordPress plugin director). We’ll cover these in a future article in more detail.
To add the plugin name to our PHP file, open your PHP file up in a code editor (like Sublime) and add the following:
<?php
   /*
   Plugin Name: Under Post Button
   */
?>
Now head to your WordPress Admin, click on ‘Plugins’ and you should be able to see your plugin in the plugin list.
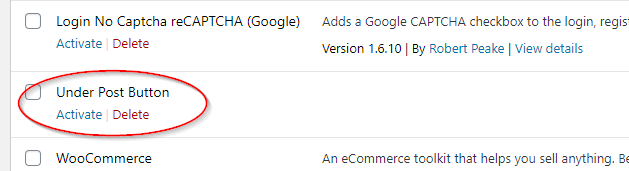
You can now activate it. The plugin is now functional but as we’ve not coded in any functionality it won’t actually do anything.
Step 2: Add Functionality to the Plugin
In your plugin’s PHP file, add the following code:
add_action( 'the_content', 'myButton' );
function myButton ( $content ) {
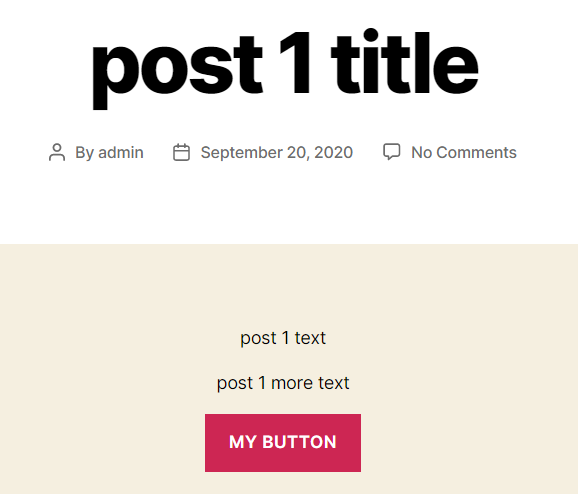
return $content .= '<button class="btn">My Button</button>';
}What this piece of code does is that it uses the “add_action()” hook to add our callback function “myButton”. This means that the “myButton” function will be executed along with the default core functions that are executed every time “the_content” action is called.
The “the_content” action by default returns the content of the current post. So, from now on, along with the content, our custom output will be printed as well. If you visit any blog post on your website now you will see the button at the end of your post’s article. So, if we had 1,000 articles on our website, all of them would now show this button at the end of the article. It was clearly much quicker to add this button by using a plugin than it was to manually add in a button to each one of those 1,000 articles!
If you’re not yet familiar with the terms “hook” and “action” or you need to better understand the way they work in WordPress check out the related official WordPress documentation. Hooks and Actions are widely used in WordPress so it’s important to have a firm grasp of what they are and how they work if you’re planning on building plugins.
Step 3: Refining Our Plugin
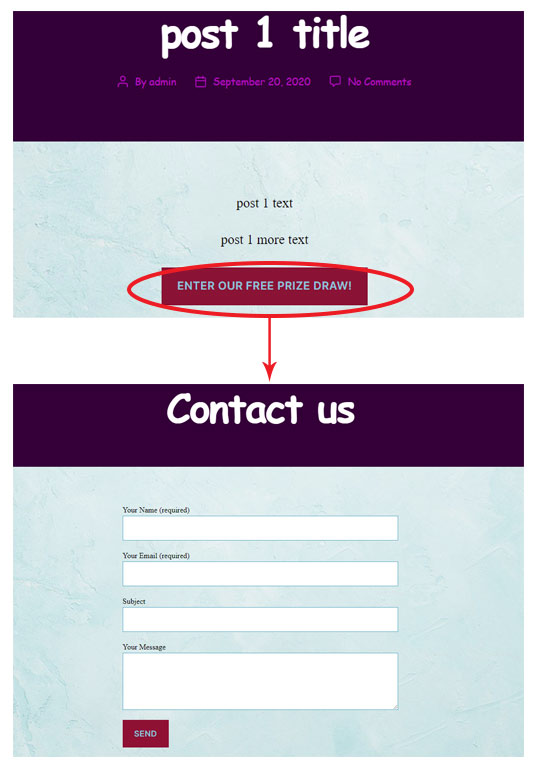
We’ve now successfully added a button to the bottom of all of our WordPress articles. This button makes a great CTA (Call to Action) that can be used to encourage someone to contact your business. We just need to make a couple of small changes so this button functions as a CTA by changing the text displayed and adding in a hyperlink so it takes you to a target page when clicked.
Changing the text displayed on the button
This is super easy. Just edit the text after the <button class=”btn”> tag. In our case we have changed this to ‘Enter our FREE Prize Draw!’
add_action( 'the_content', 'myButton' );

function myButton ( $content ) {
    return $content .= '<button class="btn">Enter our FREE Prize Draw!</button>';
}
Add a link to button
If our Free Prize Draw is entered via a form you can easily add a link to direct people to this form. For the purposes of this example we’ll direct them to our ‘Contact Us’ page
add_action( 'the_content', 'myButton' );

function myButton ( $content ) {
    return $content .= '<a href="YOURDOMAIN.URL/contact/"><button class="btn">Enter our FREE Prize Draw!</button></a>';
}
Alternatively you can use what’s known as a relative url which is considered the ‘correct’ way to add urls in WordPress.
add_action( 'the_content', 'myButton' );

function myButton ( $content ) {
    return $content .= '<a href="/contact/"><button class="btn">Enter our FREE Prize Draw!</button></a>';
}
And here we go, ready to draw in new contacts with our own custom CTA button.
If you are interested in taking your custom plugin to the next level, we highly recommend that you study our extensive series on how to create a WordPress plugin with object-oriented programming.
In these articles, we have tutorialized the techniques that will improve your plugin’s reusability and extensiveness, as well as security and scalability. Don’t miss out on this valuable resource!
Conclusion
Whilst the plugin we’ve created is undoubtable very simple, it does demonstrate the enormous power that plugins can wield. With a few lines of code we’ve managed to add a button to potentially thousands of pages on our website with very little effort. Whilst you might not think this is the most amazing plugin you’ve ever seen, hopefully our tutorial does demonstrate how relatively easy it is to build a custom plugin in WordPress. With this in mind, you’re now free to go and experiment with your own plugin.
In a future tutorial we’ll enhance our plugin by building an interface for your plugin in the admin area which in WordPress we call Options Page. This will increase the functionality of our plugin by making it easy for users logged into the WordPress admin to change things like the button name and the url without having to update the plugin code directly.
Creating plugins can be hugely satisfying. There is a ton of information available on the web to help you. The only real limit is your imagination. Happy plugin building!
Start Your 14 Day Free Trial
Try our award winning WordPress Hosting!


