

In Part 6 of our ‘Build a WordPress Website for a new Business with Elementor’ series we are going to race on and build an ‘About Us’ page and a ‘Contact’ page for our fictional business website ‘Press Plumbing’. A lot of the techniques used to build these pages will be very similar (if not identical) to those used to build both the Home page for our website and also our services pages so much so that we are going to race through these steps to avoid too much repetition. If you need to double-check how to do something that isn’t covered below then make sure you check out Part 4 and Part 5 of this series in particular for tips on building website pages using Elementor.
Let’s get going!
Building our ‘About Us’ page
An ‘About’ page is an often-overlooked page on a business website. This is surprising as its’ acknowledged among marketing professionals that it is one of the most important pages of a website. Many customers will instinctively navigate to the About page early on when browsing your website. Why? Well quite simply because they want to know who they are going to be doing business with or purchasing a product or service from. Ultimately most sales whether goods or a service (like plumbing) revolve around trust. A customer is being asked for money and in return they want to know they can trust the seller to provide the goods or service that they pay for. The About page on a website is the perfect place to show your customers who you are. To quite literally put a face to a name (by way of a photograph of the business owner(s) and employees).
A good ‘About’ page will include the following:
- Background on the business such as when it was established and how it’s grown over the years.
- Information on the key personnel in the business.
- Details of any professional or industry relevant memberships or qualifications.
- A clear link to a contact page or contact details for the business.
The aim of the About page is to help build the level of trust that’s required in order that the customer feels confident purchasing from you (or at the very least is willing to make an enquiry). It really is a critical page so don’t be tempted to skip it!
Using our Starter Theme template for our About Page
Our starter theme provided by Astra has been incredibly useful so far. In our next step it’s going to continue to prove to be a real time saver as we are going to make use of a pre-built ‘About’ page that has been created by the Astra team.
To get started head to ‘Pages’ menu from within the Dashboard and click to open this. You should hopefully see an ‘About Us’ page listed.
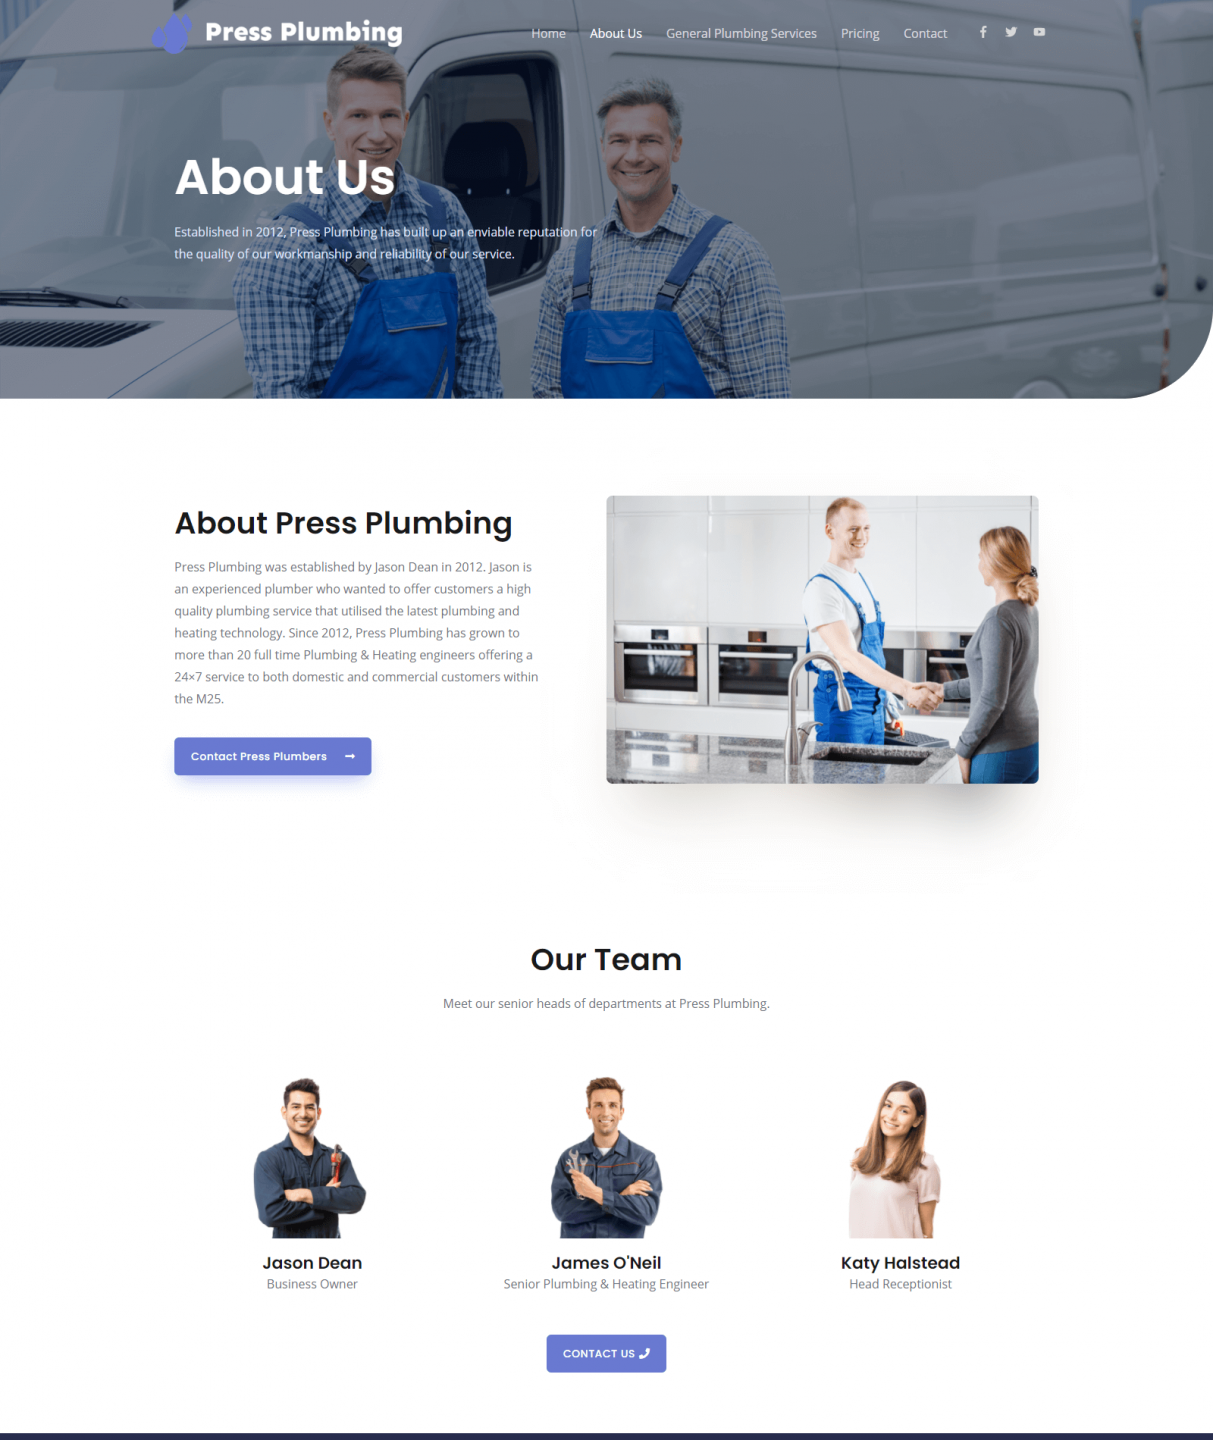
Click to open this page and you should see something like this:

If you take a quick look you’ll see that the layout that the Astra team have created looks really good. We’re going to keep a significant portion of this layout as it is which will save a lot of time and work.
The Hero Section
As previously, all we need to do to make the Hero section ‘our own’ is to change the background image and update the text. For a background image it’s worth using one that somehow reflects your business… this could be a photo of your shop front or some other feature that is synonymous with your business (e.g. a brewery might show a nice photo of some beer bottles). In our case we’re going to use an image of the team outside one of their vans.

Now that’s done we’ll move onto the main body of the page.
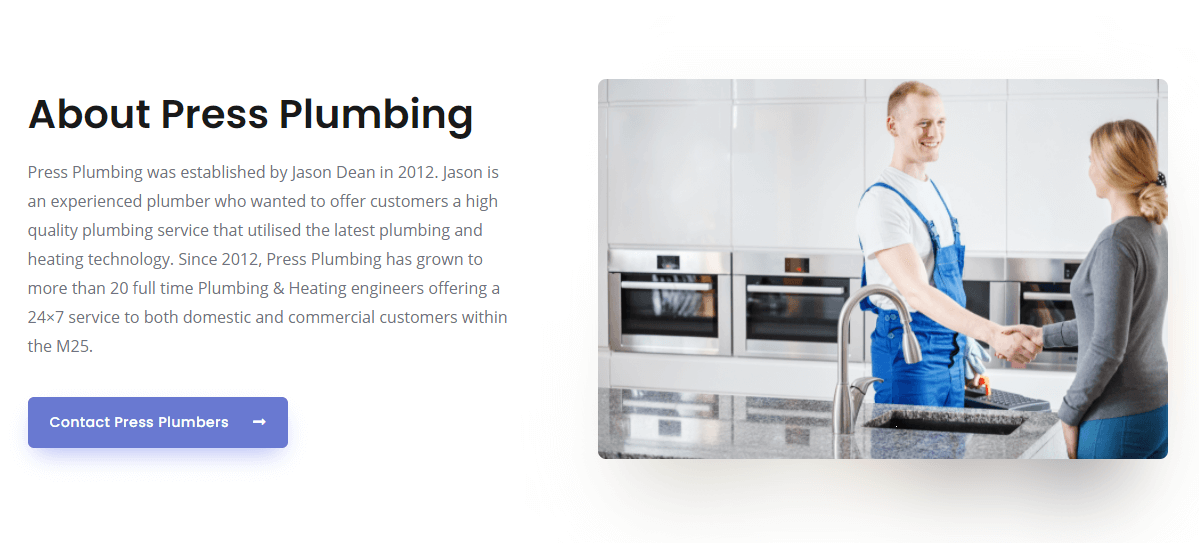
Main Page Content
We really like the initial page layout that has text on the left hand side and a photo on the right so we’ll keep this. All we need to do is update the photo and add some appropriate text.
Try our Award-Winning WordPress Hosting today!


Handily, a button is also included in the Elementor layout and we’ll use this as a mini CTA that directs people to the Contact page. It’s really only the work of 5 minutes and we have the following:
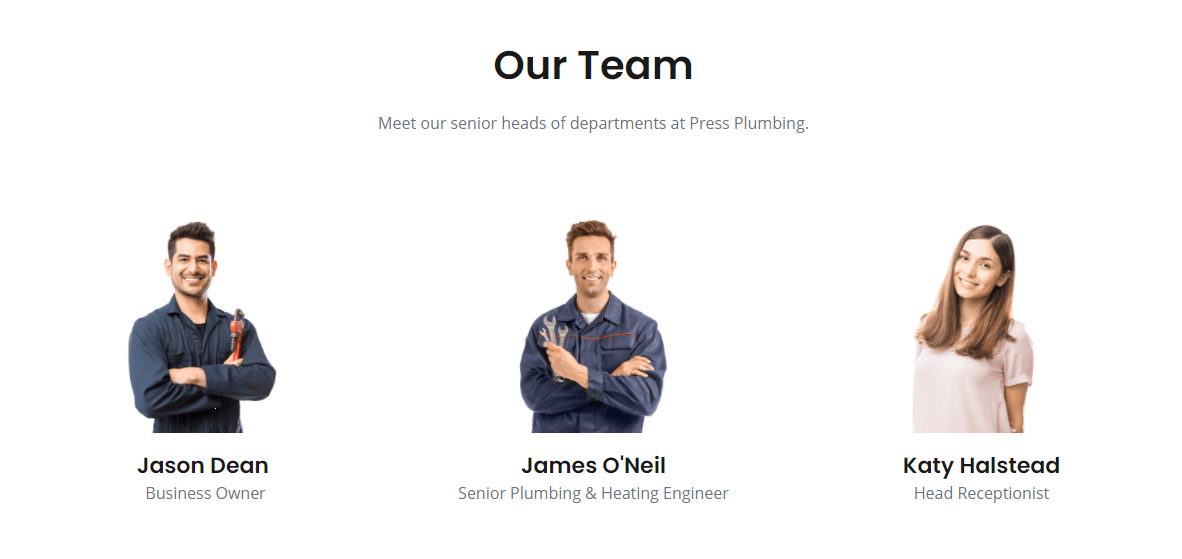
The next section is entitled ‘Our Team’. As mentioned, much of the reason for having an ‘About’ page is that it gives you an opportunity to help build trust between your business and the customer. Therefore it’s helpful if you can have a few biographies and photos of key members of your team. People instinctively want to feel like they know who they are doing business with and this section of your About page offers the perfect opportunity to do just that.
If you wish, you could list every member of your team here but in our case, we’re going to add the details of three key members of the business that customers might come into contact with. The business owner, our senior Plumbing and Heating Engineer and finally our Head Receptionist.
With our key team members added to the website we can now move on to the final sections of our About page. We are going to delete the blue Call to Action section and logo section (although you may wish to add in industry related logos here such as ones that show membership of professional organizations and so on) then add in a larger CTA Elementor button that links to our Contact page. The end result looks like this:
Now this is done let’s move on and get the Contact page setup.
Building our ‘Contact Us’ page
As with our ‘About’ page, Astra themes has given us a great look Contact page that we can now edit with Elementor to suit our needs. We are going to race through setting up our Contact page as the steps are very similar to those taken for the About page.
Step One
Head to the Pages menu in the Dashboard and you’ll see a Contact page ready to go. Click on this and you should see something like this:
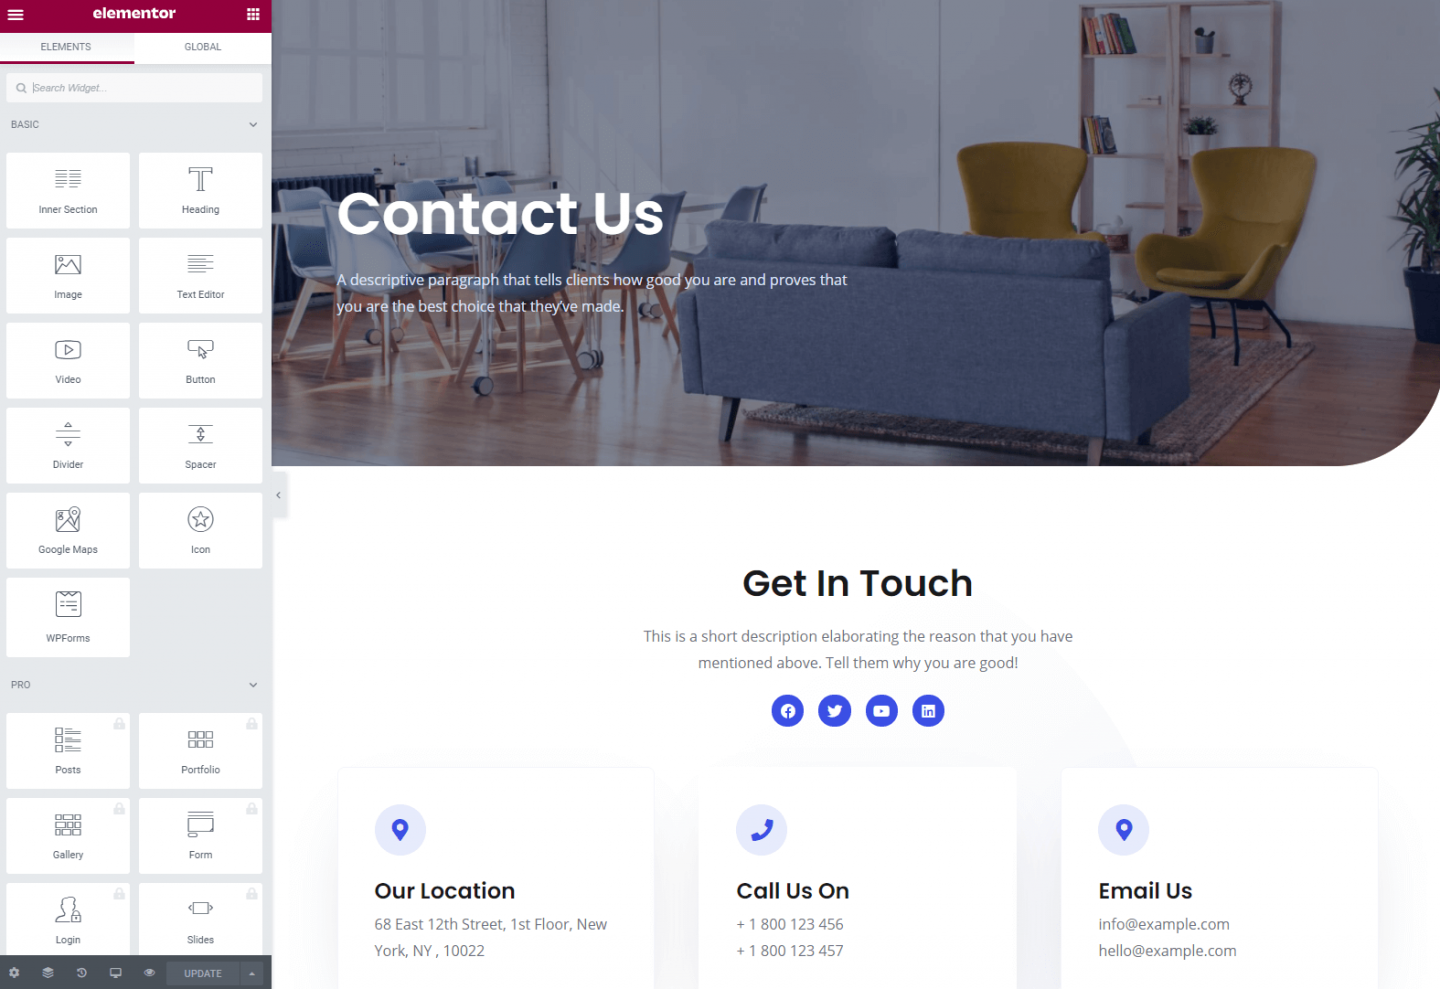
This layout is basically spot on so all we’re going to change is the Hero image and text and then other sections such as email and phone number to ours. We don’t have any social media channels setup yet so for the time being we’ll remove those.
Go ahead and update your page to include your contact details along with a suitable hero image.
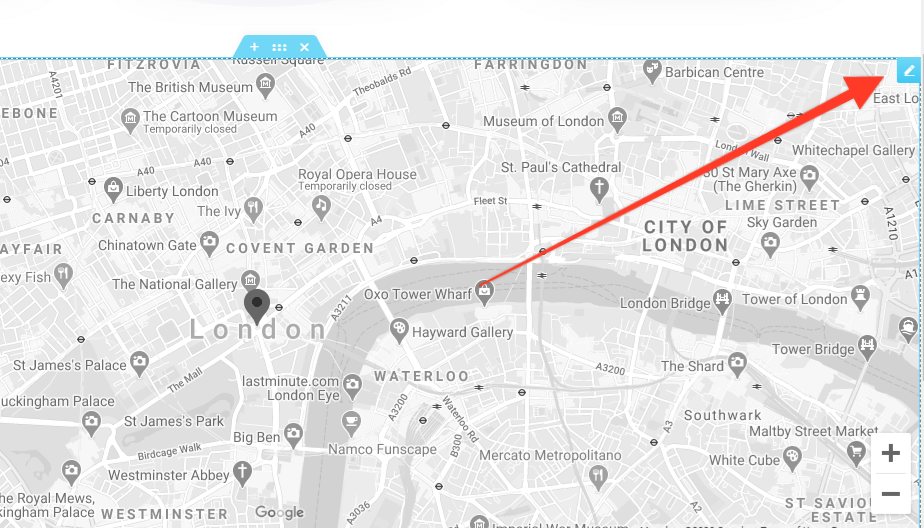
The Map Widget
If you have a physical location that customers can visit then it’s worth showing a map. Elementor make this really easy to do with the map widget. To edit the location hover over the widget and click on the pencil icon (see below). You’ll then be able to enter an address in the Elementor editor which will auto update the map.
The Contact Form
The contact page on any business website is pretty important! After all, you want your customers to be able to get in contact with you easily. We already have an email address and phone number on the website so that’s a good start. However it’s much more common today for businesses to provide forms on their website through which customers can submit enquiries. This is often easier for the customer than sending an email (particularly on a mobile phone).
Our Contact page already has a form added to it that is, however, not part of Elementor. This form contains the core information needed from a customer (e.g. name, email and a message) and has been created by a third-party plugin called WPForms. It’s a free plugin to use that allows you to create simple forms quickly and easily. If more advanced features are required they are available by purchasing the premium version of the plugin.
When it comes to forms on WordPress websites you are spoilt for choice. If you don’t want to use WP forms then try Contact Form 7 which is one of the most widely used free form plugins (with 5+ million installs on websites around the world). Or perhaps Ninja Forms or Gravity Forms… When it comes to forms you really are spoilt for choice!
All these form plugins work in a very similar way. You install the plugin (as you would for any other WordPress plugin) and then, using that particular plugin’s editor, you build your form (normally using a drag and drop builder of some description).
When the form is built you’ll normally have a variety of options when it comes to what to do with any submissions made through the form. The most usual is for these to be sent to an email address but some plugins will keep a copy of submissions in a database that can then be accessed through the WordPress dashboard. Others will integrate with spreadsheets and other systems.
In short, there is very little you CAN’T do with forms on WordPress these days and that’s great!
For our purposes though we don’t need anything fancy. All we want is a simple form that allows customers to send us a message. It’s also fine that this message gets emailed to us and WPForms works perfectly for this purpose.
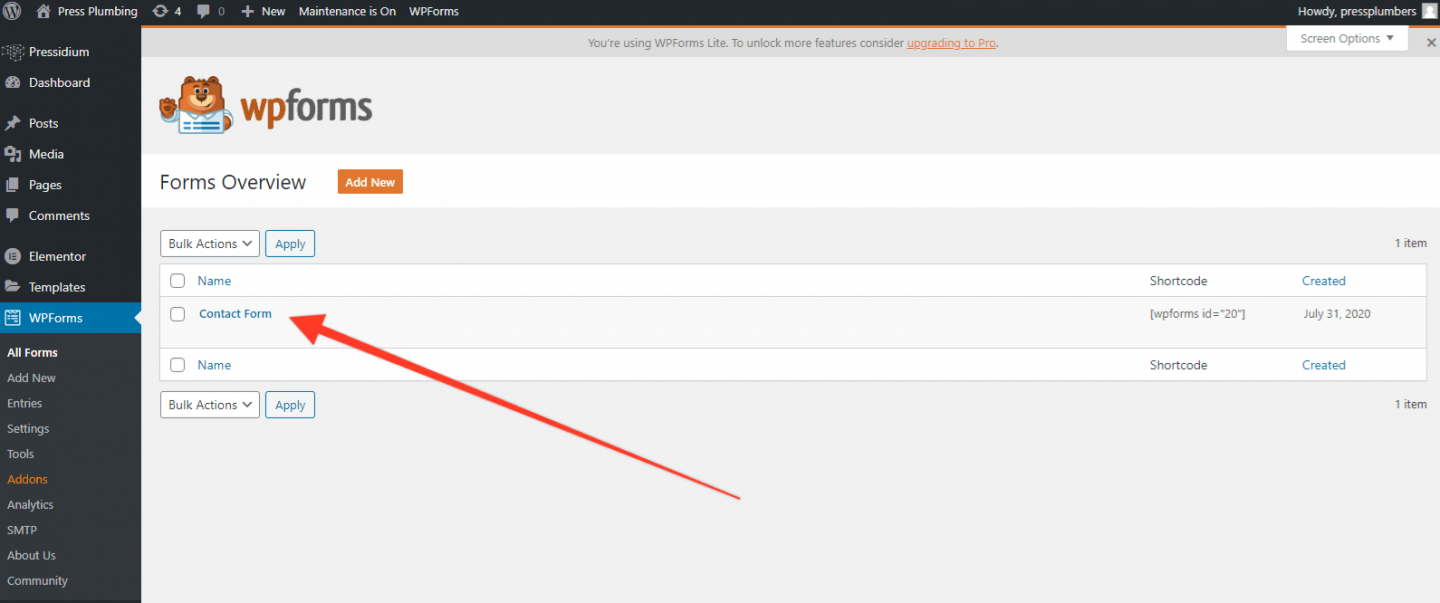
To check the form settings and edit any of the fields you’ll need to head to the WP Admin/Dashboard and find ‘WPForms’ in the menu. Click this to open and then click ‘All forms. You’ll see a pre-built Contact Form on the list. Click to open.
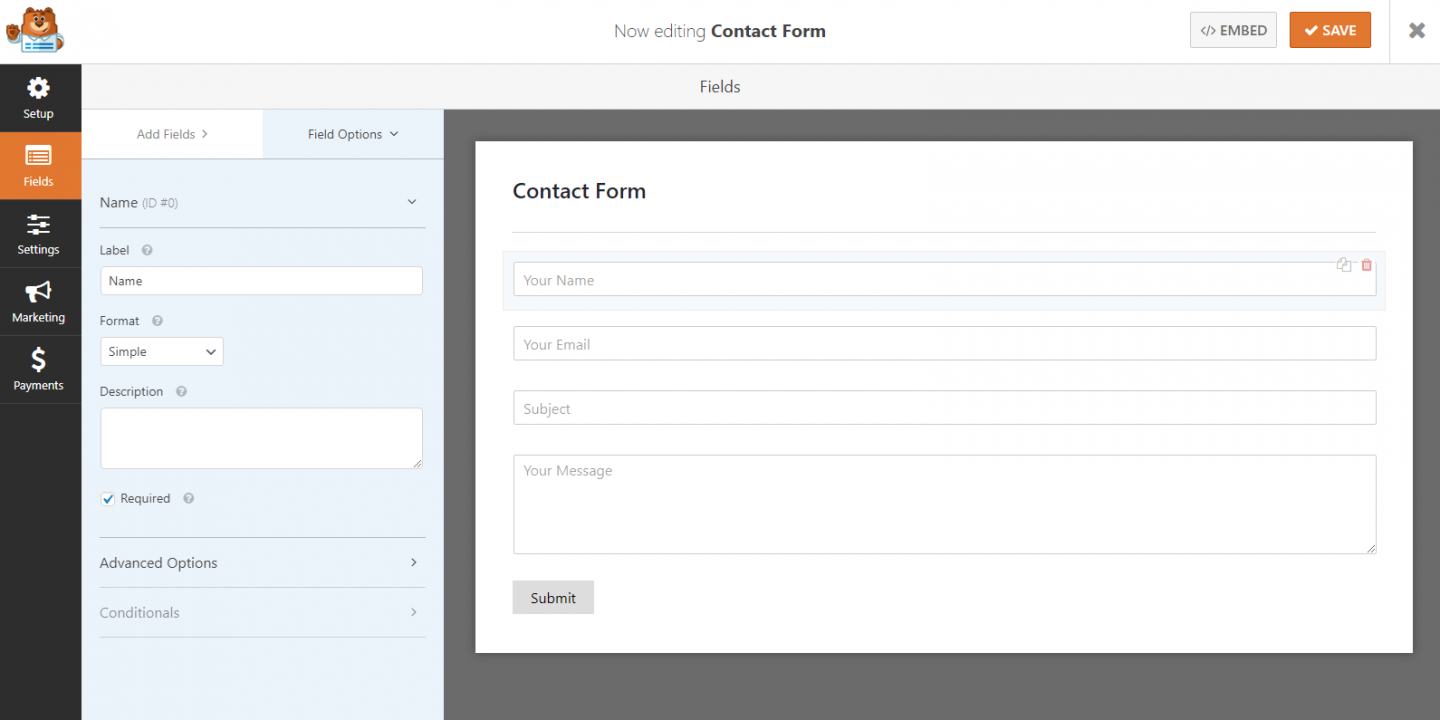
In the form editor, you’ll see that there is a similar setup to the Elementor editor with the ability to drag fields from the left side to the right side where your form is. By clicking on each field you can change the label and also whether or not the field is a mandatory one (it’s a good idea to make at least the email field mandatory).
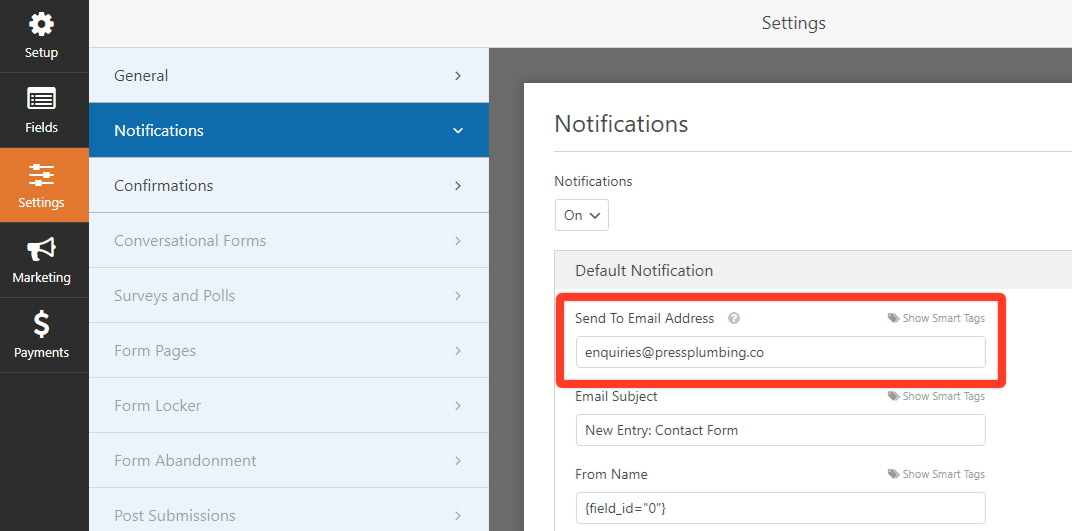
Once you’ve built your form, click on the Save button (top right). Now head to the ‘Settings’ section by clicking on Settings in the left hand menu. Then click on Notifications. You’ll see a default notification which is switched on. You will need to update the email address that you want this notification sent to. In our case we’ll change this to ‘enquiries@pressplumbing.co’. Press save again and then exit the form builder by clicking the ‘X’ (next to the save button).
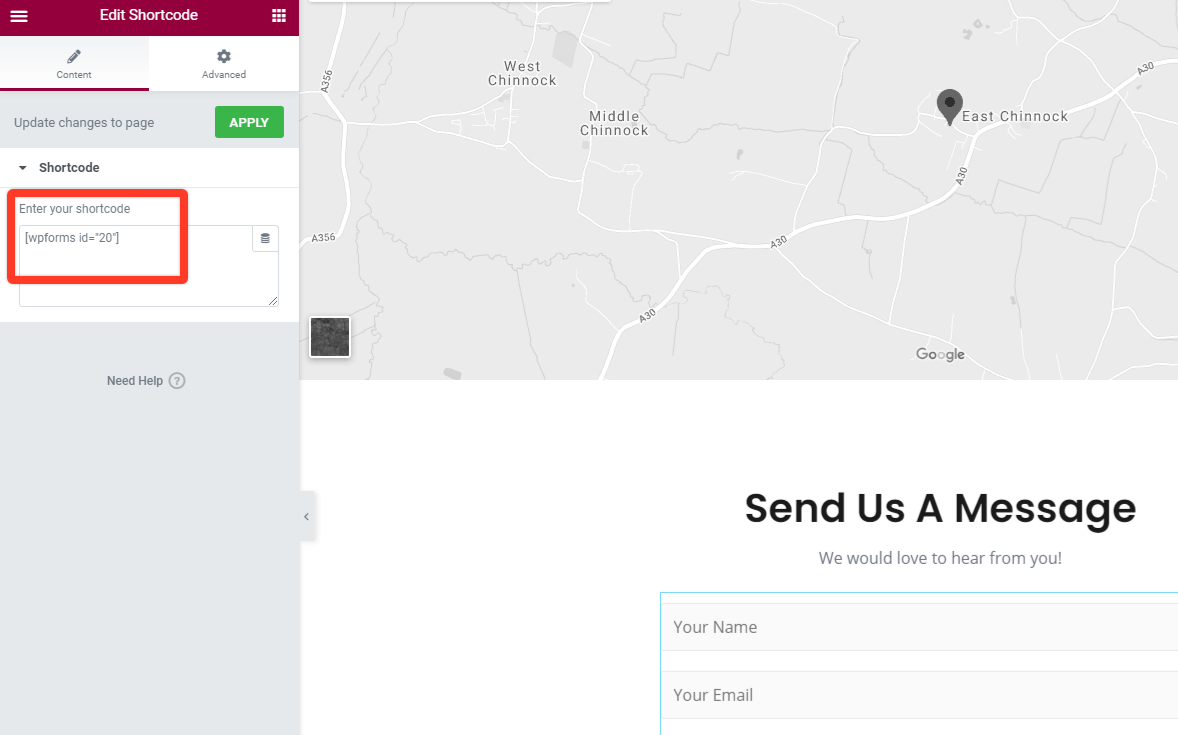
You’ll get back to the list of forms. On the right hand side you’ll notice a ‘Shortcode’ field. A Shortcode is a piece of code that allows you to quickly embed something like a form on a page on your website. This on our form is [wpforms id=”20″].
Copy this code and then head back to your Elementor’s contact page. Scroll down to the form and click on it. The editor will open up and reveal a Shortcode block. As this page has been preconfigured you’ll see the shortcode that we copied pasted in there. If your shortcode is different you’ll need to add this instead to get the correct form to appear on your website. Click ‘Apply’ to save any changes.
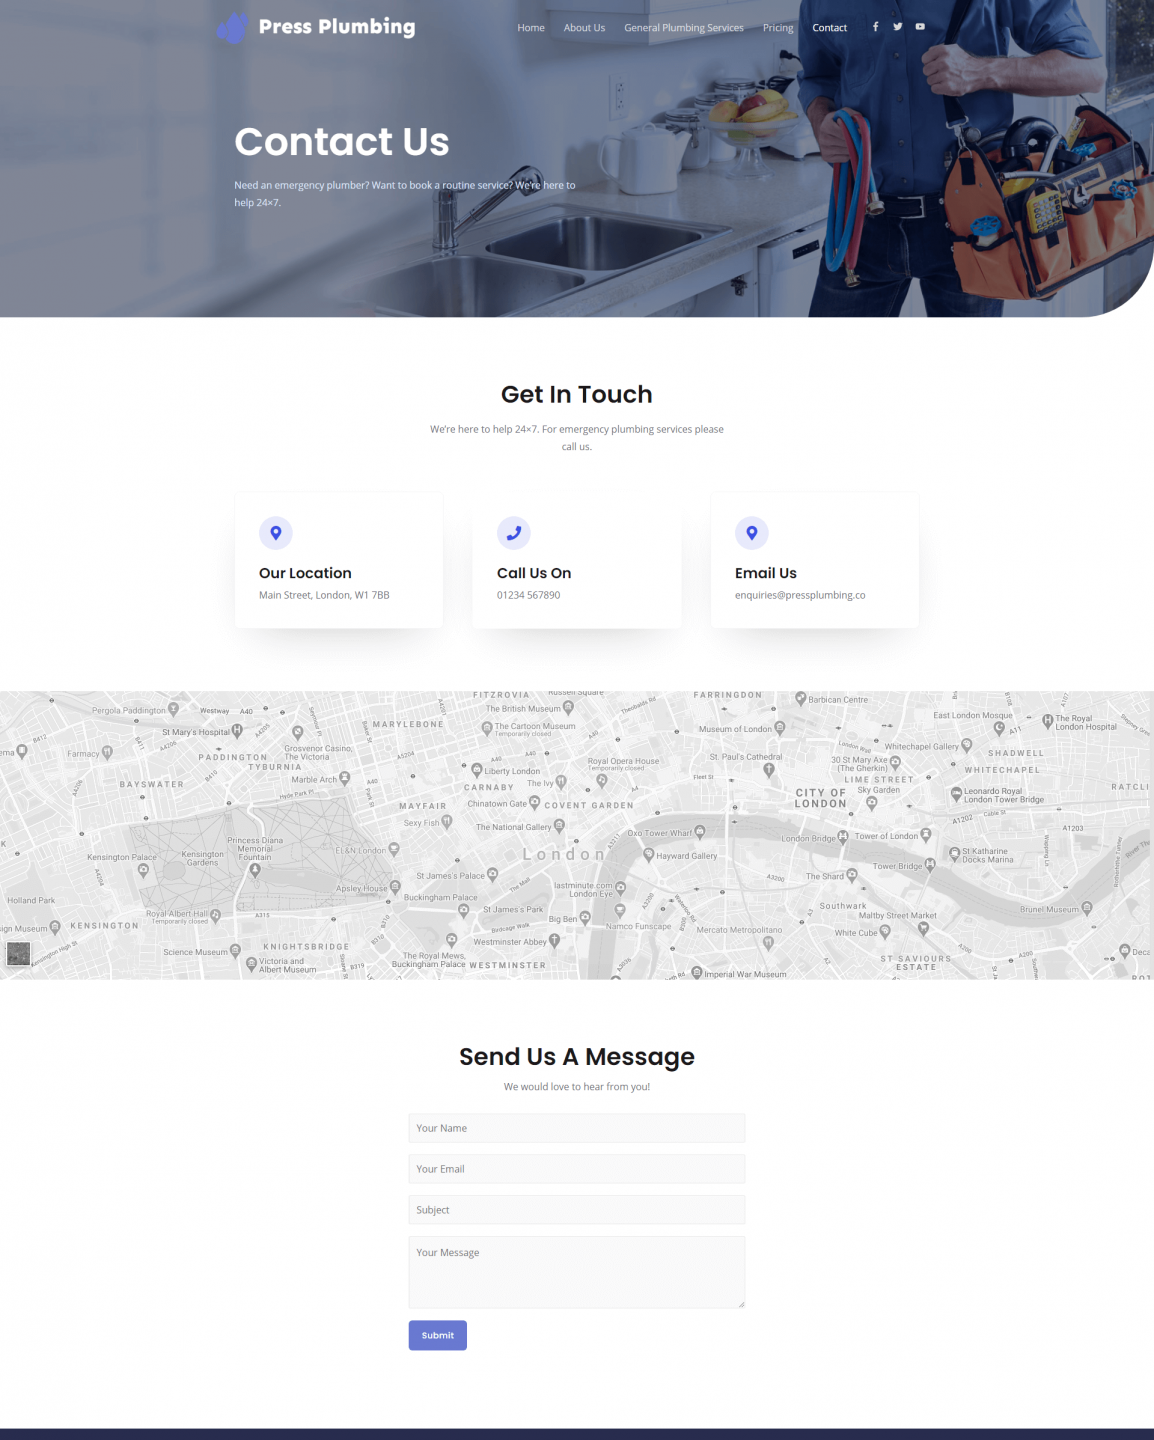
And that’s it! Save your page and exit the builder. If you visit the page you can test out the form and check that you get a copy of the message sent to the email address you entered. Our finished page looks like this:
Our website is almost done!! We now have all our main pages up and running. Outstanding jobs are tweaks to the main menu and then changes to the footer. We are also going to add in a blog and then configure a couple of plugins for optimal functionality and we’ll be ready to go live.
Join us for Part 7 as we get cracking with these finishing touches.
Start Your 14 Day Free Trial
Try our award winning WordPress Hosting!


