

A client portal is a WordPress trend in the form of a dedicated page where your customers can access critical documents, support, and files. It’s a platform that allows business owners to manage client-related resources online.
And since it’s easily accessible, clients can use it themselves, improving their experience and satisfaction levels. And remember, 88% of customers won’t return to use a service after suffering a bad user experience.
Client portals cut across all industries. A photographer will benefit from owning a WordPress client portal. Your clients can upload or download their images through the dedicated client portal.
The same goes for small business owners running a graphic design agency. A WordPress customer portal that allows clients to check their files and info will prove useful. Even companies in the cloud communication niche can use it to answer common queries about using a BYOC system.
This blog is your guide to extending your WordPress into a customer portal capable of holding videos, drawings, and documents. First, we’ll start with a quick look at use cases for client portals.
Why You Need a Dedicated Client Portal
WordPress client portals find use in legal, finance, and service-based businesses. But, the uses for a client portal are not limited to these industries. Below are some of the vital reasons to consider building one for your website:
- Allows you to easily manage all the important details related to your project, services, products, and affiliate marketing niches in one central location.
- A dedicated customer portal allows your customers to find and manage their project details via the same platform.
- A client portal offers financial management capabilities. Clients can send invoices or update their payment details through a dedicated client portal.
- Offers an official record of all files, communications, or conference room set up between your team and individual clients. You can upload files like logos, style recommendations, contracts, and briefs through the customer portal.
- Depending on how much data it can hold, a WordPress client portal can serve your project management needs.
Why Build Your Client Portal on WordPress
There’s always the possibility of using a third-party plug-in or project management platform to achieve the functionalities above. But building a client portal on WordPress offers multiple advantages compared to a project management system. These advantages include:
- A WordPress client portal looks more legitimate since the on-site portal bears similarities to the other pages on your website.
- WordPress client portals have extra functionality that allows clients to find answers to common questions and issues without agent assistance.
- Dedicated WordPress client portals improve brand visibility and convenience.
- WordPress client portals have financial management options that reduce the probability of clients underpaying or making payments to the wrong account.
- Building a dedicated client portal on WordPress allows you to handle support requests and queries right from WordPress. Therefore, you don’t have to worry about getting familiar with new tools.
Effective WordPress client portals allow your customers to manage preferences, profiles, settings, and communications without your input. They don’t have to call a toll free number and waste valuable minutes trying to contact support. Ultimately, it makes your clients’ lives ten times easier.
Try our Award-Winning WordPress Hosting today!


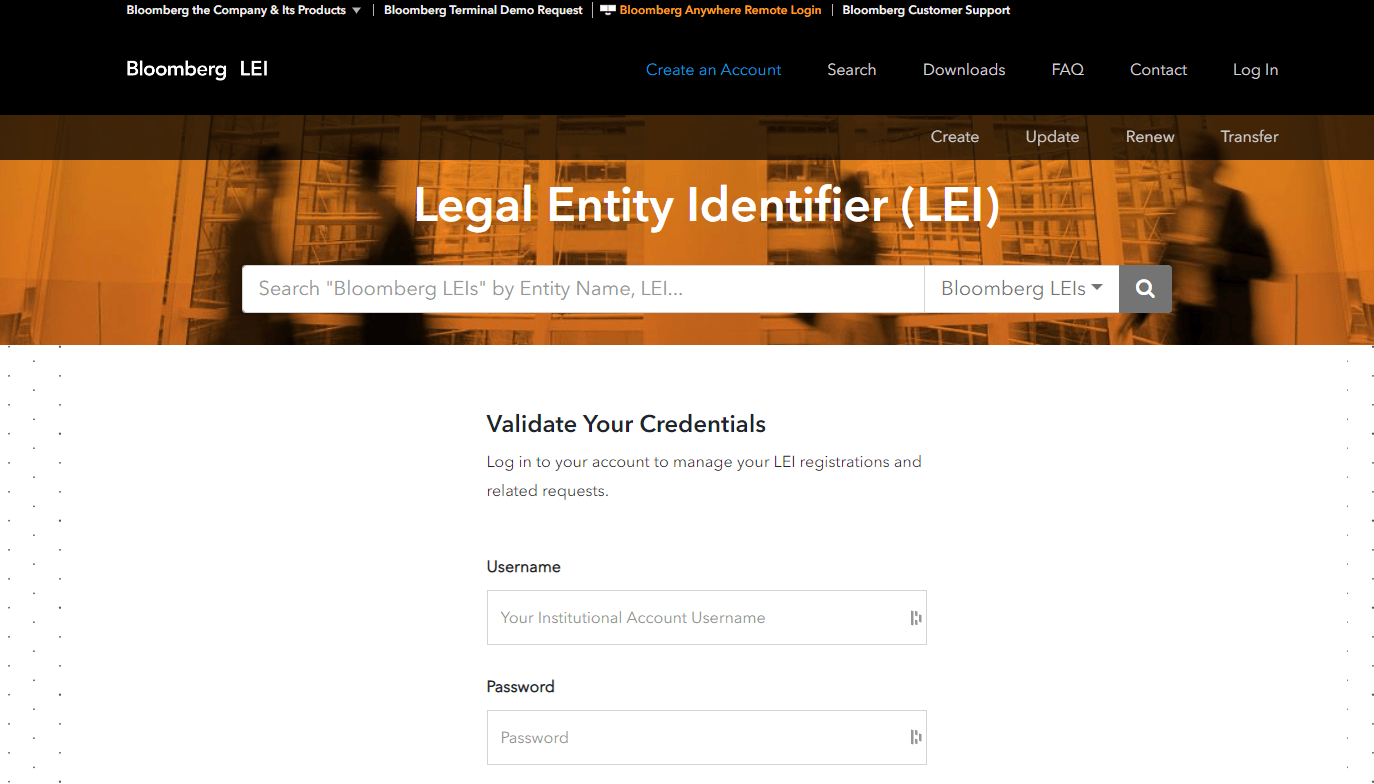
Bloomberg LEI uses a customer portal to service registered users. This client portal allows Bloomberg’s customers to manage their registration, submit requests and questions as they happen.
Comprehensive Guide to Building an Effective WordPress Client Portal
Here’s what you need to do:
Start by Installing a New WordPress Copy
Install a fresh WordPress copy on your development server. The next step is utilizing a Custom Post Type UI plugin, so your custom posts exist independent of the WordPress theme. We also recommend choosing an ‘understrap’ theme providing a boilerplate foundation that allows you to start work fast.
Remove all Default Plugins
Sometimes, your WordPress copy may come with default plugins. If that’s the case, it’s best to delete them. The WordPress plugins you’ll need to build your client portal are “Custom Post Type UI” and “Advanced Custom Fields.”
Add a Custom Post Type
The Custom Post Type UI plugin allows you to create an ultra-new post type tagged ‘customer.’ There is usually a column tagged ‘Post Type Slug.’ One of the mistakes WordPress developers make is neglecting to replace spaces with underscores. Be sure to avoid it!
Be sure to write all nouns in their singular forms. This deliberate move allows you to create custom templates down the line.
Add a Custom Post Type Interface
Fill in both plural and singular labels. You can label the plural form ‘customers’ and the singular one as ‘customer.’ This format is exactly how it’ll appear in your WordPress administrator menu. Utilizing capitalization in these fields will help your WordPress menu appear tidier.
Design a Rewrite Slug
A custom rewrite slug allows for an improved customer experience. A post-type slug with a prefix means new customers in the portal will have a link that resembles this format ‘/tu-customer/example-company.’ It’s an untidy format that you can fix with a custom rewrite slug.
For example, designing the rewrite slug to read ‘customers’ will allow your custom post type to take shape as ‘/customers/example-company.’
Include Support for Custom Fields
The next step is ticking the ‘Custom Field’ option and saving the changes. The last option you’ll need to enable is ‘Supports > Custom Field,’ usually present on the bottom part of the page. Tick this option before adding a new post type to the page’s bottom.
Create Custom Fields
You can now create custom fields and assign them to the recently created post type with support in place. Start by adding a field group tagged “customer portal” before adding custom fields alongside the field button.
Set the field brief as the field type ‘file’ so you can upload files to this location. You can also set the appropriate value as ‘file URL.’
Develop the Fields
The next logical field to add is the ‘brand questionnaire.’ Adding the questionnaire is simpler when using a Google form that customers can fill. And the best field type to achieve this is ‘URL.’
You can also use the same methodology for other fields linked to external services. After adding the fields, find the ‘Location’ box and use the logic command ‘Show if Post Type’ = ‘Customer.’ Then, publish all the fields.
Create a Template File
The best WordPress client portals require a personalized customer dashboard. Achieving this is only possible by following the template hierarchy and creating a template file specifically for the post type. For illustration, you can create a new file tagged ‘single-tu_customer.php’ for the root directory.
Add a Full-Width Single Post Structure
Open your single-tu_customer.php file, then add the get_footer and get_header WordPress functions. And in the middle of these functions, you should create a full-width layout structure that holds content with a custom font compatible with your default WordPress theme.
Create the Content
The best WordPress client portal results come when you use a placeholder to plan your content. You can also use container elements within the <main> element to hold information.
The placeholder mentioned above gives you an idea of the ideal layout structure for your client portal. And you can start to improve on this idea by adding style and design features to the individual elements.
Test the Portal with a Dummy Customer
All the steps above describe the technical aspects of building a WordPress client portal. This step is where you test the results of your hard work.
Start by accessing your administrator dashboard and adding a new customer via the ‘Add New Customers’ button in the left-hand bar. Typically, the system should get a familiar post view. Plus, scrolling down should allow you to view custom fields. You can also use dummy data to check that every feature works seamlessly.
Handle Missing Data Errors
Sometimes, you may forget to add a document. Or perhaps, it’s too early in the development process to make a document accessible. In both scenarios, it can be confusing when the buttons for accessing specific files don’t work.
Therefore, check that all values exist before launching the client portal. This final check lets you tweak the button to display a ‘missing field’ variation for your customers. By doing so, your customers won’t be confused when the allocated button doesn’t work.
Finish the Interface
At this point, you already have the main structure of your WordPress client portal interface. You can use CSS to style it appropriately, ensuring it conforms with your business’ branding needs.
For example, you can use CSS to change the interface’s primary colors, so they align with your brand colors. Another effective step is using introduction text to improve user direction and make the client portal more intuitive — a plus for Shopify fulfillment.
Remove the Portal from Your Sitemap
Custom post types aren’t supposed to be part of your search engine results. Consequently, you’ll need to exclude the post type from your website sitemap. You can achieve this with a meta tag, SEO plugin, or robots.txt.
Create an App
With our portal built and live you might want to consider one last step… creating an iPhone or Android app to complement it! Creating apps used to be something that only large businesses with serious budgets could contemplate but now, thanks to no-code app builders like Appy Pie’s App Builder it is now possible to launch a fully-fledged app that complements your website, quickly easily, and affordably.
Improve Your Customer’s Experience with a WordPress Client Portal
The steps above will help you create a working client portal that services your customers. But you’ve also got to inform your clients about the new portal.
Sending a broadcast newsletter that informs your clients of the portal’s existence will do. Be sure your newsletter introduces the portal, its functions, and effective hacks for using it. This step improves the relationship with your customers while simultaneously fast-tracking the pivot to a client portal. Good luck!
—–
About our Guest Author: Patty Yan is the EMEA Product Marketing Manager for RingCentral Office, the leader in cloud hosting solutions. Patty is passionate about creating value and differentiation, ensuring a better experience for customers and partners. She gained a wealth of international product marketing, product management, GTM and market development experience, across a range of high-tech SaaS in a fast-paced, hyper-growth environment that assumes both strategic and tactical execution. She is not new to UC, starting in Tandberg, then Cisco, driving the launch of video collaboration and services, and Enghouse with global responsibilities for hosted CCaaS. She has also written for sites such as MGID and Storyblok.
Start Your 14 Day Free Trial
Try our award winning WordPress Hosting!


