

After months of work from the Pressidium Development Team, we were very excited to release our brand new Dashboard to all our clients a couple of weeks ago. When you log in to the old Dashboard (previously called the Customer Portal) you will see a banner prompting you to try out the newly designed Dashboard… we’d encourage you to give it a go so you can enjoy the benefits that the new design brings!
Our old Customer Portal has done us proud… launched back in 2014, the same basic design has remained with just a few tweaks here and there over the years. It was starting to show its age however and we were excited by the possibility of building a brand-new Dashboard completely from scratch.
The new Dashboard design is not only more consistent, simpler and cleaner but includes some new features that will make managing your portfolio of websites even easier. Let’s take a look around!
Logging In
First things first… to log in you’ll need to go to a new address – dashboard.pressidium.com. The old control panel will remain available for a period of time but we’d encourage you to bookmark the new address and start using the new version. Your login credentials are the same for both the old and new versions.
When you’ve logged in, you’ll see your ‘Team’. You can invite multiple users into your team, each of who will have access to different websites and resources, as specified by you (more on that later). To begin, click on your Team name. If you don’t like the name of your team you can change this by clicking on the Pencil icon (as shown below).
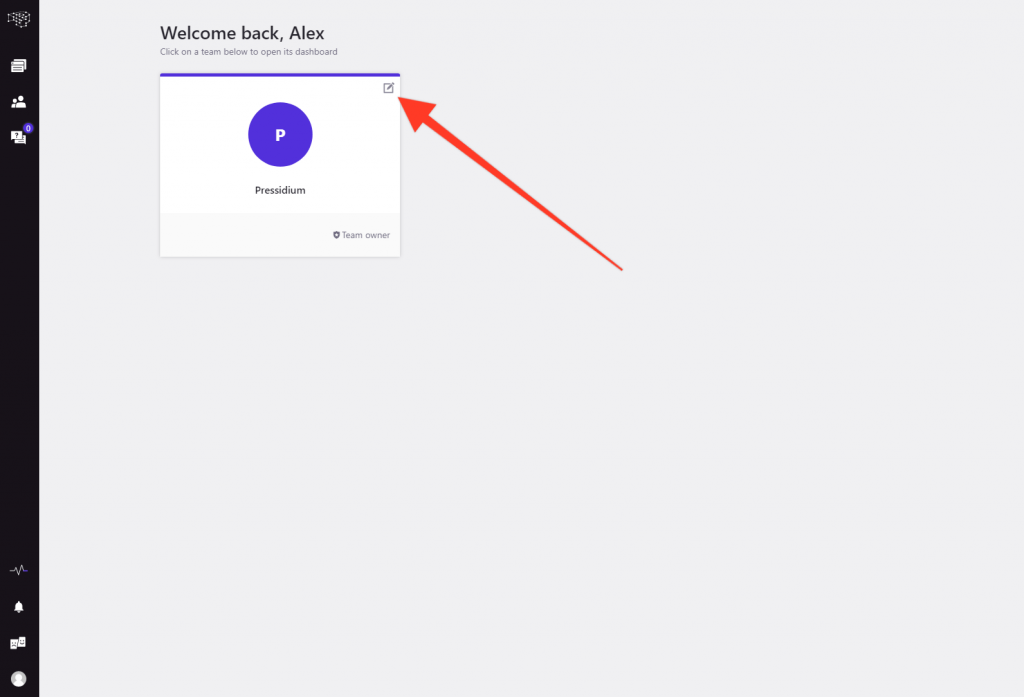
Once you’ve clicked on your Team name you will be presented with a list of your websites along with specific data relating to your Pressidium Plan usage including the number of websites on your plan (and the total number allowed), overall storage, the number of unique visits your websites have had this month and also your CDN usage (if enabled).
Spinning up a New Website
Alongside the search bar (which allows you to quickly find a specific site… great if you have more than a handful linked to your account) are two buttons… ‘New’ and ‘Migrate’. Click on the New button to spin up a fresh WordPress install or alternatively hit ‘Migrate’ to move a website to Pressidium.
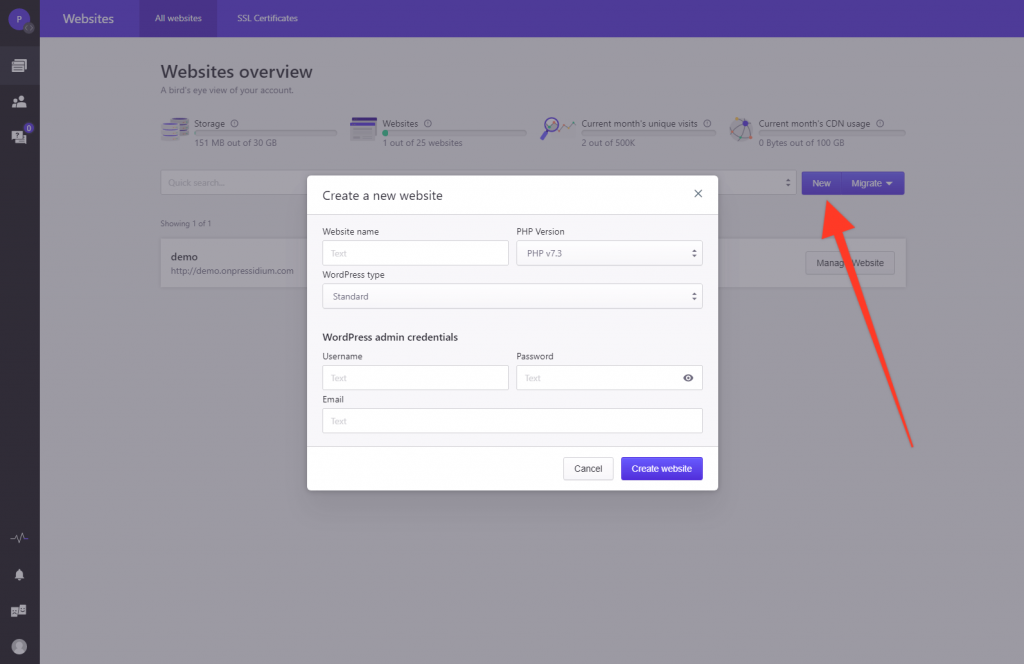
When you hit the ‘New’ button, you will be presented with a popup window that allows you to specify the name of the website, the WordPress type, the credentials for logging into the site and even the PHP version you wish to use. Within a minute or so from filling in these details and hitting ‘Create Website’ you will receive an email notification that your new website has been provisioned and is ready to go. It will now also appear in the list of websites.
Managing your Website
Click on one of your websites from the list on the main page and you will see our completely redesigned Production environment management panel. This panel allows fine-grained control over the domains connected to your site, backups, SFTP access, Database control, logs, and further settings.
Try our Award-Winning WordPress Hosting today!


The Overview Screen
The initial screen you see is the Overview screen. As the name suggests, this provides an overview of your website install including the domain linked to the website, the last 3 months usage (including unique visits and storage), quick access to certain settings including WP_DEBUG and also our incredibly useful Plugins and Themes panel.
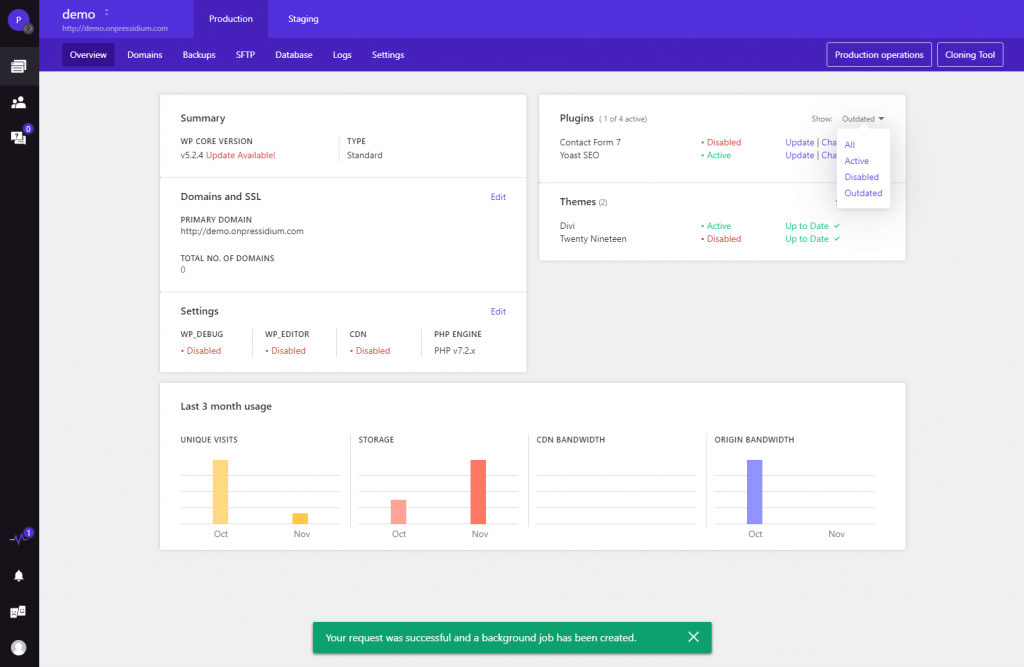
We all know the importance of keeping plugins up-to-date but when you have more than one website on the go it can become hard work. Now, at a glance, you can not only see what versions of your plugins you are running but you can update them with a single click!
The changelog button provides all the info you need about the new version and the handy filter to the right of the plugin panel means you can opt to just see plugins that need updating. This makes it a breeze to keep on top of your WordPress maintenance jobs!
The Domains Screen
From here you can link domain(s) to your WordPress install. The freshly designed domain installation guide walks you through the process making it even easier to configure your domain correctly.
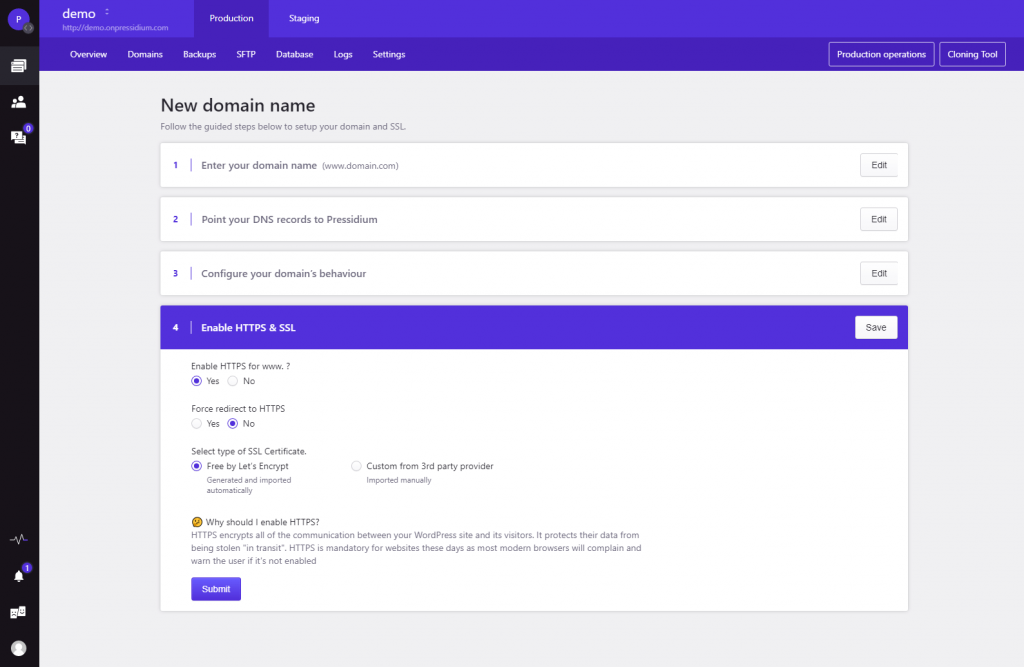
Previously you would have needed to setup an SSL certificate using a separate module in the old Customer Portal. Now, you are able to complete the setup of your SSL certificate (either your own or from Let’s Encrypt) as part of the domain configuration process.
The Backups Screen
Backups are critically important for any WordPress website and have always been a key component of the Pressidium Platform. Now they are even easier to manage.
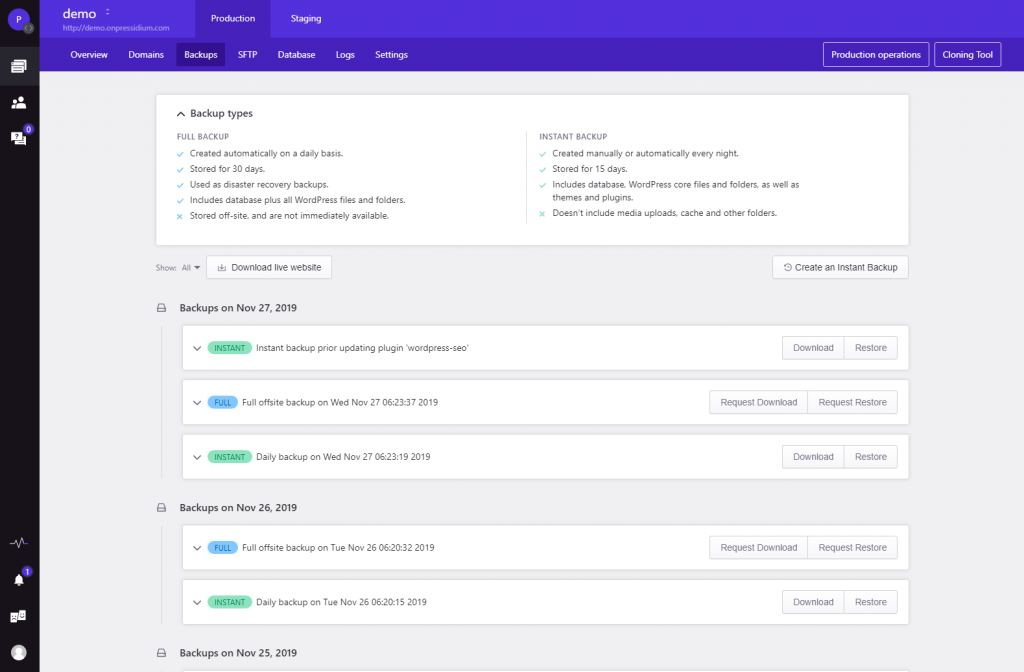
Click on the Backups tab and you will be presented with a list of current backups, both Instant (snapshot) backups and daily Full Offsite backups. You can choose any of these backups and process a restore with just a couple of clicks.
The SFTP Screen
Sometimes its’s necessary to SFTP into your site. We provide a default SFTP User for each website but when you’re asking a developer or other third party to work on your site you can create a set of new SFTP credentials for them, meaning you don’t have to divulge your own login details and can revoke their access at any time should you wish.
The Database Screen
The database screen allows you to easily manage your WordPress site’s MySQL database.
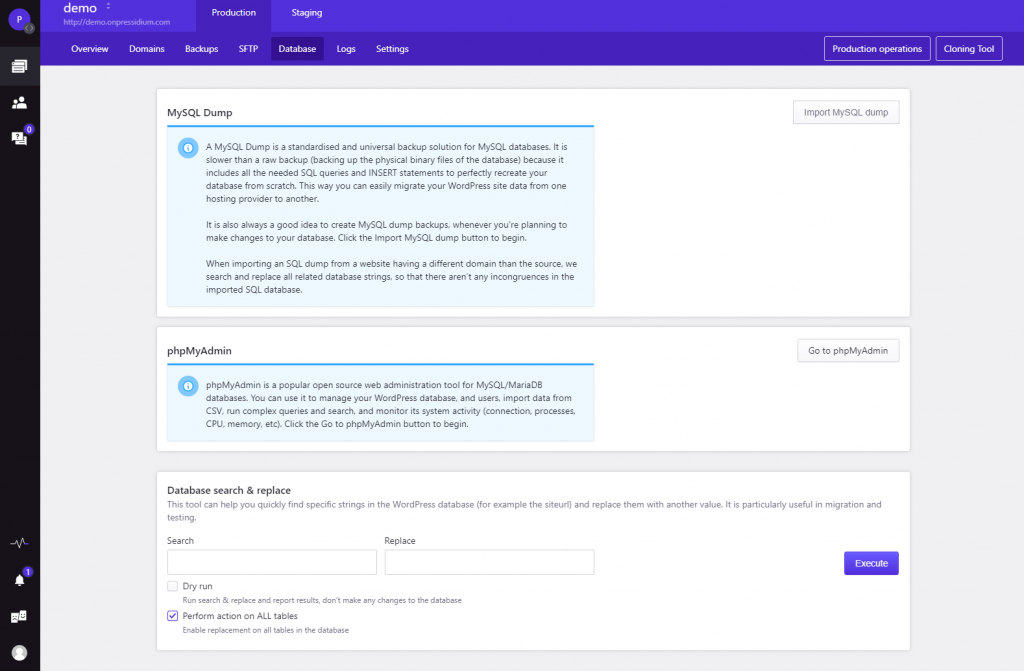
You can quickly import a MySQL database dump, access the database via phpMyAdmin with a single click and also take advantage of our brand new ‘Database Search & Replace’ tool negating the need for any third-party search and replace tools.
The Logs Screen and Settings Screen
Want to dig into your website’s Error and Access logs? You now can from the Logs screen.
Head to the Settings screen where you can change your website’s PHP version as well as enable the WP Editor, WP_DEBUG and choose to serve your website from a CDN.
Finally, you can also delete your website (Production & Staging) from the Settings Screen. Click with care!!
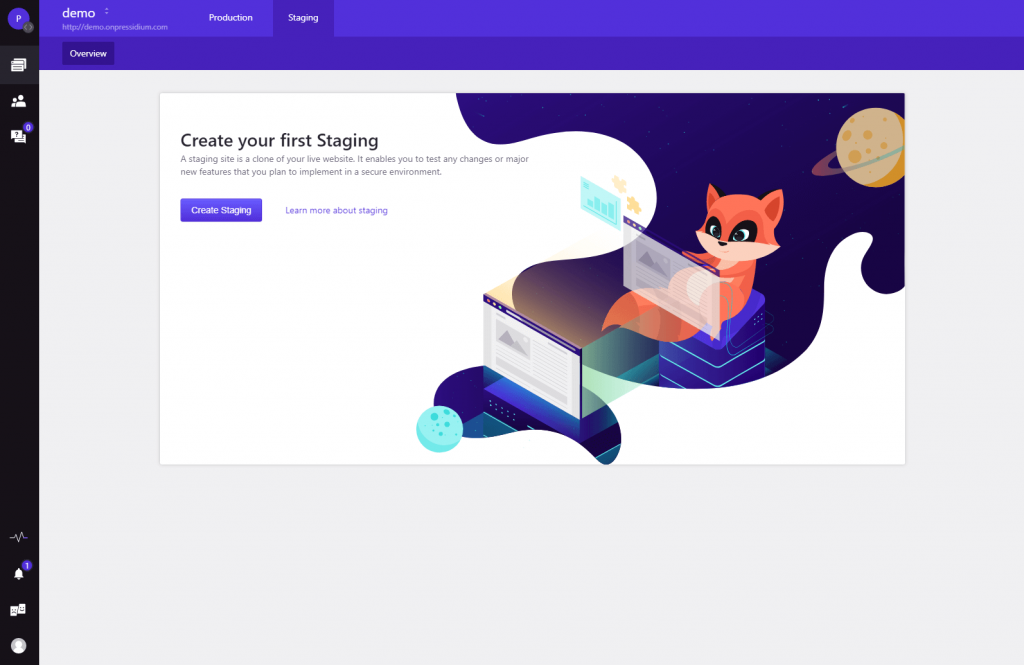
Reimagined Website Staging
Whether you’re updating a plugin or making more serious changes to your website has never been without risk… especially if you have a lot of traffic hitting your site all day long. Staging websites are the answer. We’ve offered our clients the ability to quickly spin up a staging website from day one and they’re a hugely popular feature.
With the release of our new Dashboard we took the opportunity to enhance how our staging feature works by building in the same feature set that is available in the Production environment. This now means the following features are available from within the Staging environment:
- Backups – you can now view and restore backups taken from your Staging site. This means you have the same peace of mind when working on your Staging site as you currently do on your Production site.
- SFTP Users – Separate SFTP login credentials can now be created for your staging sites.
- Database Management – Fine-grained control over your staging site’s database is now available via the Database Screen.
- Plugin Updates – You can now update plugins on your staging site from the Dashboard.
All of these improvements make staging sites even more useful. Never again need you run the risk of ‘breaking’ your production site!
To get started with a Staging site, head to the Staging tab and click on ‘Create Staging’. You’ll be notified when your staging site is ready.
Staging sites are also very handy when it comes to rolling out design changes to your site at a certain point in time. For example, if you know you want to change your website design to promote your Black Friday sale but don’t want to publish these changes until back Friday, you can use a Staging site to handle this.
To get started, create a Staging copy of your site. Then login to the Staging version of your site and make the required design changes. You can test and make sure you are happy with everything without having any effect on your live website. Then, when you’re ready to unveil your changes to the world (like first thing on Black Friday) all you need to do is push your staging site to your production environment. It’s as easy and seamless as that!
Managing Your Team
If you’re working as part of a team it can be incredibly useful to be able to generate unique logins for your Pressidium Dashboard for your team members. Our comprehensive Team management feature allows you to assign user roles with different levels of access including:
- Team Admin – Full access to the Dashboard.
- Websites Admin – Access is restricted to certain websites specified by you.
- Billing Admin – Access is restricted to billing information.
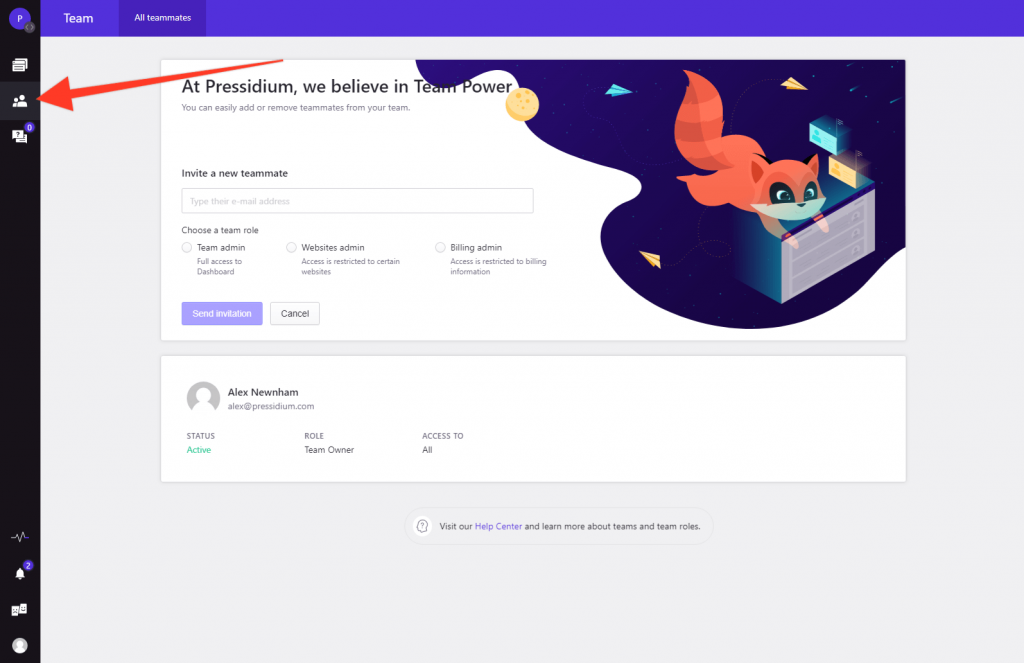
To configure access roles, click on the Team tab on the left of the screen and then begin inviting teammates.
Support When You Need It
We believe in offering the highest levels of support to our clients. With response times of 5 minutes or less on our Enterprise plans, you can be confident that we’ve got your back when it matters the most.
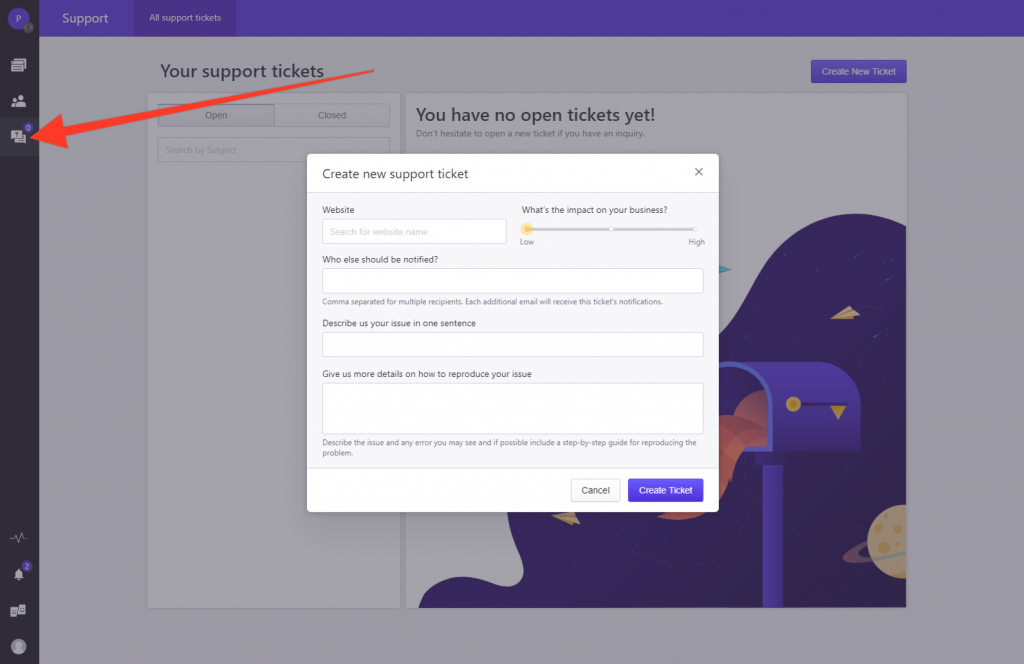
To get in touch with our Support team you can quickly raise a support ticket from within the Dashboard. Just click the Support tab on the left of the screen and we’ll get back to you asap!
This is Just the Start!
We are working behind the scenes to continually improve the new Dashboard and have several new features that will be rolled out soon including:
- Analytics (coming very soon!)
- Cache Management
- Web Application Firewall (WAF) Management
We’re always happy to hear your feedback on the design and, if there are any features that you feel are missing that would help you do let us know.
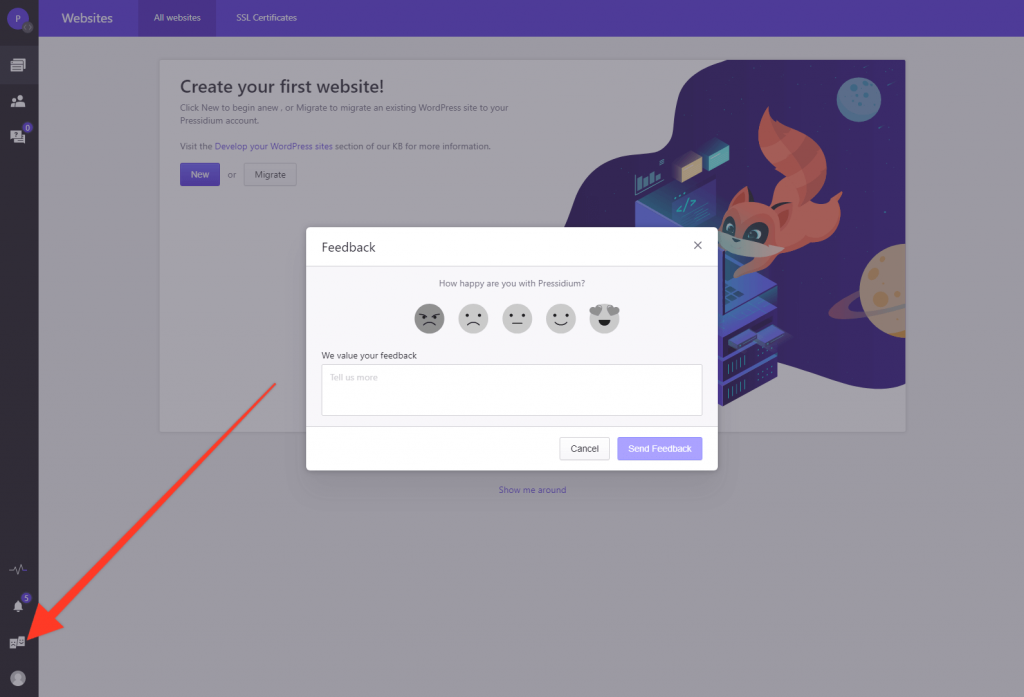
You can do this quickly and easily via the feedback tab located on the left of the Dashboard.
We hope you enjoy using the new Dashboard!
Start Your 14 Day Free Trial
Try our award winning WordPress Hosting!


