

If you are not familiar with the Walker Class get ready to be amazed by how helpful it can be for your work. The WordPress Walker Class was implemented in WordPress 2.1 to provide developers with a means to traverse tree-like data structures for the purpose of rendering HTML. In this article we will study how the walker parameter works and how to customize the outputs in menus, categories and comments.
Let’s get going!
Walker Class Overview
In WordPress, we frequently see objects that have an hierarchical structure such as navigation menus, category lists or comment lists
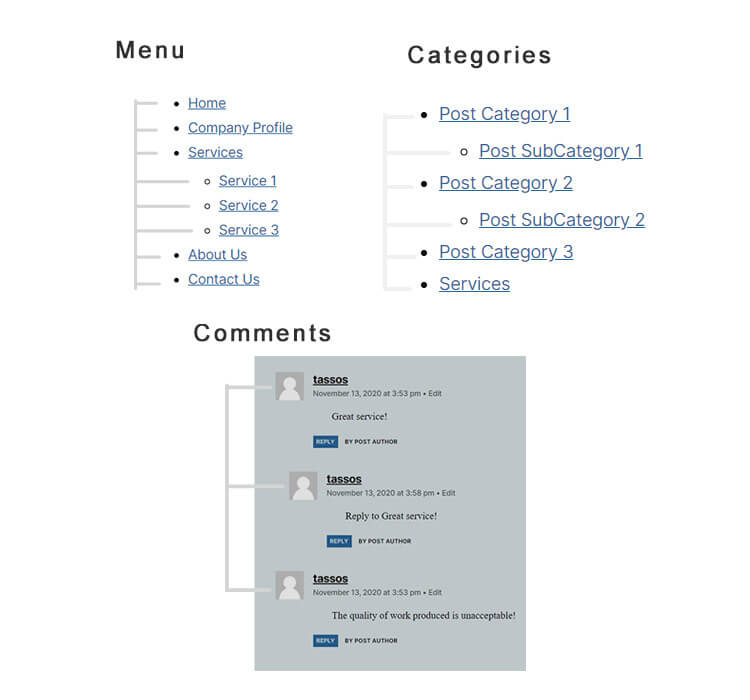
As you may already know, in the case of a tree-data structure, some elements are parents and others are their children. “Post Subcategory 1” is a child to “Post Category 1”, a reply to a comment is a child comment to the comment itself, and “Service 1” is an child menu item to the “Services” item.
The Walker is named as such as it simply “walks” through each object or associative array and executes a function at each node. What we would like to achieve with this is the ability to list the ‘top level’ links, with their their ‘child’ items in different ways according to our specific requirements.
In other words, WordPress gives you a standard <ul> <li> structure and you can customize its arguments, but, by extending the Walker you can customize the structure itself by modifying its HTML content.
The core file related to the Walker Class is wp-includes/class-wp-walker.php and it governs all the types of tree-like data we previously listed.
Try our Award-Winning WordPress Hosting today!


As it is an abstract PHP Class, in order to generate any HTML, it has to be extended by the developer who will define a customized version of its properties and methods. So let’s study the child classes in the class-wp-walker.php file one by one.
Child Classes
The $tree_type is an optional variable that comes in a type or array of types and defines what the class handles.
public $tree_type = array( 'post_type', 'taxonomy', 'custom' );The $db_fields is a required variable and defines which database fields to use. This property is an array with two keys: ‘parent’ and ‘id’ whose values are the names of the object properties that hold the parent id and item id, respectively.
public $db_fields = array(
    'parent' => 'menu_item_parent',
    'id'     => 'db_id',
);
The $max_pages property is optional too and its role is to specify the maximum number of pages walked by the paged walker.
public $max_pages = 1;The $has_children is actually self-explanatory and has a true or false value depending on whether the current element has children.
public $has_children;The start_lvl method is executed on the root of a new tree-like object and takes the $output, $depth and $args arguments.
public function start_lvl( &$output, $depth = 0, $args = array() ) {}The $output argument appends additional content, the $depth specifies the depth of the item and $args is an array of additional arguments.
The end_lvl method closes whatever tag was previously opened by the start_lvl method.
public function end_lvl( &$output, $depth = 0, $args = array() ) {}The start_el (Start Element) method is used to display the opening HTML tag for the current element. In case of a menu, for example, it is usually a <li> tag.
public function start_el( &$output, $object, $depth = 0, $args = array(), $current_object_id = 0 ) {}The end_el function is called after the Walker passes an element with all it’s children and returns a closing tag.
public function end_el( &$output, $object, $depth = 0, $args = array() ) {}The display_element actually displays the elements of the tree object. It calls start_el, start_lvl, display_element, end_lvl, end_el functions in this order. Now let’s take a look at its arguments.
- $element: the current element
- $children_elements: all child elements of the tree object
- $max_depth: the maximum depth limit we can explore
- $depth: The level we are currently at
- $args: additional optional arguments
- $output: The current HTML output.
We will now demonstrate one example for each data type by using a WordPress installation with the Twenty Twenty theme activated.
The wp_nav_menu() function that WordPress uses for displaying menus is included in the wp-includes/nav-menu-template.php file. In this file, WordPress also calls for the Walker_Nav_Menu Class around line 605.
function walk_nav_menu_tree( $items, $depth, $r ) {
    $walker = ( empty( $r->walker ) ) ? new Walker_Nav_Menu : $r->walker;

    return $walker->walk( $items, $depth, $r );
}
The Walker_Nav_Menu class is defined inside the wp-includes/class-walker-nav-menu.php file and it basically is all the file’s content.
In order to display the output of the menu, WordPress code uses the properties and methods of the Walker_Nav_Menu Class described inside this file.
Let’s for example fix a well known problem many developers face which is to change the element for parent menu items with an empty custom link (‘#’) in order to prevent visitors from clicking them.
To enable us to compare our results we will first create a clone of the primary menu by just adding the code below in the header.php right after the start of the <header>element.
<header id="site-header" class="header-footer-group" role="banner">
<?php
    wp_nav_menu( array(
        'menu_class' => 'primary-menu reset-list-style'
    ) );
?>
What we actually did here was to regenerate the primary menu and inherit its drop down functionality and CSS by adding its classes primary-menu reset-list-style to the new menu as well.

Now in our functions.php file we will create a class that extends the Walker_Nav_Menu class. Since we want to change the type of element we will override the start_el method.
if ( !class_exists('My_Custom_Nav_Walker') ) {
    class My_Custom_Nav_Walker extends Walker_Nav_Menu {
        function start_el(&$output, $item, $depth=0, $args=[], $id=0) {
            $output .= "<li class='" .  implode(" ", $item->classes) . "'>";
            if ($item->url && $item->url != '#') {
                $output .= '<a href="' . $item->url . '">';
            } else {
                $output .= '<span>';
            }
            $output .= $item->title;
            if ($item->url && $item->url != '#') {
                $output .= '</a>';
            } else {
                $output .= '</span>';
            }
        }
    }
}
So we wrapped each element normally with a <li> tag and then, with the use of the if statement appended a span when a link is “#” and an <a> tag for the rest.
To apply this to our menu we head back to the menu code we added previously and specify the walker parameter:
wp_nav_menu(
    array(
        'walker' => new My_Custom_Nav_Walker,
        'menu_class' => 'primary-menu reset-list-style'
    )
);
Now the result should look like this:

If you now hover over the ‘Services’ in the menu item no hand cursor will appear and neither is this menu item clickable. The drop down submenu will still be correctly shown however.

Customizing Categories
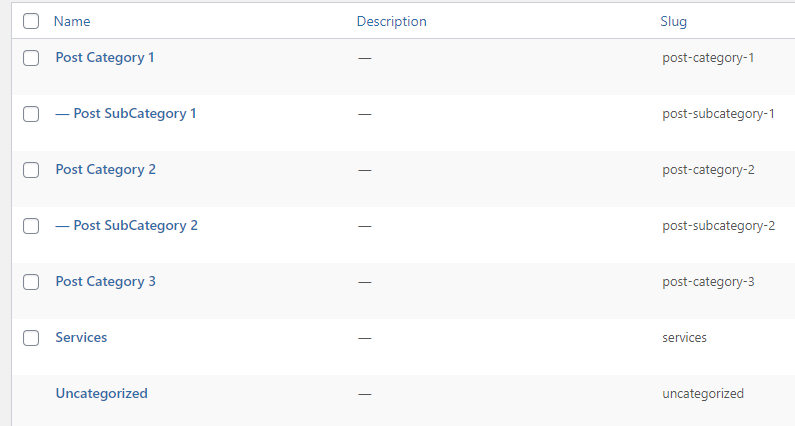
First go in the admin area and create some post categories and subcategories in order to have a category tree for the demonstration.
After that we will generate a category list by adding this code somewhere in the header.php. You can put it after the start of the header element as previously.
<header id="site-header" class="header-footer-group" role="banner">
<?php
    wp_list_categories( array('hide_empty' => FALSE) );
?>
The function is a built-in WordPress function that generates an HTML output of a category tree. By default it shows only the categories that contain posts that is why we used the hide_empty option to display the empty categories as well and see the whole hierarchy for the purposes of this example.

As previously we can create a custom class in functions.php to extend the default Walker_Category Class that is described in the wp-includes/class-walker-category.php file and apply our changes. For example, we will add some icons before the category names by adding this code:
if ( !class_exists('My_Category_tree_Walker') ) {

    class My_Category_tree_Walker extends Walker_Category {

        function start_el(&$output, $item, $depth=0, $args=array(),$current_object_id = 0) {
        $output.= '<li><a href="'.home_url('category/'.$item->slug).'">
        <img src="http://path/to/mages/'.($item->slug).'.jpg">
        '.esc_attr($item->name);
        }

    }

}
For this to work you would of course need to prepare suitable images and save them in the defined folder. These images would need to follow a specific name format which in this example would be “post-category-1”, “post-subcategory-1”, “post-category-3.jpg” etc.
Customizing Comments
Updating the menu and categories list is by far the most common reasons why you might customize a Walker Class, but sometimes you have to implement the same technique for comments as well. If, for example, you want to change the meta info next to the Gravatar image in the comments section, we can easily do this by extending the Walker_Comment Class found in the wp-includes/class-walker-comment.php file.
In the functions.php file add this code
if ( !class_exists('My_Comment_Walker') ) {

    class My_Comment_Walker extends Walker_Comment {
        protected function html5_comment( $comment, $depth, $args ) {
            $tag = ( 'div' === $args['style'] ) ? 'div' : 'li';
            ?>
            <<?php echo $tag; ?> id="comment-<?php comment_ID(); ?>" <?php comment_class( $this->has_children ? 'parent' : '', $comment ); ?>>
                <article id="div-comment-<?php comment_ID(); ?>" class="comment-body">
                    <footer class="comment-meta">
                        <div class="comment-author vcard">
                            <?php if ( 0 != $args['avatar_size'] ) echo get_avatar( $comment, $args['avatar_size'] ); ?>
                            <?php printf( __( '%s <span class="says">says:</span>' ), sprintf( '<span class="fn">%s</span>', get_comment_author_link( $comment ) ) ); ?>
                        </div><!-- .comment-author -->

                        <div class="comment-metadata">

                            <?php
                            $user_id=$comment->user_id;
                            ?>
                            <p class="commenter-bio"><?php the_author_meta('description',$user_id); ?></p>
                            <p class="commenter-url"><a href="<?php the_author_meta('user_url',$user_id); ?>" target="_blank"><?php the_author_meta('user_url',$user_id); ?></a></p>

                        </div><!-- .comment-metadata -->

                        <?php if ( '0' == $comment->comment_approved ) : ?>
                        <p class="comment-awaiting-moderation"><?php _e( 'Your comment is awaiting moderation.' ); ?></p>
                        <?php endif; ?>
                    </footer><!-- .comment-meta -->

                    <div class="comment-content">
                        <?php comment_text(); ?>
                    </div><!-- .comment-content -->

                    <?php
                    comment_reply_link( array_merge( $args, array(
                        'add_below' => 'div-comment',
                        'depth'     => $depth,
                        'max_depth' => $args['max_depth'],
                        'before'    => '<div class="reply">',
                        'after'     => '</div>'
                    ) ) );
                    ?>
                </article><!-- .comment-body -->
            <?php
        }
    }

}
As you can notice by comparing the about code with the contents of the original Walker_Comment, the only change necessary was in the html5_comment method which basically outputs a comment in HTML5 format.
After that we have to display the comments list by using the built-in wp_list_comments function with the right arguments to display the comments tree-like object HTML.
wp_list_comments( array(
  'page' => 143,
  'walker' => new My_Comment_Walker
));
We inserted the code in the same line of header.php that we did before and used the ID of the post that contains the comments. Of course, you can simply replace the comment related code of your template instead and skip the ‘page’ option so that it applies to all of your articles comment section.
If you refresh your website front end now you will notice the extra info entries (author bio and author URL) that we added in the custom code above.

Hopefully, the above has given you some insight into using the WordPress Walker Class.
In all the examples, we applied changes directly to the core theme files. Whilst that’s fine for demonstration purposes, you’ll obviously want to make sure you only apply edits to a child theme in practice to ensure that these updates don’t get overwritten when either WordPress or the theme used is updated.
Build Smarter. Deploy Faster. Run on the Edge.
You can spend hours perfecting the structure of a menu or tweaking how categories render. That’s the craft of being a developer. But when it comes to keeping your site fast, secure, and reliable worldwide, that’s a problem you shouldn’t have to solve in code.
That’s exactly what Pressidium EDGE is built for. It takes care of performance and security at the network edge, so you can focus on building, not firefighting.
- Dynamic Edge Caching keeps even complex WordPress sites lightning-fast.
- Edge WAF stops threats before they reach your install.
- Intelligent Load Balancing ensures uptime no matter the traffic.
The best part? Edge isn’t another service to configure. It’s already built into our Managed WordPress Hosting, ready to deliver blazing-fast speed and robust security.
Click below to try it yourself, for free!
Start Your 14 Day Free Trial
Try our award winning WordPress Hosting!


