

In this series of articles, we’re going to take a look at how we can create custom database tables in WordPress by creating our own plugin.
When and Why Should I Use Custom Database Tables?
In most cases, the default WordPress database tables that are created when you install WordPress are all you’ll ever need. These tables contain all sorts of information such as the types of posts and their associated meta data. So, why would you need a custom database table?
These come into their own when you’re working with a data structure that is different or more complex compared to what WordPress provides. So, you might want to place data in a custom table when you’re building a plugin that needs to store information in a database. It’s this reason why you’ll see that plugins like WooCommerce have their own custom tables.
Aside from being a neater way to store information, using separate tables can help boost performance as any queries used don’t have to search through rows and rows of unnecessary data. Instead, they can be directed to the ‘right’ table where they can find the required info more quickly and efficiently. This gets very important when database tables begin to grow.
Creating A WordPress Custom Database Table
Let’s say we want to build a simple plugin that will help us organize a list of students. In reality, a simple task like this means that we don’t need to use custom tables at all. A custom post type would do the job perfectly.
However, for the sake of this example, this kind of data is perfect for demonstrating the theory behind custom tables so we’ll run with it. Note: We’ll assume you possess some basic PHP and MySQL knowledge.
Getting Started
To begin, we will create a ‘student’ database table with columns for name, age, email, IP address and a unique ID. We’re going to do this by creating a custom plugin to get the job done.
NOTE: If you are not already familiar with how you can create a custom plugin, check out our guide on building your own custom WordPress plugin before resuming this tutorial!
Create the Plugin Files
We’ll create a folder called “my-custom-db-tables” in the plugins folder and inside of it, a file named “my-custom-db-tables.php” which contains this piece of code:
<?php
/*
Plugin Name: My Custom DB Tables
Description: A plugin for registering my students
Author: Tassos Antoniou
*/

function create_the_custom_table() {
	// THE CODE
}

register_activation_hook(__FILE__, 'create_the_custom_table');
What we did was introduce the plugin information so that WordPress will recognize the plugin. Obviously, you will also need a function that adds the table schema to the database which will be the create_the_custom_table() function.
In most cases, you only need to run this function once, ideally when the plugin is activated. Therefore, we used the register_activation_hook() that WordPress provides to make sure the function runs upon plugin’s activation.
Define Table’s Structure
Of course, nothing will yet happen if we activate the plugin, as the function is still empty. So let’s go and fill it in with this code, in order to actually create the table:
<?php
/*
Plugin Name: My Custom DB Tables
Description: A plugin for registering my students
Author: Tassos Antoniou
*/

function create_the_custom_table() {
    global $wpdb;
    $charset_collate = $wpdb->get_charset_collate();

    $table_name = $wpdb->prefix . 'students';

    $sql = "CREATE TABLE " . $table_name . " (
	id int(11) NOT NULL AUTO_INCREMENT,
	name tinytext NOT NULL,
	email VARCHAR(100) NOT NULL,
	age int(2) NULL,
	ip_address varchar(15),
	PRIMARY KEY  (id),
	KEY ip_address (ip_address)
    ) $charset_collate;";

    require_once(ABSPATH . 'wp-admin/includes/upgrade.php');
    dbDelta($sql);
}

register_activation_hook(__FILE__, 'create_the_custom_table');
Now let’s just pause a moment to examine what we’ve done with this bit of code.
First of all, we grab the table prefix using the global $wpdb WordPress class that communicates with the database. It is the same prefix that is defined in the wp-config.php file and it is a good practice to use it in your custom table as well. We will also inherit the current collation by saving it in the $charset_collate variable to include it later on in the query.
Try our Award-Winning WordPress Hosting today!


Our next step is to define the table’s structure in the SQL query to get the desired schema right. As we said, an id, email, name, age and IP address column with the right type of data for each.
$sql = "CREATE TABLE " . $table_name . " (
	id int(11) NOT NULL AUTO_INCREMENT,
	name tinytext NOT NULL,
	email VARCHAR(100) NOT NULL,
	age int(2) NULL,
	ip_address varchar(15),
	PRIMARY KEY  (id),
	KEY ip_address (ip_address)
) $charset_collate;";
Next, we require_once the upgrade.php file. That is mandatory in order to use the dbDelta function that comes right after. When on WordPress, in order to create a database table (or update the existing tables to a new structure), we need to use the dbDelta function.
NOTE: Instead of directly executing an SQL query, this function is used to modify the database by creating or updating a table, based on specified SQL statements. Using its $queries parameter, we can pass the scheme of our custom table.
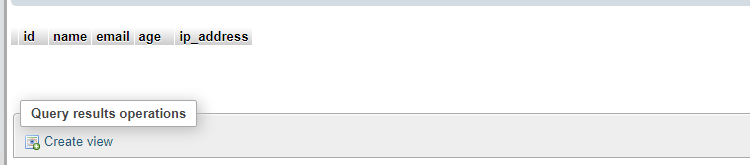
Now if you activate the plugin and check your database, you should see the table has been created.
Now, if you read inside the wp-admin/includes/upgrade.php file, you will notice that dbDelta() uses the preg_match() function in order to retrieve information from the SQL statement. Because of that, you need to be careful when editing it. The official documentation provides more information on this but we’ve highlighted the key points below:
- You must put each field on its own line in your SQL statement.

- You must have two spaces between the words PRIMARY KEY and the definition of your primary key.
- You must use the keyword KEY rather than its synonym INDEX and you must include at least one KEY.
- KEY must be followed by a single space, then the key name, then a space, then open parenthesis with the field name, then a closed parenthesis.
- Other KEYs than primary, should be given a name. For example:
...
PRIMARY KEY  (id),
KEY age (age)
...- You must not use any apostrophes or backticks around field names.
- Field types must be all lowercase.
- SQL keywords, like CREATE TABLE and UPDATE, must be uppercase.
- You must specify the length of all fields that accept a length parameter, like int(11) of the id column for example.
You may have also noticed that we didn’t check whether the table already exists in the database. That is because dbDelta does it for us. No need to worry about update queries. Not only it will create the table, but it will check if a table with the same name already exists, and if so, it will not create the table. It will only update the existing table structure if required.
So, What Comes Next?
What should happen if you deactivate and delete the plugin? Ideally, the custom table should be deleted along with the plugin.
Furthermore, there is no point in developing a plugin to store students if the admin area lacks such functionality. Some admin pages should also be created that allow you to add students and view their list in a table format.
In our next article of this mini series, we dig into these topics and show you how you can accomplish this.
On another note, if you are interested in taking your custom plugin to the next level, we highly recommend that you study our extensive series on how to create a WordPress plugin with object-oriented programming.
In these articles, we have tutorialized the techniques that will improve your plugin’s reusability and extensiveness, as well as security, scalability and maintenance. Don’t miss out on this valuable resource!
Start Your 14 Day Free Trial
Try our award winning WordPress Hosting!


