

Have you ever heard of WordPress Custom Post types but not been sure what they are? Or perhaps you’ve heard of custom post types but don’t know how to use them in WordPress. In this series of articles we’re going to be removing the mystery that surrounds WordPress custom post types and in doing so explain how you can leverage these in a wide variety of ways on your website.
In this initial article on WordPress custom post types we’ll explain what they are and then move onto showing you how you can create your own custom post types using a popular plugin. Let’s get going!
What are WordPress Custom Post Types?
If you’ve ever built a website using WordPress you’ll probably know that the core elements in any WordPress website are comprised of content in the form of Pages and Posts. These are all given the label ‘posts’ and are stored in the wp_posts table of your database. In addition, other elements such as Attachments, Revisions and Nav Menus are also referenced with the ‘posts’ label which is also stored in the wp_posts table of your database. The way these elements are distinguished is by carrying a different posts type value under the post_type column of the wp_posts table. A simple post has a post_type value ‘post’ , a page is a ‘page’ type, an image is an ‘attachment’ type and so on.
Creating your own post type used to involve extensive coding with a number of hacks needed to achieve the desired result. Things have come a long way in a short time though and since WordPress 2.9 it’s got incrementally easier to create custom post types which allow you to really make the most of WordPress as a fully featured CMS.
When Do You Need A Custom Post Type
There are countless reasons why you might want to create a new custom post type. Simply put, if you can’t display content in a way you want on your website because the default post types (pages and posts) don’t include the required features then a custom post type might be the answer.
For example, you might be running a book review website. Whilst there is a lot you can achieve with the default post types (pages and posts), they won’t give you any fine grained control over this specific type of content. With custom post types you’re free to add in features that can help your website users navigate the content such as adding in ratings and making it searchable by author and so on. This is better than trying to ‘force’ the standard post and pages in WordPress to conform to your unique requirements.
For the purposes of this series of articles we will imagine we want to create a ‘food recipe’ section on a website. We’re going to segregate recipe content from the rest of our website content by introducing a custom post type cpt-recipes. The methods we’ll run through can be applied to a wide range of other custom post types and you’re of course free to pick and choose the elements that will work for your specific website custom post type.
Create the Custom Post Type Using a Plugin
Coding a custom post type by hand is perfectly possible (we’ll run through this in later articles) but if you’d rather not get involved with code then a great solution to use is the plugin Custom Post Type UI by WebDevStudios.
This plugin allows you to quickly register (i.e. create) and manage custom post types and taxonomies for your website with an easy-to-use functional interface. After installing and activating you can view the full list of options available under the ‘CPT UI’ menu item that will appear in the admin menu.
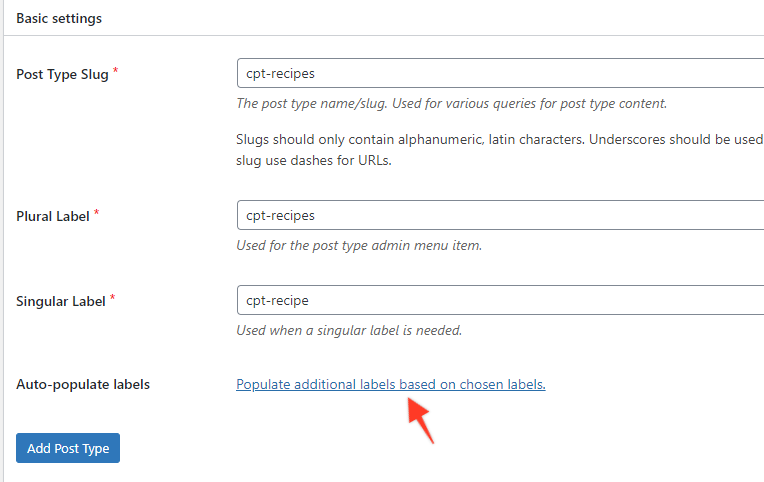
To get started creating your custom post type, click on the ‘Add New Post Type’ tab. Now, fill in the Post Type Slug, Plural Label and Singular Label (as shown above). Click ‘Add Post Type and that’s it!
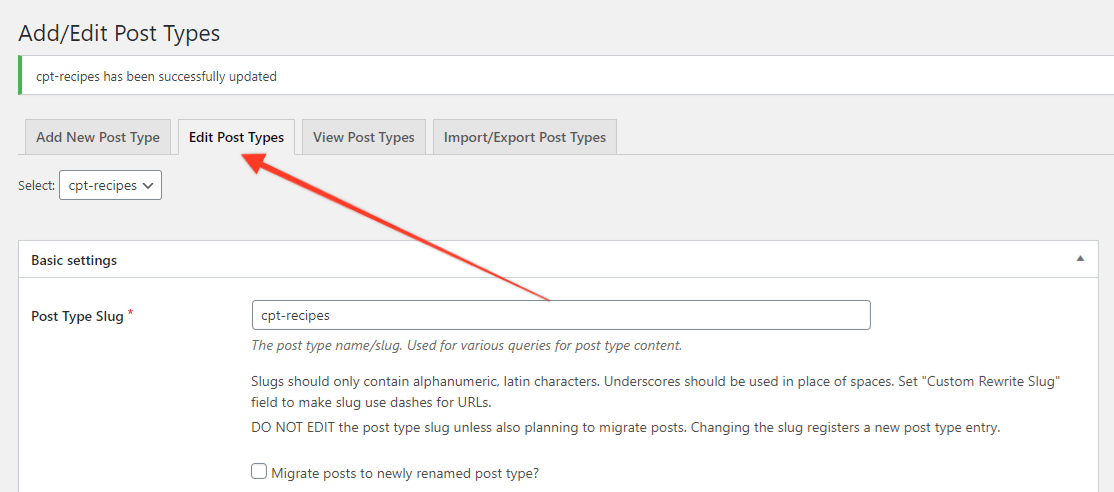
Once you’ve done this, find your new custom post by clicking on the ‘Edit Post Types’ tab. Under the Basic Setting section you’ll see a ‘Additional Labels’ section where you can add a range of additional labels for your custom post type. There are a LOT of fields to fill in but fortunately the plugin has a handy ‘Auto-populate’ feature (again, shown above). Click this and a huge amount of the work will be done for you. You’re of course free to modify these if you need.
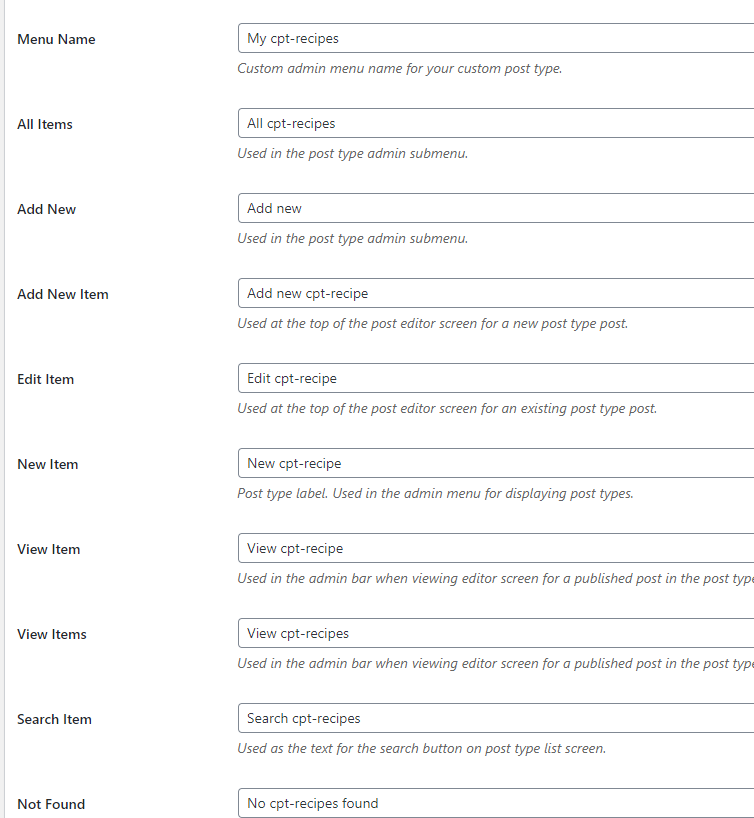
The Custom Post Type UI plugin contains all the parameters of the register_post_type() function that are described in the official WordPress documentation. These are necessary for your custom post type to function properly. Useful labels under each field explain what each item is for.
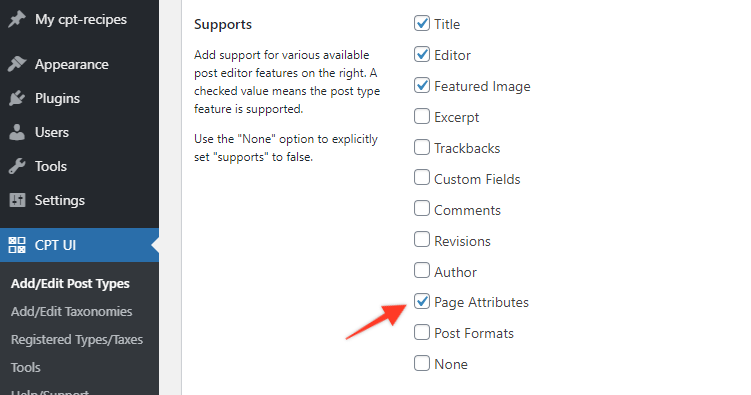
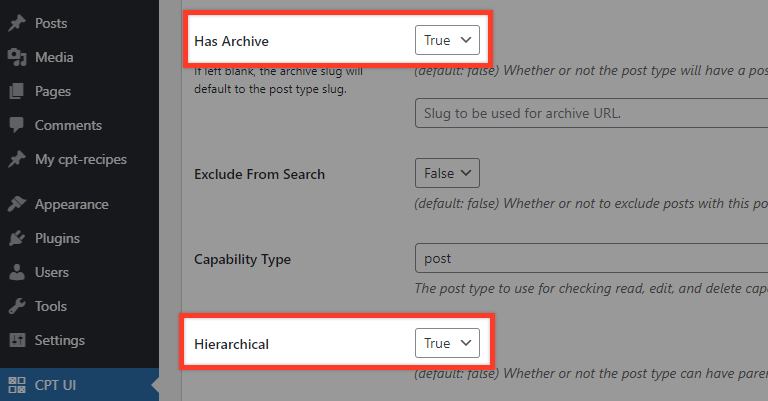
Note: If you want to create posts with a hierarchical structure you would turn the ‘Hierarchical’ option to ‘true. This alone however isn’t enough. You’ll need to head to the ‘Supports’ section (scroll down to the bottom of the Post Type setup page that you’re on) and check the ‘Page Attributes’ checkbox. This means the ‘Parent’ option will be inherited from the page structure.
Once you’ve made any updates to the labels and settings for your new customs post make sure you hit ‘Save post type’ to save your changes. You’re now ready to add content to your new post type. You can return and edit the created post type anytime in the ‘Edit Post Types’ tab if needed.
Additional Options
There are quite a few options you can have a play with including things like customizing your new custom post types menu position and associated icon. To change the menu position for example, you need to enter a number into the ‘Menu Position’ field. Take a look at the possible options below:
0 : at the very top
5 : below Posts
10 : below Media
15 : below Links
20 : below Pages
25 : below comments
60 : below first gap in menu
65 : below Plugins
70 : below Users
75 : below Tools
80 : below Settings
100 : below second gap in menu

You can also change the menu icon by either uploading your own to the Media Library or by adding in the class name of an official Dashicon icon provided by WordPress. You can see the available icons here
Adding Taxonomies
One of the key benefits of using a custom post type is the ability to better control how data is ordered. A good starting point for this is to add custom taxonomies. Let’s take a look at how we can add custom taxonomies that will allow us to group recipes in categories of our own choosing.
Try our Award-Winning WordPress Hosting today!


To begin, click on ‘Add/Edit Taxonomies’ in the CPT UI sub menu. Then, add in a new Taxonomy Slug, Plural Label and Singular label and (importantly) select the Post Type you want to associate this new Taxonomy with. In our case this will be our cpt-recipes post type.
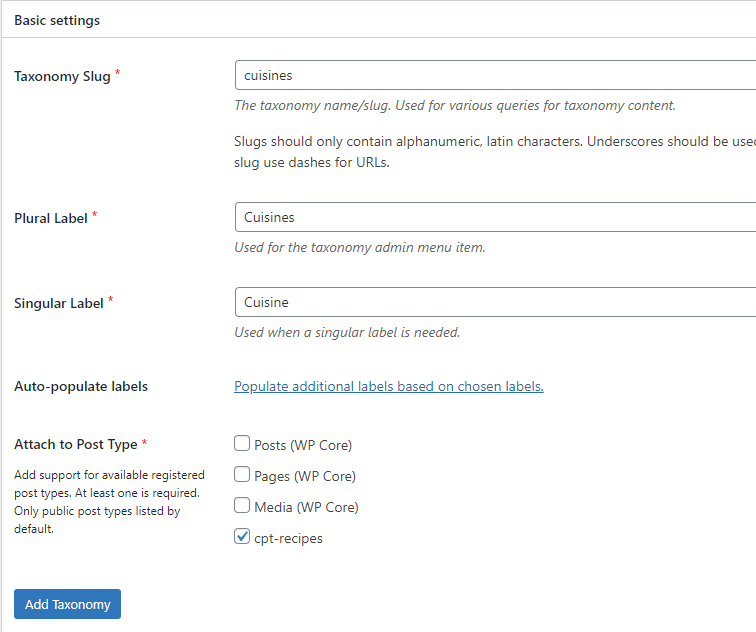
Click the ‘Add Taxonomy’ button and you’re done. Head to your custom post type and you’ll see a new item (in our case ‘Cuisines’) listed in the sub menu. Click this and you can now add your own ‘Cuisine’ categories.

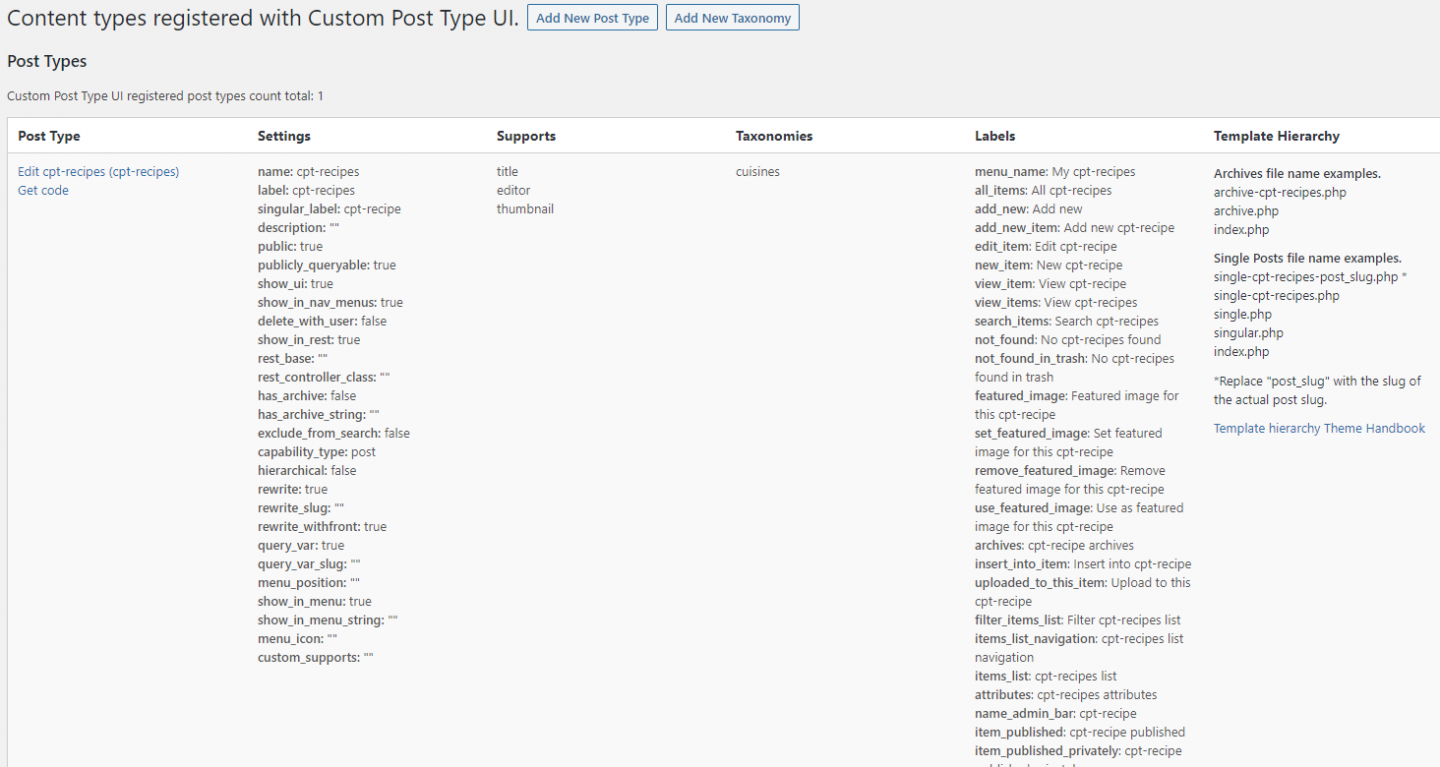
Sometimes it can get hard to keep track of what is what when setting up a new (or multiple) custom post type(s). Fortunately the CPT UI plugin provides a very useful summary table that can be found by going to CPT UI > Registered Types/Taxes where you can view all the custom post types you’ve created along with the associated taxonomies and other useful info.
Displaying Your Custom Post Type Content on the Frontend
Before testing your new custom post type out, it’s best to add some content (otherwise it’ll be much harder to see what’s going on!). In our case this means adding some cuisine related categories and some recipe posts.
If you head to the ‘Menus’ menu from within your Admin area, you’ll see that your new custom post type is listed along with your new Category.
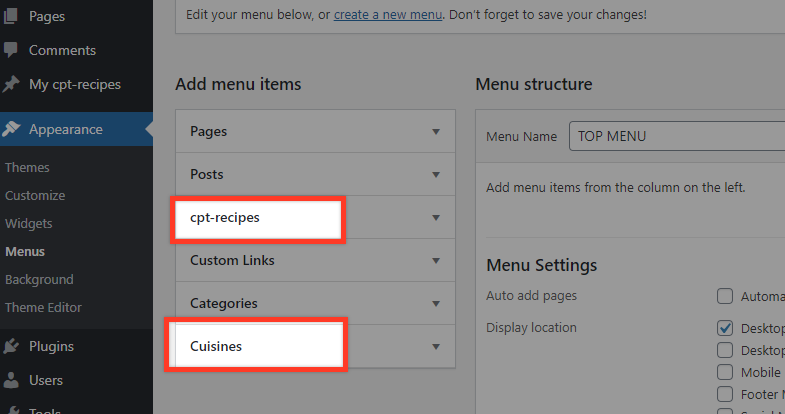
In other words, we are already ready to show a single recipe page or a view of all recipes under the same cuisine taxonomy.
What about showing an archive with all the recipes? To accomplish that go back to your custom post type settings and make sure that the related options are set correctly as shown in the image below.
Now you’re ready to add the menu item for the archive view. Go to the menu structure and create a custom link:

The link text could be “Recipes”. For the url if your permalinks are set to ‘Plain’ then you should use “/?post_type=YOURPOSTTYPENAME” which in our case is ‘cpt-recipes’. If set to ‘Post name’ your link’s URL should be “/cpt-recipes”.
Add the menu item and go to your website and click the ‘Recipes’ (in our example) menu link. You should now see all the recipe posts in an archive view.
There is all manner of ways you can view your new custom post types. Each custom post type is fully integrated into your WordPress website in the same way the default ‘posts’ and ‘pages’ are. As such you can treat any custom post type in the same way you would a post or page.
Use a Dynamic Content Plugin for Custom Post Type and Taxonomy Creation
Another viable option for adding custom post types (CPTs) and taxonomies without coding is JetEngine. It is a dynamic content plugin by Crocoblock.
The plugin allows you to add and manage CPT, group them into taxonomies, attach additional meta fields, and more using a one-stop interface. It is compatible with Elementor, WordPress Block Editor, and Bricks.
Once you install and activate JetEngine, the similarly-named item will appear in the WordPress admin panel.
Creating a Custom Post Type
To build a CPT, proceed to JetEngine > Post Types and click the “Add New” button. You will see the post type creation window.
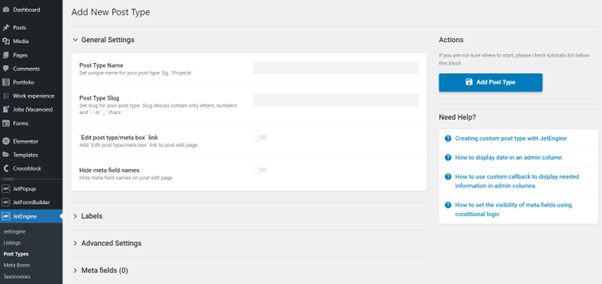
In the General Settings tab, you need to specify the Post Type Name, and the Post Type Slug will be generated immediately. Besides, there are five more content tabs you can customize:
- Labels, where you can specify which texts will be shown for the current CPT posts on the WordPress dashboard. Enter the first, singular, item, and the remaining fields will be populated automatically.
- Advanced Settings cover additional settings for CPT public visibility, hierarchy, slugs, and more.
- Meta Fields, where you can add as many custom fields for a particular CPT as needed. These meta fields will further appear on the post editing screen and will be used for storing custom data.
- Admin Columns are extra tools for sorting and editing meta field data.
- Admin Filters, where you can create custom back-end filters for CPT posts and filter them by taxonomy and metadata.
Note: If you don’t add any meta fields, the new post page will be empty. For many similar posts, you might want to create a solid structure where the fields will be the same, and the data inside shall differ. Custom meta fields are handy when you need to fetch some data to the front end dynamically.
Unfold the Meta fields tab and add as many meta fields for this CPT as you need. JetEngine helps you create four object types: Field, Tab, Accordion, and Endpoint. So far, the plugin supports 19 field types. Add the necessary fields one by one, providing their labels, names/IDs (generated automatically after you submit the Label), field types, etc. You can make certain fields required, too.
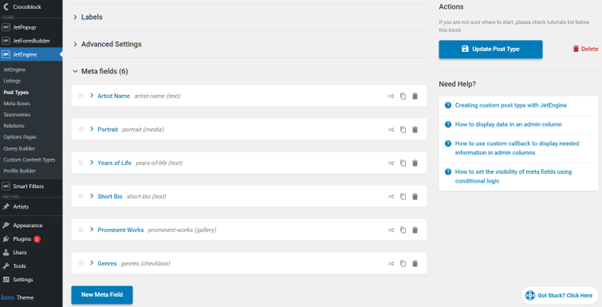
Once you finish adding the meta fields and customizing the post type, press the “Add/Update Post Type” button.
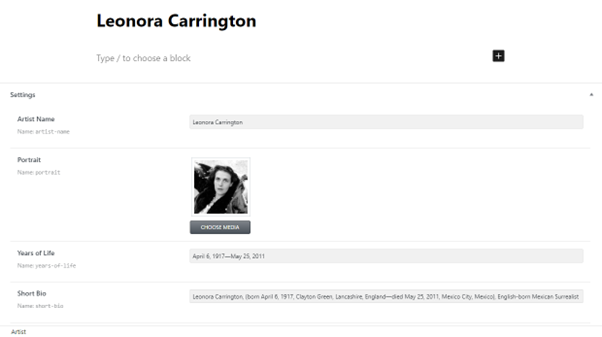
Here is what the post editing screen looks like after you add some meta fields to the CPT:
Creating a Custom Taxonomy
To add a custom taxonomy, head over to the JetEngine > Taxonomies tab and press “Add New.” In the newly-opened window, there will be four settings tabs: General, Labels, Advanced, and Meta Fields.
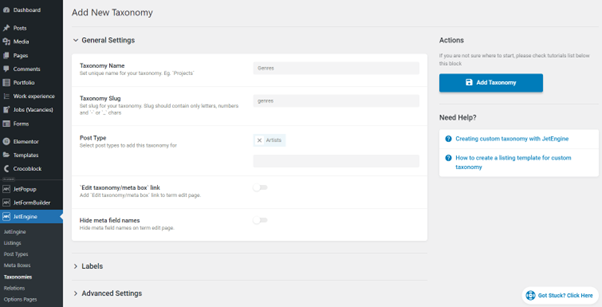
Similarly to the post-adding routine, specify the Taxonomy Name (the slug will be generated automatically) and attach the given taxonomy to the Custom Post Type created earlier. Then provide custom labels, adjust advanced settings, and add more meta fields if necessary.
Once done, click the “Add Taxonomy” button. Now you are ready to see what you have managed to create on the front end.
Using Listing Grid to Output Custom Post Type and Taxonomy Content
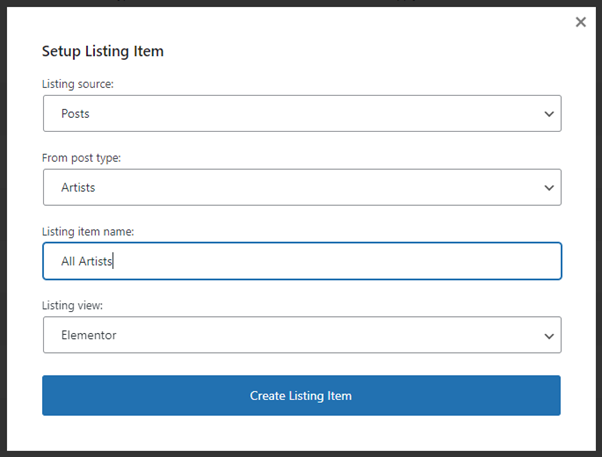
Proceed to JetEngine > Listings and click the “Add New” button. You need to specify the Listing Source, which is “Posts,” then choose the post type from which the data will be taken, enter the Listing Item name, and pick the preferred Listing View (i.e., page builder).
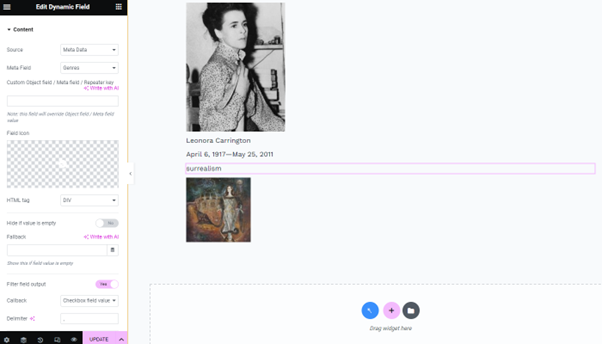
Then hit “Create Listing Item,” and the page editor will open. Using JetEngine Dynamic Widgets (namely, Dynamic Field and Dynamic Image), it is possible to pull data from the CPT meta fields to the Listing Item and then to the front end.
Once you finish customizing the listing item, press “Publish/Update.”
Note: You only need to build one listing item layout. The created structure will further apply to all similar posts of the same CPT automatically.
Now, proceed to the page where you wish to place the Listing Grid. Open the page and search for the Listing Grid widget in the side panel. In the General tab, pick the recently created Listing, adjust the column number, and style settings if you wish.
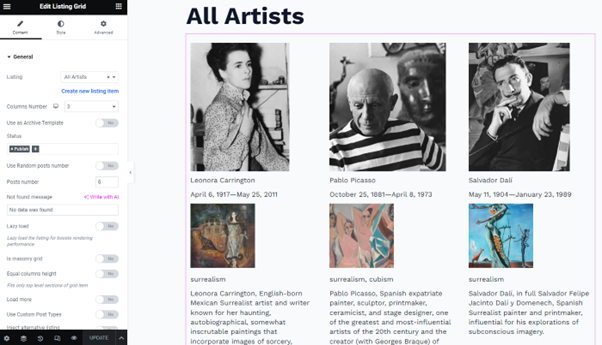
That’s it; the Listing Grid is now added to the page. Similarly, you can create a listing template for a custom taxonomy and showcase posts by a certain taxonomy term. For instance, here are the great artists falling under the “Surrealism” category.
Custom Post Types and Widgets
Frustratingly, custom post types are not added to WordPress widgets. A good way to overcome this is to use a post widget plugin like the Ultimate Posts Widget.
Once the plugin it is installed and activated, a new widget will be available in the Appearance > Widgets area called ‘Ultimate Posts’. If you add it to a position (e.g. the footer area) you will be able to configure this via a range of options provided by the plugin.
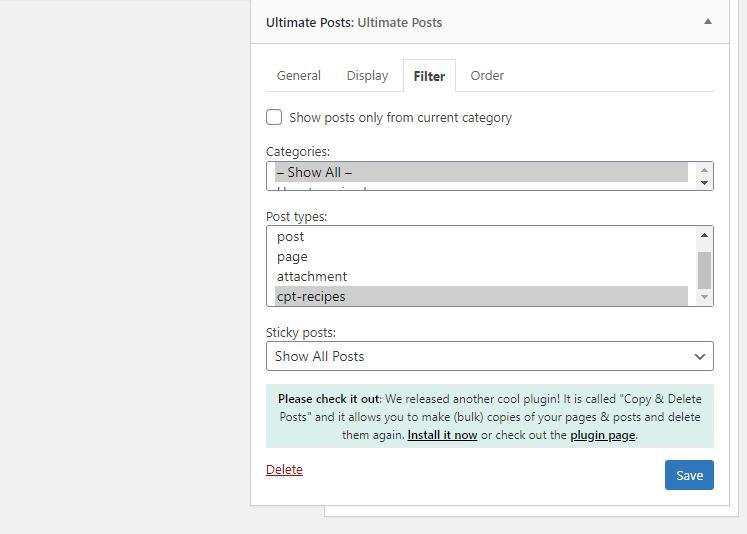
To display your custom posts head to the Filter tab where you’ll be able to choose the post type you created. You can then modify how this displays in the Display tab as you would for any other post type.
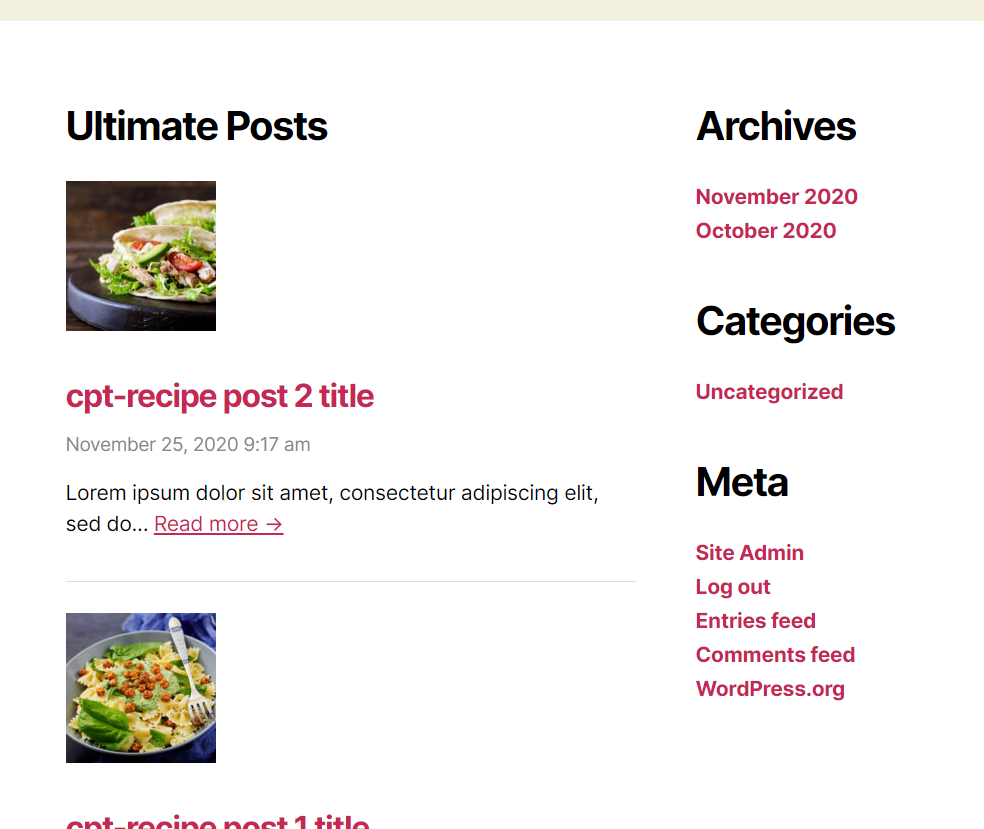
Save your settings and then head to the front end of your website to see how things look.
Further Reading
Create WordPress Custom Post Types Manually
WordPress Custom Post Types – Taking It Further
Create WordPress Custom Post Types Using Your Own Plugin!
Conclusion
Custom post types are one of the major features that helped propel WordPress to become the most popular Content Management System available today. The ability to display different types of content is a huge help and allows you to create a truly bespoke website for your needs. The CPT UI plugin offers an incredibly easy way to create custom posts types. It is genuinely a quick process so if you’ve always wanted to create a custom post type but not known how then we hope this article has provided the info you need to give it a whirl.
And if you’re feeling adventurous and want to manually code your own custom post types then check out our article ‘Create WordPress Custom Post Types Manually‘ to find out how!
Start Your 14 Day Free Trial
Try our award winning WordPress Hosting!


