

WordPress Custom Posts Types are incredibly useful. If you’re not sure what these are then check out our article ‘Create WordPress Custom Post Types Using a Plugin‘ for more details. In a series of articles we’ve taken a look at various ways you can create a custom post type. This includes using a plugin (as per the article just mentioned) right through to coding a custom post type from scratch.
As with most things WordPress related, if you have the technical ability to code in a feature then odds are you can achieve pretty much anything without being bound by restrictions placed by plugins that aim to help you achieve your chosen goal. However, perhaps the ultimate in control AND usability comes from using a custom plugin that you yourself created. In this article we’re going to wrap up our mini series on creating custom post types by looking at how to build your very own Custom Post Type plugin.
So, fire up a text editor and let’s get started!
Create your Custom Post Type Plugin
If you’ve never built your own WordPress plugin then before continuing with this tutorial, it might be worth checking out our article ‘How To Build Your First WordPress Plugin. A Step-by-Step Guide‘.
Plugins are an ideal way to extend the functionality of WordPress websites. The ability to both use ‘off the shelf’ plugins and also to create your own in order to extend the functionality of a WordPress website is one of the many reasons why WordPress is such a popular CMS. Adding functionality by creating your own plugin (or using a third party plugin) normally offers the ability to switch themes and make other major updates to our site without losing the functionality of the plugin(s) in question.
Because of this, it makes sense to design plugins in a way that separates function from website design – in other words, where a plugin is designed to deliver a core function, it works best if it doesn’t also include theme specific functionality. This then gives you the ultimate in flexibility as this plugin can, in theory, be deployed on any WordPress website.
With this in mind, the plugin we will create for our Custom Posts Type is a simple but complete plugin which will register our ‘recipes’ custom post type without the end user having to code this function directly into their website.
Step One: Register the Plugin
First step is to create a plugin which we will name ‘My custom post type’ and register it with our website.
To do this, create the plugin folder under the /wp-content/plugins folder and name it my-custom-post-type. Then, create its main file inside this folder that will hold our plugin functions and registration code. We suggest that you give the file the same name my-custom-post-type.php. So, in your FTP client it should look like this.

The minimum mandatory code you have to write here is this:
<?php
/**
Plugin Name: My CPT plugin
**/
This PHP comment tell WordPress about the plugin’s existence and name of the plugin. The ‘My CPT plugin’ string is the name that you will see now in your admin area plugins list if you refresh this.
Give Functionality to the Custom Post Type Plugin
Now we’ve named and registered our plugin we need to crack on and add some functionality to it.
The bulk of the code you’ll need was previously written in our article ‘Create WordPress Custom Post Types Manually‘. You can check that out to find out how this code works or just go ahead and copy from the code below.
Note: If you previously followed our tutorial you will have added code to the functions.php file. We don’t want to double up by having our code in both the functions.php file AND our plugin so it’s best to delete this from our functions.php file before continuing.
We’ve pasted the same code from functions.php file into our plugins main php file. Your my-custom-post-type.php file should now look like this:
<?php
/**
Plugin Name: My CPT plugin
**/
//// Create recipes CPT
function recipes_post_type() {
register_post_type( 'recipes',
array(
'labels' => array(
'name' => __( 'Recipes' ),
'singular_name' => __( 'Recipe' )
),
'public' => true,
'show_in_rest' => true,
'supports' => array('title', 'editor', 'thumbnail'),
'has_archive' => true,
'rewrite' => array( 'slug' => 'my-home-recipes' ),
'menu_position' => 5,
'menu_icon' => 'dashicons-food',
// 'taxonomies' => array('cuisines', 'post_tag') // this is IMPORTANT
)
);
}
add_action( 'init', 'recipes_post_type' );
//// Add cuisines taxonomy
function create_recipes_taxonomy() {
register_taxonomy('cuisines','recipes',array(
'hierarchical' => false,
'labels' => array(
'name' => _x( 'Cuisines', 'taxonomy general name' ),
'singular_name' => _x( 'Cuisine', 'taxonomy singular name' ),
'menu_name' => __( 'Cuisines' ),
'all_items' => __( 'All Cuisines' ),
'edit_item' => __( 'Edit Cuisine' ),
'update_item' => __( 'Update Cuisine' ),
'add_new_item' => __( 'Add Cuisine' ),
'new_item_name' => __( 'New Cuisine' ),
),
'show_ui' => true,
'show_in_rest' => true,
'show_admin_column' => true,
));
register_taxonomy('ingredients','recipes',array(
'hierarchical' => false,
'labels' => array(
'name' => _x( 'Ingredients', 'taxonomy general name' ),
'singular_name' => _x( 'Ingredient', 'taxonomy singular name' ),
'menu_name' => __( 'Ingredients' ),
'all_items' => __( 'All Ingredients' ),
'edit_item' => __( 'Edit Ingredient' ),
'update_item' => __( 'Update Ingredient' ),
'add_new_item' => __( 'Add Ingredient' ),
'new_item_name' => __( 'New Ingredient' ),
),
'show_ui' => true,
'show_in_rest' => true,
'show_admin_column' => true,
));
}
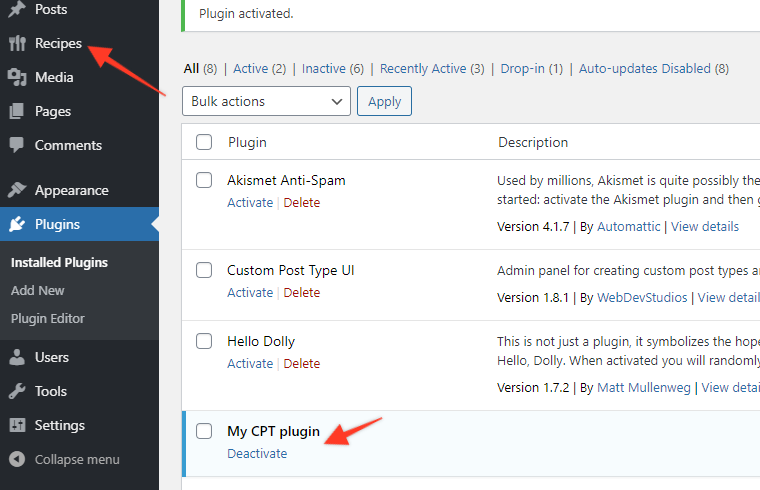
add_action( 'init', 'create_recipes_taxonomy', 0 );Now if you go and activate your plugin in the admin area, you should see ‘Recipes’ appear in the main menu!
So, we now have a ‘recipes’ custom post type and two Recipes posts ‘Recipe 1’ and ‘Recipe 2’, each of which has been assigned a ‘Cuisine’ taxonomy. And that’s it! Now, rather than having to make code changes to your functions.php file each time you want to update your Custom Post Type you can do this via your plugin php file which is much better. You also have direct control over it from your Admin and can disable the plugin quickly and easily. In addition, this could be saved as a plugin zip file and used on other WordPress websites.
Try our Award-Winning WordPress Hosting today!


If you are interested in taking your custom plugin to the next level, we highly recommend that you study our extensive series on how to create a WordPress plugin with object-oriented programming.
In these articles, we have tutorialized the techniques that will improve your plugin’s reusability and extensiveness, as well as security and scalability. Don’t miss out on this valuable resource!
Use a Library Plugin Instead
If you want to further speed up the process of creating your own Custom Posts you could try using the My Custom Functions plugin.

This plugin allows you to insert PHP functions code into your website without having to directly edit files via a SFTP connection.
After installing and activating the plugin a new menu item will be added to your admin menu. Just go to ‘Settings > PHP Inserter’ and add the custom code for your Custom Posts Type in the provided code block.
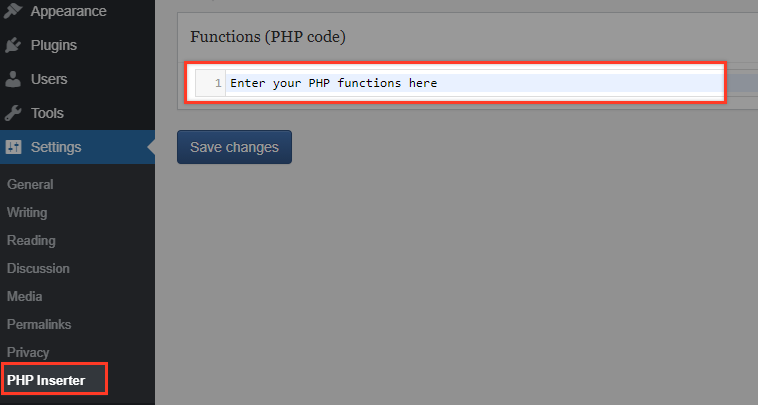
After inserting the code, turn the switch ON and save the changes. Your PHP code will be automatically added to your website without affecting its performance or changing your theme files.
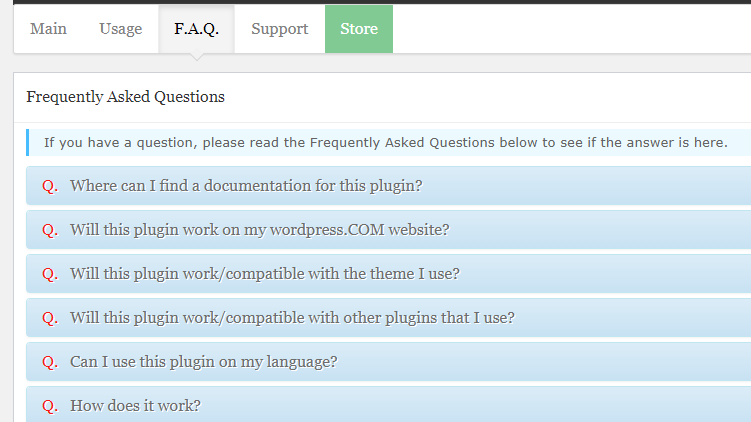
In the same admin screen, you can also find a usage tab and an FAQ tab which can really help you figure out how to use the plugin (we made good use of it when testing it out!).
Further Reading
We’ve now concluded our mini-series on Custom Post Types. If you want to check these out then the links to previous articles are below:
- Create WordPress Custom Post Types Using a Plugin
- Create WordPress Custom Post Types Manually
- WordPress Custom Post Types – Taking It Further
Conclusion
We hope you enjoyed this article series and now understand how Custom Post Types are handled. Custom Post Types are amazing things and can revolutionize how you build WordPress websites making them yet another great WordPress feature!
Start Your 14 Day Free Trial
Try our award winning WordPress Hosting!


