

At this point, we’ve got clearly defined requirements as they were described in Part 3 of this series (check it out here if you missed it). Now is the time to start thinking about the design of our new and improved Object Oriented WordPress Plugin before proceeding to programming.
We’d like to remind you that this step may take you a long time when you try it out on your own projects. You probably won’t get everything right the first time either. Odds are you’ll come up with a design, start implementing it, and then realize that you need to go back and rethink your approach.
It is totally worth the effort though so take as much time as necessary to get everything just right. A well-structured project will make it easier to maintain and extend it, and even reuse its code in other projects so in the long run it’s a good use of time.
Right up next, we’ll focus on some key parts of the plugin and discuss how we came up with our design.
Dissecting the Settings Page
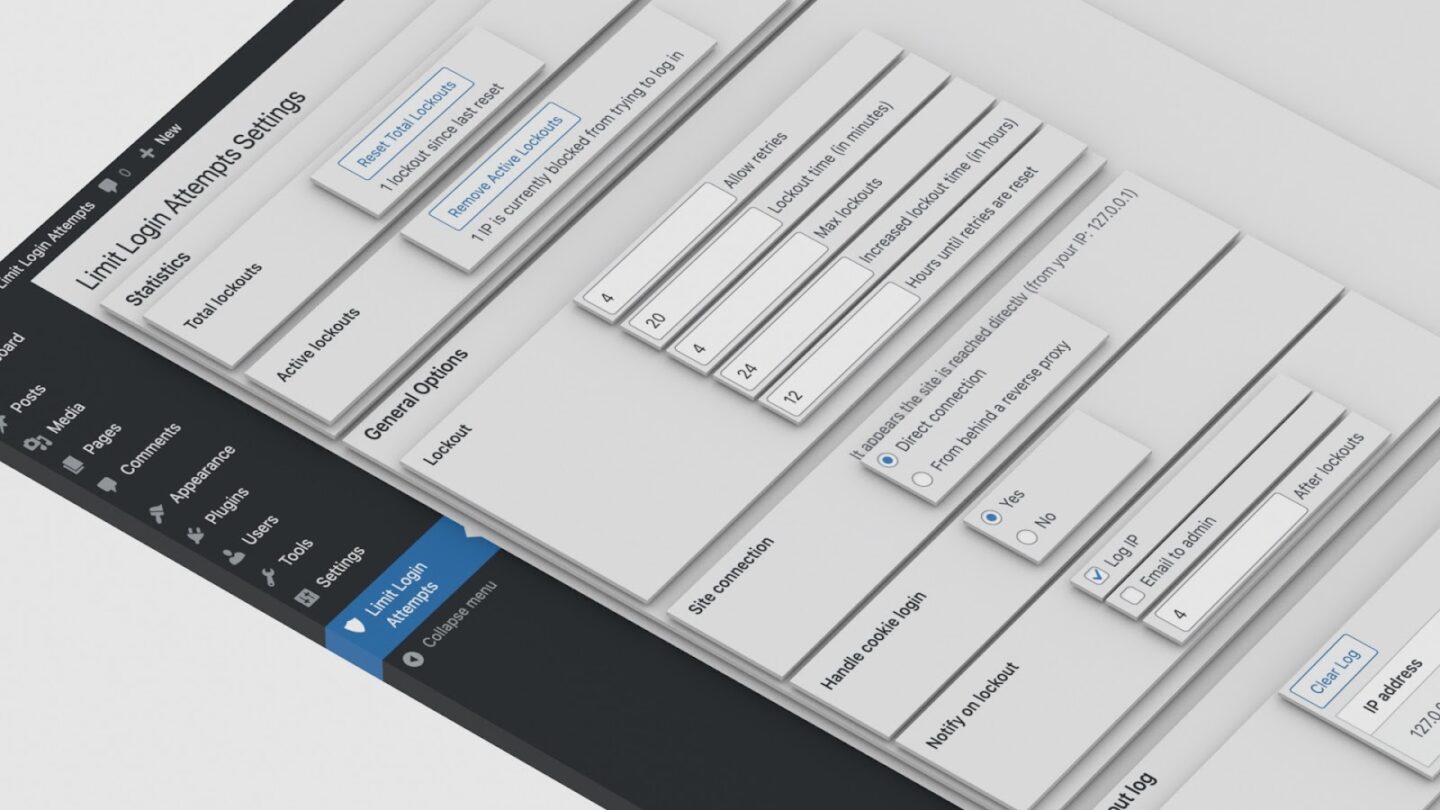
Let’s take a closer look at the admin page of the plugin.
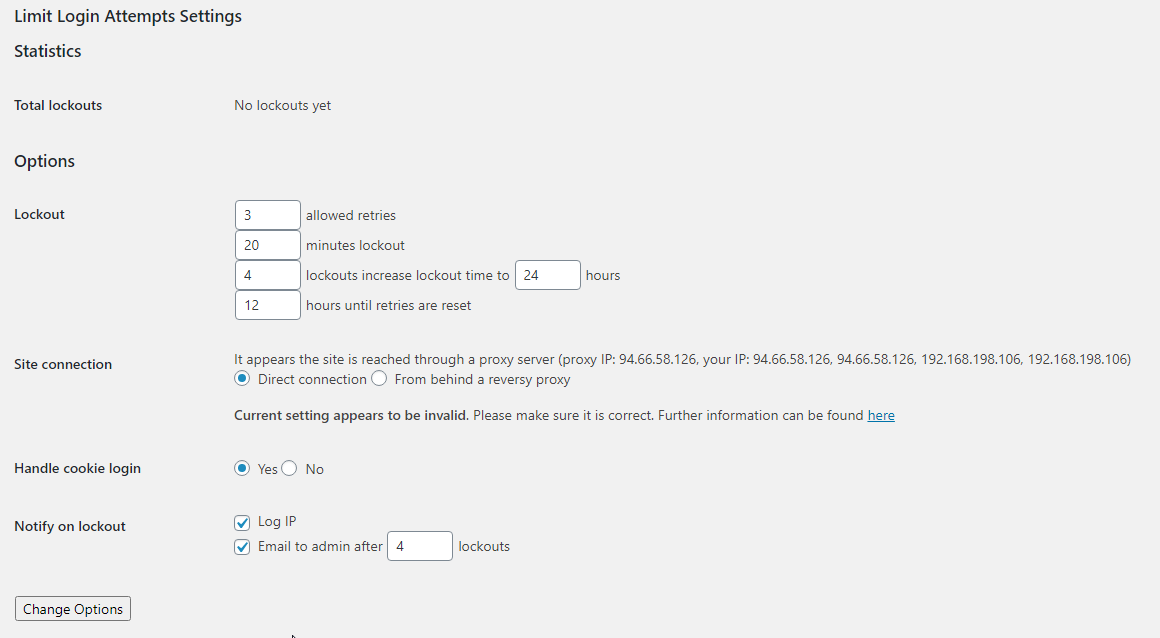
You will notice that there is a title (“Limit Login Attempts Settings”), several sections containing some fields, and a “Change Options” button at the bottom of the page.
Each section consists of a title, like “Statistics”, and a few fields.
Each field has a title on the left, and the rest of its content on the right side. There are text fields, radio buttons and checkboxes and, some of them, like “Total Lockouts”, only display information and cannot be directly modified by the admin user.
Some fields also include a description, like the “Site Connection” field, but not all of them.
With the above in mind, we have to break it down into conceptual pieces that will later on become classes.
The WordPress Settings API allows us to register settings pages, sections within those pages and fields within the sections:
Pages → Sections → Fields
We thought, why not add one more “layer”, the Elements, in order to make our plugin easier to extend in the future.
Pages → Sections → Fields → Elements
So, Pages and Sections are what we’ve already explained above, and Fields will contain Elements of any content type on the right side.
Taking under consideration all these different kinds of elements, we went with an Element class and several classes, extending it, for the checkboxes, radio buttons, numbers etc. that will render different output.
We may also need to add more pages and sections in the future. So it’s likely that we’d need to extend these admin page and section classes.
The same goes for the fields. The classes for “Total lockouts”, “Active lockouts” etc. will extend the same (parent) class.
Here’s a simplified visual that demonstrates those relations:
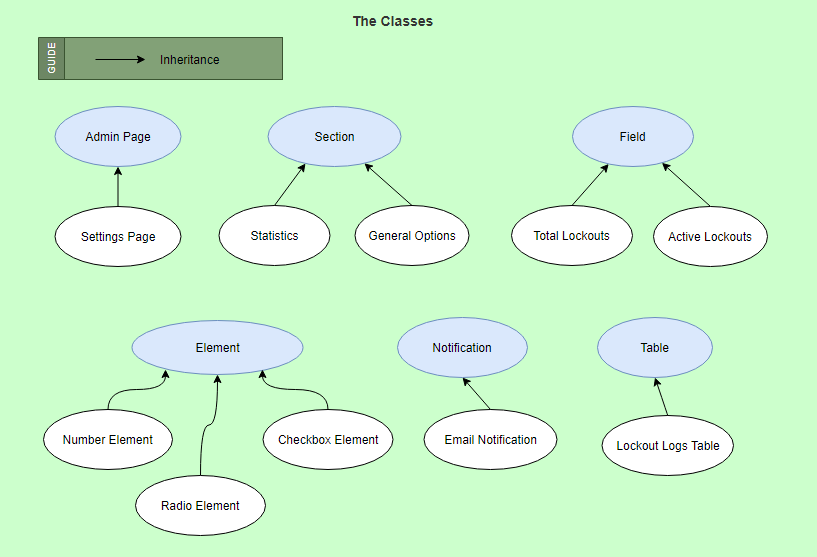
Of course, not all “components” are included in the diagram.
A structure like this makes the plugin easier to extend; we’re able to easily add a field, element or section if the need arises. We’ll be able to easily add more components—fields, elements, or sections—by creating new child classes, without having to modify existing ones.
Thinking and Abstracting
Now it’s a great time to start thinking about what the various components of our plugin do. During the design phase, we don’t have to go into much detail about how something works.
For example, consider all elements, tables, statistics and pretty much anything else that is going to be displayed to the user. They might be separate components with nothing in common, but will all eventually render some output. Therefore, some functionality will be common for components that are otherwise completely unrelated. Of course, this extends to the rest of our components as well.

In the above visual, we see how a UI interface is implemented by multiple classes.
Pay attention to the fact that the UI interface is implemented by the Statistics, Lockout Logs, Table, and Element classes that are referred to as parent classes. There’s no need for the Radio/Number/Checkbox Element classes to implement the interface directly, since they inherit all interfaces from their parent class. However, a child class could override a method of its parent class.
Try our Award-Winning WordPress Hosting today!


Since we know that our plugin’s going to deal with settings, we can safely assume that we’ll read and write their values. That is, being able to get, set, and remove options.
All these actions will be bundled together in a class. We’ll probably store our options in the WordPress database or something like that. For now, we don’t have to care about how or where we’re going to store our data.
We can keep the get/set/remove options abstraction in our minds, simplifying things conceptually, and keep designing our plugin.
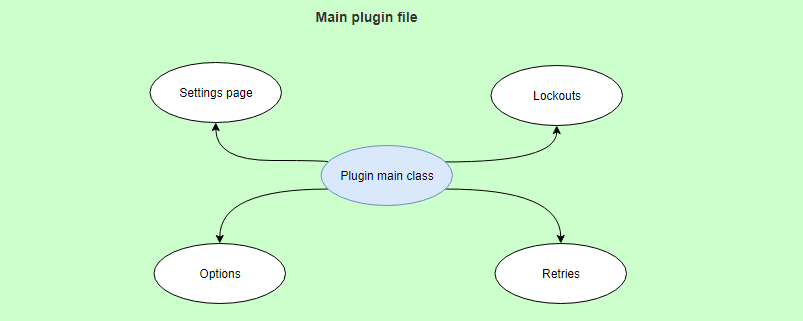
Main Plugin File
Here, we’ll provide some information about the plugin to WordPress through the header comment and perform some initialization. We’ll organize our code, by wrapping everything in a small class.
Depending on how the classes of our plugin will work together, the main class will have to instantiate most of them. As far as we know, this will include classes related to options, admin pages, retries and lockouts.
Potential Classes
We took some time to try and figure out what classes we’re going to need and we ended up with a list as follows:
- Retries
- Lockouts
- Cookies
- Error messages
- Email notifications
- Admin notices
- Buttons
- Lockout logs
- Active/Total lockouts
- IP address
Keep in mind that there’s no one single “correct” way to structure your plugin. As with most things in software development, there are multiple, equally valid, ways to solve a problem.
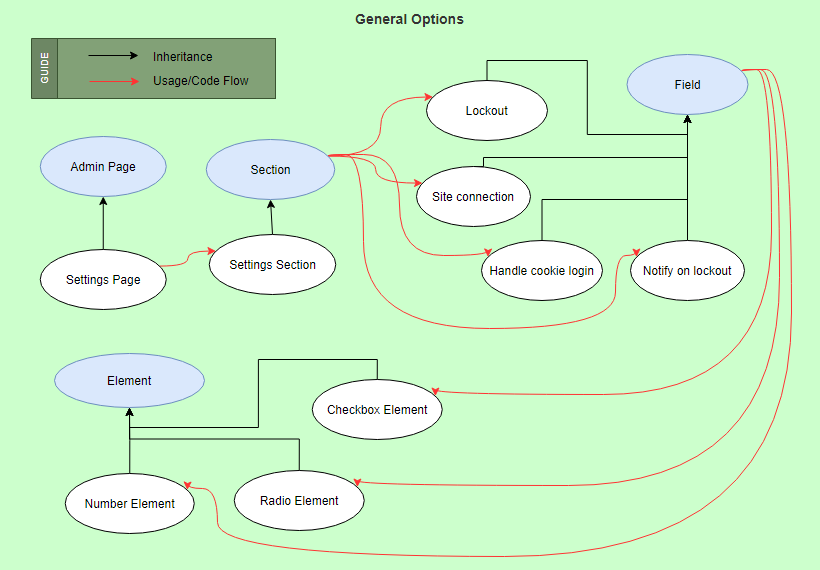
In the “General” section, for example, the relations between our classes would look like this:
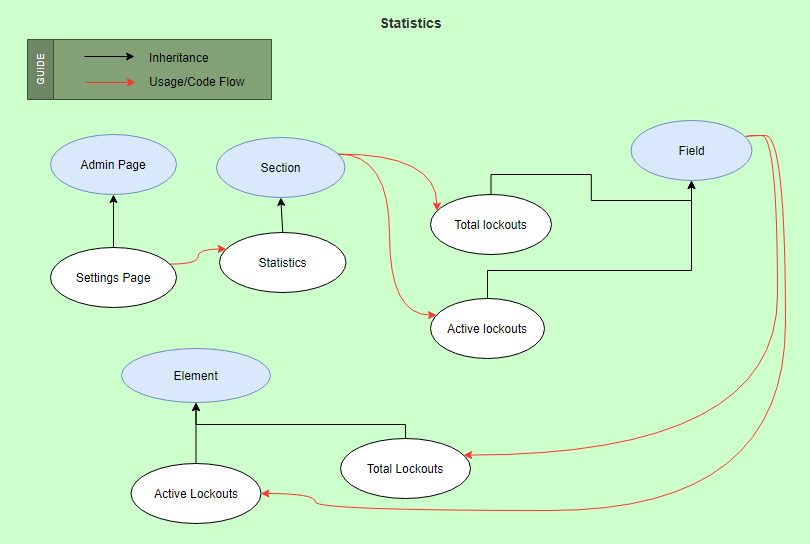
The “Statistics” section will be similar to this:
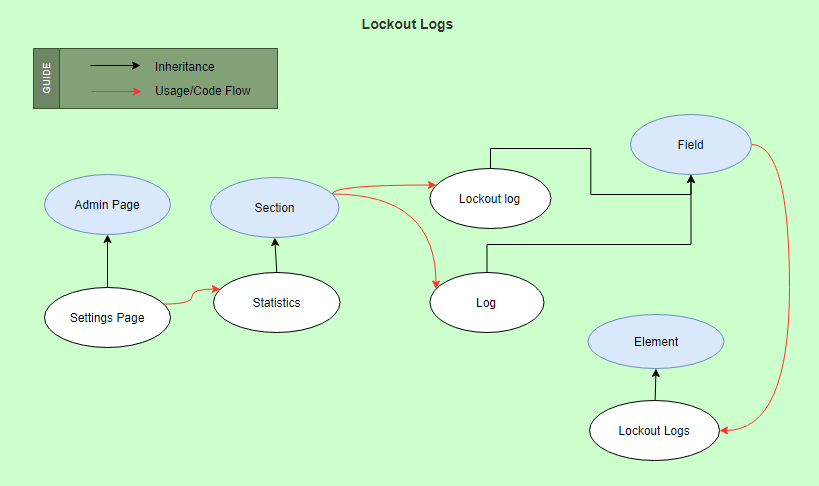
Finally, the “Lockout logs” will be very similar to “Statistics”:
Conclusion
So far we defined our requirements and thought of a design for our new and improved plugin. We explained how we came up with our structure and also provided some simple diagrams showing how our classes will be related to each other.
Next, in Part 5 in our Objected Oriented Programming Series, we will enter the Implementation stage.
See Also
- Summary of the series
- Part 1 – WordPress and Object-Oriented Programming – An Overview
- Part 2 – WordPress and Object Oriented Programming: A Real World Example
- Part 3 – WordPress and Object Oriented Programming: Α WordPress Example – Defining the Scope
- Part 6 – WordPress and Object Oriented Programming: A WordPress Example – Implementation: Registering the Sections
- Part 7 – WordPress and Object Oriented Programming: A WordPress Example – Implementation: Managing WordPress Hooks
- Part 8 – WordPress and Object Oriented Programming: A WordPress Example – Implementation: Options
Start Your 14 Day Free Trial
Try our award winning WordPress Hosting!


