

In a previous article we looked at how you can add you own custom field to menu items using the wp_nav_menu_item_custom_fields action hook that was introduced in WordPress 5.4. We detailed two routes to achieve this; by adding some custom code to functions.php or by using a WordPress plugin.
In this article, we will recreate the same field but this time we will do it by creating our own plugin from scratch.
Let’s get started.
Plugin Creation
We won’t get into the basic details of creating a WordPress plugin as this was covered in our in-depth article ‘How To Build Your First WordPress Plugin. A Step-by-Step Guide‘. We’ll skip ahead to creating our plugin folder under the wp-content/plugin/ folder. Next we will name our custom plugin folder “menu-item-field-creator” and inside of it we will create a file called menu-item-field-creator.php.

After this we will open this file with our favorite text editor and add the code below. This code has the effect of introducing the plugin to the WordPress core.
<?php
/*
Plugin Name: Menu Item Field Creator
Description: My custom plugin to create menu item fields
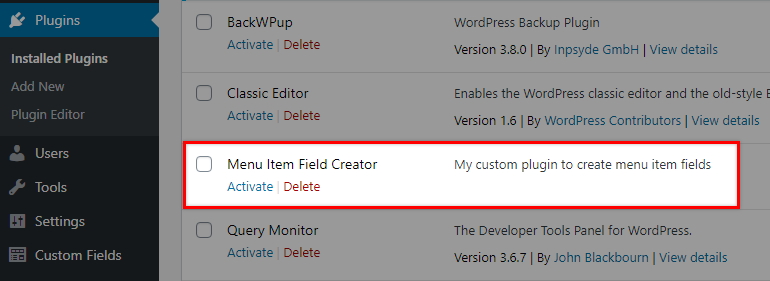
*/As you may note we defined the plugin name and description as we want them to be displayed in the admin plugin area. For the sake of this example we will not define any other header field.
With these steps done, let’s head to our Plugins section in the Admin area and check if the plugin is correctly shown.
Next, we will insert our first functional code that will establish our main class and some functions.
The Simple Way
The simplest way of getting this plugin to work is to insert the code we wrote in our previous article into the plugin’s main PHP file so that the final content looks like this:
<?php
/*
Plugin Name: Menu Item Field Creator
Description: My custom plugin to create menu item fields
*/

/**
 * Add the field.
 */
function pr_menu_item_sub( $item_id, $item ) {
    $menu_item_sub = get_post_meta( $item_id, '_menu_item_sub', true );
    ?>
    <div style="clear: both;">
        <span class="subtitle"><?php _e( 'Subtitle', 'menu-item-sub' ); ?></span><br />
        <input type="hidden" class="nav-menu-id" value="<?php echo $item_id; ?>" />
        <div class="logged-input-holder">
            <input type="text" name="menu_item_sub[<?php echo $item_id; ?>]" id="menu-item-sub-<?php echo $item_id ;?>" value="<?php echo esc_attr( $menu_item_sub ); ?>" />
        </div>
    </div>
    <?php
}
add_action( 'wp_nav_menu_item_custom_fields', 'pr_menu_item_sub', 10, 2 );

/**
 * Save input.
 */
function save_menu_item_sub( $menu_id, $menu_item_db_id ) {
    if ( isset( $_POST['menu_item_sub'][ $menu_item_db_id ] ) ) {
        $sanitized_data = sanitize_text_field( $_POST['menu_item_sub'][ $menu_item_db_id ] );
        update_post_meta( $menu_item_db_id, '_menu_item_sub', $sanitized_data );
    } else {
        delete_post_meta( $menu_item_db_id, '_menu_item_sub' );
    }
}
add_action( 'wp_update_nav_menu_item', 'save_menu_item_sub', 10, 2 );

/**
 * Show the Menu Field Value.
 */
function show_menu_item_sub( $title, $item ) {
    if ( is_object( $item ) && isset( $item->ID ) ) {
        $menu_item_sub = get_post_meta( $item->ID, '_menu_item_sub', true );
        if ( ! empty( $menu_item_sub ) ) {
            $title .= '<p class="menu-item-sub">' . $menu_item_sub . '</p>';
        }
    }
    return $title;
}
add_filter( 'nav_menu_item_title', 'show_menu_item_sub', 10, 2 );
At this point, if you activate the plugin you should find this works just fine. There is however a way to achieve the same results using a different coding style.
Using Object-Oriented Programming
To achieve the same results in a more Object-Oriented approach, as we described it in our related article, please follow the instructions below.
If you are interested in taking your custom plugin to the next level, we highly recommend that you study our extensive series on how to create a WordPress plugin with object-oriented programming.
In these articles, we have tutorialized the techniques that will improve your plugin’s reusability and extensiveness, as well as security and scalability. Don’t miss out on this valuable resource!
To begin, empty the contents of your plugin’s main PHP file, except from the header comment and insert these lines:
class MyCP_Menu_Item_Field_Creator {

}
$mycp_menu_item_field_creator = new MyCP_Menu_Item_Field_Creator();
What we have done with this code so far is to define the MyCP_Menu_Item_Field_Creator wrapper class that will contain the whole functionality. Lastly, we instantiate an object.
It is very important to remember that the main class name you define will be globally available and therefore you have to make sure it is unique and that there is no chance that any other plugin or theme uses the same name. That is why it is recommended that you use a custom prefix such as the MyCP_ we used above.
Inside the class we will now add in some functionality. The final content of our plugin main PHP file will look like this:
<?php
/*
Plugin Name: Menu Item Field Creator
Description: My custom plugin to create menu item fields
*/

class MyCP_Menu_Item_Field_Creator {

    public function __construct() {
        add_action( 'wp_nav_menu_item_custom_fields', array( $this, 'menu_item_sub' ), 10, 2 );
        add_action( 'wp_update_nav_menu_item', array( $this, 'save_menu_item_sub' ), 10, 2 );
        add_action( 'nav_menu_item_title', array( $this, 'show_menu_item_sub' ), 10, 2 );
    }

    public function menu_item_sub( $item_id, $item ) {
        $menu_item_sub = get_post_meta( $item_id, '_menu_item_sub', true );
        ?>
        <div style="clear: both;">
            <span class="subtitle"><?php _e( 'Subtitle', 'menu-item-sub' ); ?></span><br />
            <input type="hidden" class="nav-menu-id" value="<?php echo $item_id; ?>" />
            <div class="logged-input-holder">
                <input type="text" name="menu_item_sub[<?php echo $item_id; ?>]" id="menu-item-sub-<?php echo $item_id; ?>" value="<?php echo esc_attr( $menu_item_sub ); ?>" />
            </div>
        </div>
        <?php
    }

    public function save_menu_item_sub( $menu_id, $menu_item_db_id ) {
        if ( isset( $_POST['menu_item_sub'][ $menu_item_db_id ]  ) ) {
            $sanitized_data = sanitize_text_field( $_POST['menu_item_sub'][ $menu_item_db_id ] );
            update_post_meta( $menu_item_db_id, '_menu_item_sub', $sanitized_data );
        } else {
            delete_post_meta( $menu_item_db_id, '_menu_item_sub' );
        }
    }

    public function show_menu_item_sub( $title, $item ) {
        if ( is_object( $item ) && isset( $item->ID ) ) {
            $menu_item_sub = get_post_meta( $item->ID, '_menu_item_sub', true );
            if ( ! empty( $menu_item_sub ) ) {
                $title .= '<p class="menu-item-sub">' . $menu_item_sub . '</p>';
            }
        }

        return $title;
    }
}
$mycp_menu_item_field_creator = new MyCP_Menu_Item_Field_Creator();
We removed the prefixes from the methods’ names as we now have a class prefix instead.
In the __construct function we defined the hooks we used along with their callback functions that will execute. Next we introduced the menu_item_sub callback function that will display the input field where the admin user can fill in the item subtitle.
After this, we save the input with the save_menu_item_sub method and finally, with the show_menu_item_sub callback, we show the values, if available, in the front-end menu.
Expanding the Walker
In the example above we included the custom menu field inside the menu item title, without altering the HTML output of the menu tree data. But what if we wanted to add the subtitle field as a separate HTML element such as a <div> element outside the title element link?
Try our Award-Winning WordPress Hosting today!


This is where we have to work once again with the Walker class. As we saw in our article ‘Getting Familiar with the WordPress Walker Class‘, by extending the Walker you can customize the structure of a tree-like data. In this case this will be the menu.
This means of course that we only have to alter our code related to the front-end display of our custom field. So let’s go and replace the whole code with this one:
<?php
/*
Plugin Name: Menu Item Field Creator
Description: My custom plugin to create menu item fields
*/

class MyCP_Menu_Item_Field_Creator {

    public function __construct() {
        add_action( 'wp_nav_menu_item_custom_fields', array( $this, 'menu_item_sub' ), 10, 2 );
        add_action( 'wp_update_nav_menu_item', array( $this, 'save_menu_item_sub' ), 10, 2 );
        add_filter( 'wp_nav_menu_args', array( $this, 'menu_item_sub_custom_walker' ) );
    }

    public function menu_item_sub( $item_id, $item ) {
        $menu_item_sub = get_post_meta( $item_id, '_menu_item_sub', true );
        ?>
        <div style="clear: both;">
            <span class="subtitle"><?php _e( 'Subtitle', 'menu-item-sub' ); ?></span><br />
            <input type="hidden" class="nav-menu-id" value="<?php echo $item_id; ?>" />
            <div class="logged-input-holder">
                <input type="text" name="menu_item_sub[<?php echo $item_id; ?>]" id="menu-item-sub-<?php echo $item_id; ?>" value="<?php echo esc_attr( $menu_item_sub ); ?>" />
            </div>
        </div>
        <?php
    }

    public function save_menu_item_sub( $menu_id, $menu_item_db_id ) {
        if ( isset( $_POST['menu_item_sub'][ $menu_item_db_id ]  ) ) {
            $sanitized_data = sanitize_text_field( $_POST['menu_item_sub'][ $menu_item_db_id ] );
            update_post_meta( $menu_item_db_id, '_menu_item_sub', $sanitized_data );
        } else {
            delete_post_meta( $menu_item_db_id, '_menu_item_sub' );
        }
    }

    public function menu_item_sub_custom_walker( $args ) {
        if ( class_exists( 'My_Custom_Nav_Walker' ) ) {
            $args['walker'] = new My_Custom_Nav_Walker();
        } else {
            echo 'DOES NOT EXIST';
        }

        return $args;
    }
}

$mycp_menu_item_field_creator = new MyCP_Menu_Item_Field_Creator();

if ( ! class_exists( 'My_Custom_Nav_Walker' ) ) {

    class My_Custom_Nav_Walker extends Walker_Nav_Menu {

        public function start_el( &$output, $item, $depth=0, $args=[], $id=0 ) {
            $menu_item_sub = get_post_meta( $item->ID, '_menu_item_sub', true );

            $output .= '<li class="' . implode( ' ', $item->classes ) . '">';
            if ( $item->url && $item->url != '#' ) {
                $output .= '<a href="' . $item->url . '">';
            } else {
                $output .= '<span>';
            }

            $output .= $item->title;
            if ( $item->url && $item->url != '#' ) {
                $output .= '</a>';
            } else {
                $output .= '</span>';
            }
            if ( ! empty( $menu_item_sub ) ) {
                $output .= '<div class="menu-item-sub">' . $menu_item_sub . '</div>';
            }

        }

    }

}
You may have noticed that we deleted the show_menu_item_sub method and worked with the front-end menu item structure differently. We introduced our custom Walker class My_Custom_Nav_Walker outside our main class and through our menu_item_sub_custom_walker method we changed the default value for the ‘walker’ argument into My_Custom_Nav_Walker. This way the menu HTML output we provided in our custom Walker will apply in our front end.
Let’s check the results.


As we can see, our description this time is placed outside the href of the menu item link as we intended.
Taking it Further
Before we wrap this up it’s worth mentioning that we deliberately used the “Subtitle” example because it is simple to do and understand.
If you want to push yourself then we’d suggest you create your own scenarios to experiment with. Try for example to create a different output that will allow the Admin user to define which user role is allowed to view the menu item.
As a starting hint, we will provide you with the output. Replace the current output method (shown below)
function menu_item_sub( $item_id, $item ) {
	$menu_item_sub = get_post_meta( $item_id, '_menu_item_sub', true );
	?>
	<div style="clear: both;">
		<span class="subtitle"><?php _e( 'Subtitle', 'menu-item-sub' ); ?></span><br />
		<input type="hidden" class="nav-menu-id" value="<?php echo $item_id; ?>" />
		<div class="logged-input-holder">
			<input type="text" name="menu_item_sub[<?php echo $item_id; ?>]" id="menu-item-sub-<?php echo $item_id; ?>" value="<?php echo esc_attr( $menu_item_sub ); ?>" />
		</div>
	</div>
	<?php
}
with this one:
function PREFIX_Menu_Item_Roles() {
    global $wp_roles;
    $display_roles = apply_filters( 'nav_menu_roles', $wp_roles->role_names );

    if ( ! $display_roles ) return;
    ?>

    <p class="field-nav_menu_logged_in_out nav_menu_logged_in_out nav_menu_logged_in_out-thin">
        <fieldset>
            <legend><?php _e( 'Display Mode', 'nav-menu-roles' ); ?></legend>
            <label for="edit-menu-item-role_logged_in">
                <input type="radio" id="edit-menu-item-role_logged_in" class="edit-menu-item-logged_in_out" value="in" name="menu-item-role_logged_in" />
                    <?php _e( 'Logged In Users', 'nav-menu-roles' ); ?><br/>
            </label>
            <label for="edit-menu-item-role_logged_out">
                <input type="radio" id="edit-menu-item-role_logged_out" class="edit-menu-item-logged_in_out" value="out" name="menu-item-role_logged_out" />
                    <?php _e( 'Logged Out Users', 'nav-menu-roles' ); ?><br/>
            </label>
            <label for="edit-menu-item-role_everyone">
                <input type="radio" id="edit-menu-item-role_everyone" class="edit-menu-item-logged_in_out" value="" name="menu-item-role_everyone" />
                    <?php _e( 'Everyone', 'nav-menu-roles' ); ?><br/>
            </label>
        </fieldset>
    </p>

    <?php
}
Now try to create a method that saves the changes along with one that displays the current/saved value using the correct hooks.
Conclusion
Customizing a WordPress menu can be frustrating until you are made aware of the tools available to you to do this. Hopefully this article has given you some insights into just what is possible to achieve and the ways that you can go about implementing tasks like this.
See Also
Start Your 14 Day Free Trial
Try our award winning WordPress Hosting!


